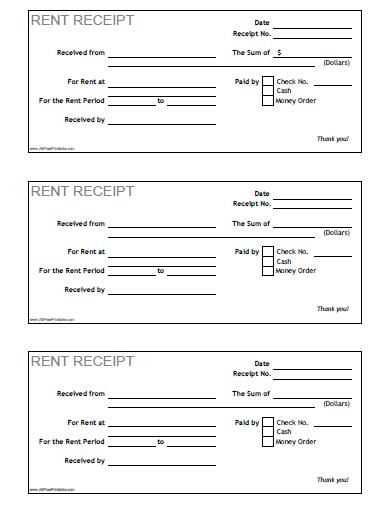
Creating a clear and concise online receipt is simple with the right template. Start by including the date, unique receipt number, and vendor information. A clean design enhances readability, making the receipt more user-friendly for both the customer and the vendor.
Ensure to add a breakdown of the purchased items, including their quantities and prices. Summarizing the total cost at the end of the receipt prevents confusion and provides transparency in financial transactions. You can also include additional fields like taxes, discounts, or payment methods to provide a complete overview.
To save time, choose a template that suits your business needs. Whether it’s for a small shop or an online store, adjusting the layout and sections will make the receipt more relevant and professional. Don’t forget to add contact details for customer service, as this builds trust.
Online Receipt Template: A Practical Guide

Choose a clean, simple design for your online receipt template. Use clear fonts, sufficient spacing, and organize key information logically to make it easy for customers to read.
Key Components of an Online Receipt

Start with your business name and logo at the top, followed by contact details. Ensure that the date and time of the transaction are clearly displayed. The main body should include a breakdown of the products or services purchased, along with individual prices. After that, show the total amount paid, including any taxes or discounts applied. A unique receipt number can also be helpful for future reference.
Customization and Usage
Make your receipt template adaptable by adding customizable fields. Allow space for payment methods, discounts, and special notes. Offering a PDF version of the receipt makes it easy for customers to download or print, ensuring they have a record of the transaction.
How to Design an Online Receipt Template for Small Businesses

Keep your online receipt simple and easy to read. Use clear fonts and a clean layout to highlight key details. Ensure that the receipt includes the business name, transaction date, a list of items or services, their prices, and the total amount paid.
Include Business Details

Place your business name, address, and contact information at the top. This builds trust and ensures that customers know where the receipt is coming from. Make sure to include your email or phone number in case there are any follow-up questions.
Clearly Display Transaction Information
Break down each product or service purchased. List the quantity, price per item, and total amount for each entry. This avoids confusion and helps with record-keeping. Make the total amount stand out by using bold text.
Don’t forget to add a unique receipt or transaction number for tracking purposes. A date and time stamp are also important for verification and future reference.
Consider adding payment details like the method of payment (credit card, PayPal, etc.) to keep everything organized.
Test your template on multiple devices to ensure it displays well on both desktop and mobile screens. Make adjustments as needed to ensure the receipt remains readable and professional across all platforms.
Best Tools for Generating Digital Receipts

Receipt Generator is a simple and free online tool that allows users to create customizable receipts. The interface is user-friendly, offering multiple templates for different types of transactions. You can easily adjust details like the company logo, payment method, and itemized list.
Invoice Generator offers another strong solution. It lets users create both invoices and receipts. The templates are clean, and the tool provides the ability to save and email receipts directly from the platform. Customization options are straightforward, with a focus on clarity and professionalism.
Zoho Invoice is a powerful tool that integrates receipt generation with invoice management. Ideal for businesses of all sizes, it enables users to automate the process and create detailed, branded receipts. It also tracks payments and integrates with other accounting software for seamless workflow.
Square’s Receipt Generator is perfect for businesses with retail needs. It’s free to use and allows you to generate receipts on the go. This tool is particularly helpful for those using Square as a point of sale system, as it can automatically create receipts after transactions.
FreshBooks offers a receipt generation tool within its invoicing system. It’s tailored for small business owners and freelancers, allowing quick generation and automatic filing of receipts. This tool integrates well with other FreshBooks features, making it a solid choice for managing finances in one place.
How to Ensure Legal Compliance with Your Online Receipts
Ensure that your online receipts meet legal requirements by incorporating these key elements:
- Accurate Business Information: Include your company’s name, address, and contact details on every receipt. This provides transparency and helps establish the legitimacy of your business.
- Clear Itemization: List all purchased items or services clearly with prices, quantities, and any applicable taxes. This transparency helps avoid disputes and aligns with consumer protection laws.
- Tax Information: Specify the tax rate applied to each transaction. Make sure that the receipt clearly separates the cost of goods and taxes, complying with local tax regulations.
- Transaction Date and Time: Display the date and time of the transaction. This is often required by law for record-keeping and auditing purposes.
- Unique Transaction Identifier: Use a unique order or receipt number for each transaction. This helps customers reference their purchases and simplifies tracking for your business.
- Refund and Return Policy: Include details about your company’s refund or return policy, ensuring compliance with consumer protection laws regarding customer rights.
Staying up to date with your jurisdiction’s specific legal requirements is critical. Regularly review your receipt template to make sure it aligns with the latest changes in business laws.