If you need a customizable taxi receipt template, you’re in the right place. A good template should be flexible enough to accommodate various details such as the trip date, amount, and contact information. This can save time and reduce errors when you need to generate receipts for passengers or clients.
Start with a template that allows you to fill in key information, such as the passenger’s name, trip fare, and taxi ID number. The receipt should also include space for both the pickup and drop-off locations. Keep it simple, yet clear enough to ensure transparency and trust with your passengers.
Make sure the template is easy to adjust for different pricing structures or discounts. Whether you’re working with a flat fare or a metered rate, your template should accommodate these variations without any hassle. You can also include a section for payment methods, such as cash or card, to provide a complete record of the transaction.
Using an editable template not only saves you time but also helps maintain consistency in your receipts. Customizing it to fit your specific needs ensures you won’t miss any important details, making your operations smoother and more professional.
Here are the corrected lines with minimal repetition:
Focus on consistency by ensuring each receipt is clear and easy to read. Repetition in wording can cause confusion and make the document harder to navigate. Remove redundant terms and avoid unnecessary details. Instead, prioritize key information such as the fare, date, and route. Use concise phrases to describe each section without overloading the customer with similar content.
Optimizing clarity:
Choose simple, direct language. Instead of repeating the same descriptors like “total fare” multiple times, try varying your terms or eliminating excess phrases. This keeps the receipt concise and focused on the necessary information.
Formatting tips:
Be mindful of how the receipt is organized. Align the text to create a neat structure, and use bullet points for key items like the trip details, price breakdown, and payment method. This minimizes unnecessary repetition in presentation and ensures the customer quickly understands the essential points.
- Editable Taxi Receipt Template: A Practical Guide
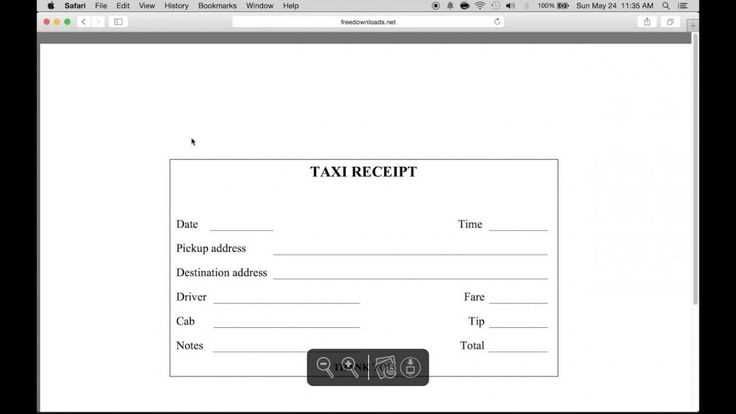
To create a customizable taxi receipt, begin with the key fields that need to be present: date, time, fare amount, taxi number, and passenger details. Ensure the template is structured to allow for easy updates. Use placeholders such as [Date], [Time], [Fare], [Taxi Number], and [Passenger Name] to make filling out the details fast and efficient.
Key Elements to Include
The template should cover the following components:
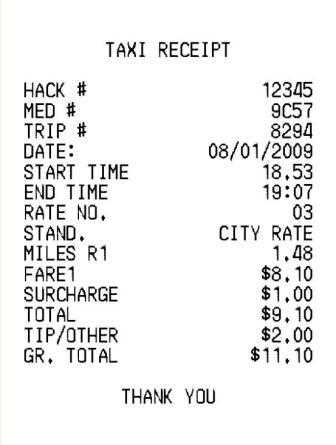
- Date and Time: Placeholders should be in a simple format like [MM/DD/YYYY] for the date and [HH:MM AM/PM] for the time of the ride.
- Taxi Number: Include a section for the taxi or vehicle number to identify the specific ride.
- Fare Amount: Clearly mark the amount with a placeholder for both the fare and any additional charges.
- Passenger Information: While optional, a space for the passenger’s name or contact can make the receipt more personalized.
- Driver’s Name (optional): Including the driver’s name can enhance the professionalism of the receipt, especially for corporate transactions.
Customizing the Template
Most templates can be edited with basic text editors or specialized tools. Ensure the format you use (such as Word or Excel) is compatible with your needs. If using a platform like Google Docs or a spreadsheet tool, make sure the placeholders remain editable, and the layout is clear and legible. Consider adding a logo or branding for added professionalism.
How to Customize Your Taxi Receipt for Different Locations
To tailor your taxi receipt for various locations, adjust the following elements according to regional regulations and customer needs:
1. Location-Specific Tax Rates
Ensure the tax rate displayed reflects the local government’s current rate. Some regions apply different tax percentages based on the area or type of transportation service. Make sure to update your receipt template to include the correct rate for each location.
2. Currency Formatting
Adapt the receipt’s currency format based on the local currency. For example, if you operate in both the US and Europe, change the currency symbol and formatting (e.g., “$10” in the US vs. “€10” in Europe) to suit the location of the service.
3. Local Contact Information
Update the contact information for your taxi service depending on the location of the ride. This includes phone numbers, email addresses, or website links that are specific to the city or country of the service.
4. Special Location-Dependent Charges
Some areas impose additional fees, such as tolls or airport surcharges. Ensure these are accurately reflected in your receipt by including specific line items detailing any extra charges based on the service location.
5. Customizing for International Locations

When operating internationally, it’s crucial to adjust the receipt template to comply with local regulations, including any necessary translations. For example, use the local language for any text that appears on the receipt. Additionally, account for any international payment processing fees that may apply.
| Location | Tax Rate | Currency Format | Additional Charges |
|---|---|---|---|
| New York | 8.875% | $10.00 | Airport Surcharge: $5.00 |
| Paris | 10% | €10.00 | Parking Fee: €2.00 |
To modify fare details in your taxi receipt template, follow these steps:
1. Open the Template File
Start by opening the editable receipt template on your preferred text editor or document editor. Ensure the document is in a format that allows changes (e.g., .docx, .html, or .pdf).
2. Locate the Fare Section
Find the section where the fare details are displayed. This typically includes the base fare, distance, time, and additional charges. It’s often labeled as “Fare Summary” or “Charges Breakdown.”
3. Adjust Base Fare
If you need to change the base fare, look for a placeholder text like “Base Fare” or a specific dollar amount. Replace the existing value with the new fare. Ensure the formatting remains consistent with the rest of the receipt.
4. Modify Additional Charges
Update any additional charges such as extra stops, toll fees, or surcharges. This is usually indicated with labels like “Tolls” or “Additional Fees.” Simply update the numbers accordingly.
5. Update Time and Distance
Check the time and distance fields. These may appear as “Time Traveled” and “Distance Covered.” Modify the values based on the actual trip data and make sure the units (minutes, miles, kilometers) match your original format.
6. Review Taxes and Discounts
If your receipt includes taxes or discounts, ensure these values are accurate. Edit percentages or fixed amounts based on current rates or customer-specific offers.
7. Double-Check the Total Fare
After making adjustments, confirm that the total fare is correct. Ensure that the sum of base fare, distance, time, and any added charges aligns with the new total.
8. Save Your Changes
Once you’ve reviewed and modified all the necessary details, save the updated template. If you’re using an HTML template, save it as a new file to preserve the original. For document editors, ensure the file is saved in the desired format (e.g., .pdf for printing).
By following these steps, you’ll be able to accurately modify fare details on your taxi receipt template, ensuring both accuracy and professionalism.
Keep the layout clean and straightforward. Prioritize important details such as the fare, date, time, driver information, and taxi number. These should be placed in easily identifiable sections, using bold or larger fonts for emphasis.
Use a simple font like Arial or Helvetica to ensure clarity and readability. Stick to standard font sizes (around 12-14px) for the body text, and highlight key details like total amount in a larger or bolder style to make them stand out.
Make the document printer-friendly by ensuring it fits standard paper sizes (like A4 or Letter). Avoid unnecessary colors and graphics that could add complexity or result in ink wastage. A minimalist approach works best.
Ensure that all critical elements such as the payment method, tips, and fare breakdown are displayed in a logical order. Include a section for the company’s contact details at the bottom for any future inquiries or issues.
Include a clear, space-efficient header with your taxi company’s name, logo, and contact information. This creates a professional look while keeping things minimalistic. A footer with small, unobtrusive legal disclaimers can also be added.
Test the design on various devices before finalizing it. Make sure that the receipt prints correctly without losing any critical information, especially when users print it on different printers or screen sizes.
Use your company’s logo and colors to make the receipt immediately recognizable. Place your logo at the top or in the header section, ensuring it’s clear and crisp. The color scheme should match your branding guidelines, applying your primary and secondary colors to elements like the background, borders, or text. This creates a cohesive visual identity across all customer touchpoints.
Make your company’s contact information easily accessible by positioning it at the bottom or in a dedicated space on the receipt. Include phone numbers, email addresses, and website URLs, providing clear links for customers to reach out if needed.
For a more personalized touch, consider incorporating a slogan or a brief message that reflects your company’s values or mission. This can be placed beneath the logo or in the footer area to create a memorable experience for your customers.
Don’t forget to adapt the font styles to reflect your brand’s character. Use the same fonts as your website or other marketing materials, ensuring consistency throughout your communication. Adjust text sizes to highlight key information like the total amount, date, and payment method, making it easy for customers to find what they need.
Lastly, always test your template in different formats (PDF, print, digital) to ensure it displays correctly across all platforms while maintaining your company’s branding standards. This attention to detail ensures your receipts are both functional and a positive reflection of your business identity.
Each vehicle type requires a slightly different approach to recording essential information on a taxi receipt. Customizing the details on your receipts ensures clarity and accuracy for both drivers and passengers. Here’s how to use taxi receipts for different vehicle types effectively:
Standard Taxi
- Include the vehicle’s make and model to identify the car easily.
- Ensure the driver’s name and taxi license number are printed clearly for verification.
- List the pickup and drop-off locations with the precise time stamps for transparency.
- Note the fare details, including base fare, additional charges, and any surcharges like airport fees or tolls.
Ride-Sharing Vehicles
- Specify whether the vehicle is a private car or part of a ride-sharing fleet.
- List the ride-sharing service’s details, including the app used, and if applicable, the driver’s profile information.
- Include the ride duration, route taken, and fare breakdown (with app fees if applicable).
- Highlight any promotional discounts or codes used for the fare, if applicable.
Limo or Luxury Vehicles

- Provide detailed information on the vehicle, such as make, model, and color.
- Include any pre-arranged services like waiting times, extra stops, or hourly rental rates.
- Ensure tips or luxury service charges are separated from the base fare for clarity.
- List additional features like special amenities provided, which might justify higher fees.
By adjusting the receipt format to reflect the specifics of each vehicle type, you improve transparency and ensure that both the driver and passenger understand the details of the transaction clearly.
Once you’ve customized your taxi receipt template to your liking, saving and sharing it efficiently is key. First, ensure that you save the document in a compatible format, such as PDF or DOCX. These formats maintain the integrity of your layout and text across different devices and software.
Saving Your Template
To save your template, simply choose the “Save As” option in your editor and select the desired format. It’s best to organize your saved files by creating a dedicated folder, so you can easily access or update them when necessary. For recurring use, consider naming your file with relevant keywords like “Taxi Receipt_Template” for quick reference.
Sharing Your Template
When you’re ready to share your receipt template, there are a few options. Emailing it as an attachment is a straightforward choice. You can also use cloud storage platforms like Google Drive or Dropbox. This method allows you to share a link with others, ensuring they access the most recent version of your template, without the need for multiple file exchanges.
By saving your template correctly and choosing a suitable sharing method, you’ll save time in future interactions and ensure a seamless experience for yourself and others.
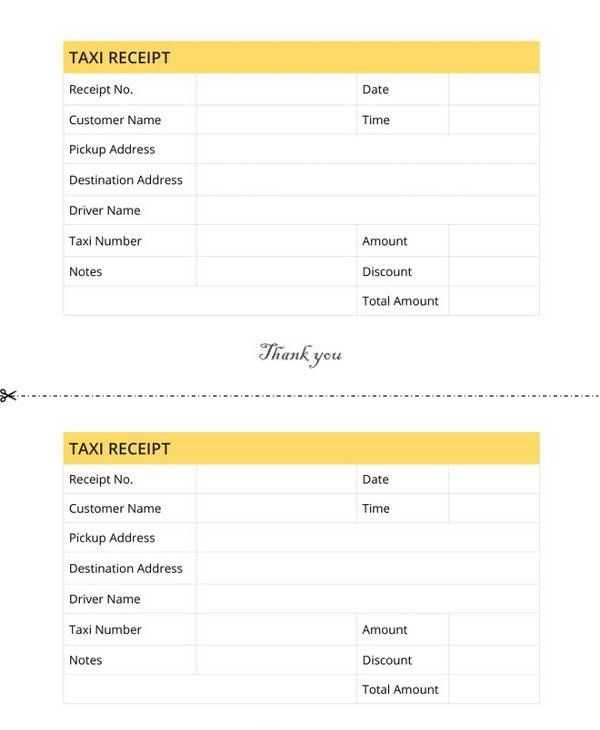
To create a functional and editable taxi receipt template, use a clear structure with relevant details. Begin by including fields such as the passenger’s name, taxi number, date, and time of the ride. These should be easy to fill in or modify for each new transaction.
Key Sections to Include

- Driver Information: Include the driver’s name and contact number to ensure transparency.
- Taxi Details: Mention the vehicle number, model, and license plate for identification purposes.
- Journey Information: Include the starting and ending locations, as well as any stops made along the way.
- Payment Summary: List the total fare, including any extra charges (e.g., tolls or surcharges). Optionally, include payment method (cash, card, etc.) for reference.
- Receipt Number: Add a unique number for each receipt to maintain an organized record of transactions.
Editable Fields
- Make the template fields editable so they can be customized easily, either by text boxes for manual input or drop-down options where necessary.
- Ensure that the template is designed for use in common formats like PDF or Word, allowing users to update and print receipts quickly.
- Consider adding a logo or business name at the top for brand consistency and recognition.