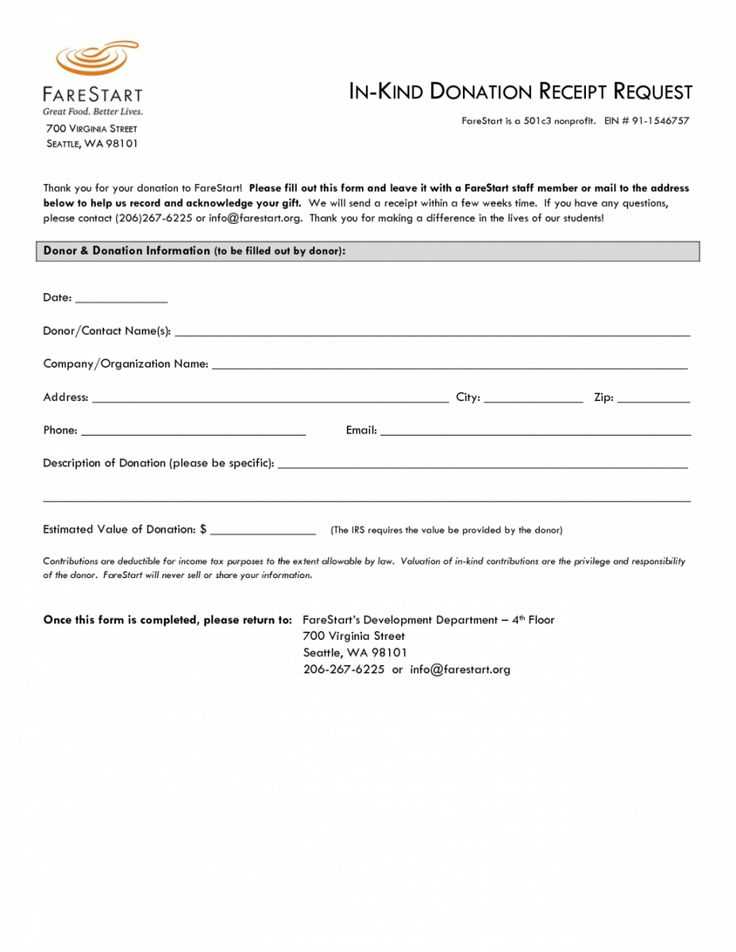
If you need a donation receipt for your charitable organization, QuickBooks offers an easy-to-use template that simplifies the process. You can quickly download the template and customize it to meet your needs. This template is designed to help you stay organized and compliant with tax regulations while saving time on paperwork.
Start by downloading the template directly from QuickBooks or from their official website. Once downloaded, open the file in QuickBooks, where you can enter donation details, such as the donor’s information, the donation amount, and any special notes. QuickBooks allows you to tailor the template to include your organization’s branding and specific wording requirements.
After filling out the necessary details, you can print the receipt or send it electronically to the donor. QuickBooks ensures that the template includes all essential fields to meet IRS standards, providing a professional look that builds trust with donors. Make sure to store copies of the receipts for your records and in case of future audits.
Download QuickBooks Donation Receipt Template
QuickBooks offers a straightforward donation receipt template to help streamline your charitable donation processes. Access it directly through QuickBooks or download it from trusted sources online. This template ensures that you can easily create receipts for donors, helping you maintain proper records and stay organized for tax purposes.
How to Access the Template

To get started, log into your QuickBooks account and navigate to the “Donations” section. You’ll find an option to generate donation receipts. Select the template that suits your needs, then input the necessary information like donor name, donation amount, and date. Save or print the receipt for your records or to send to the donor.
Customizing the Template
If you want to personalize the receipt further, QuickBooks allows for basic customization. You can adjust the text, logo, and contact details to match your nonprofit’s branding. Make sure all fields are filled out correctly to provide your donors with an accurate receipt for tax deduction purposes.
How to Access and Download the QuickBooks Template
To get the QuickBooks donation receipt template, follow these straightforward steps:
- Visit the official QuickBooks website and log in to your account.
- Once logged in, navigate to the “Templates” section in your account dashboard.
- Search for “Donation Receipt” in the template library.
- Choose the template that best suits your needs from the available options.
- Click on the “Download” button to save the template to your device.
Using QuickBooks Templates
After downloading the template, open it in QuickBooks. You can now customize it with your organization’s details and specific donation information. QuickBooks makes it easy to integrate the template into your accounting workflow.
Other Available Features

- Ability to customize the layout and design.
- Option to add donation specifics like donor name, amount, and donation date.
- Automatic saving of templates for future use.
How to Customize the Template for Your Organization

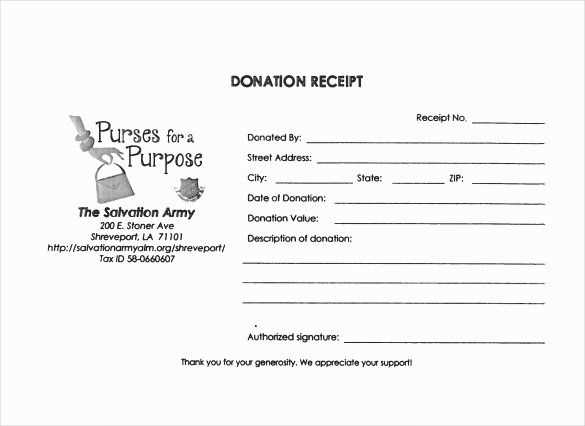
Adjust the donation receipt template to reflect your organization’s branding and information. Begin by adding your logo at the top of the receipt. This ensures it’s easily recognizable and aligned with your visual identity.
Next, update the organization name, address, and contact details in the designated fields. Make sure these are correct and current so donors can easily reach out if needed.
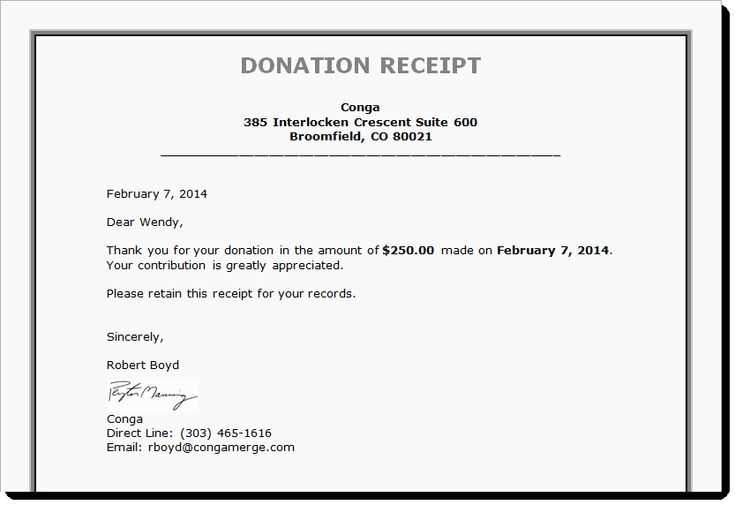
Modify the message section to include a personalized thank-you note. A heartfelt message will make the receipt feel more personal and engaging, strengthening the relationship with your donors.
Check the fields for donor information, such as name and donation amount, and ensure that the layout is clear and well-organized. Keep it simple but informative, making sure the essential details are easy to read.
Lastly, update any legal disclaimers or tax information relevant to your region. This is key to ensuring your receipts meet local requirements and provide the necessary information for tax purposes.
Best Practices for Using Donation Receipts in QuickBooks
Always include clear details in donation receipts, such as the donor’s name, donation amount, and the date. QuickBooks automatically generates a receipt with this information when the donation is entered, but double-check for accuracy before sending it out.
Use QuickBooks’ built-in templates for a polished look. These templates are customizable, allowing you to add your organization’s logo, address, and other details. Personalization ensures a professional and consistent appearance for your receipts.
Track donation types properly. Ensure that donations are categorized accurately within QuickBooks to maintain proper records. Use different accounts or tags for one-time donations, recurring donations, and in-kind gifts. This makes reporting and tax preparation easier.
Regularly reconcile donation records with your bank statements. QuickBooks can connect to your bank account, making it easier to match donations recorded in QuickBooks with those deposited in your account. This helps avoid discrepancies and keeps everything aligned.
For large donations, include a description of any goods or services provided in exchange. QuickBooks allows you to create receipts with additional notes, so donors are aware of the non-tax-deductible portion of their contributions.
Export donation reports periodically to keep track of your fundraising progress. QuickBooks lets you generate detailed reports on donations, which can be filtered by date, donor, or donation type. These reports help you analyze trends and prepare for financial audits.