Start creating purchase receipts with this easy-to-follow template. It includes all necessary details, ensuring clear communication between buyers and sellers. This format ensures accuracy and reduces errors when documenting transactions.
Customer Information: Make sure to collect full details like name, address, and contact info. This data helps both parties in case of any post-purchase inquiries or issues. It’s also useful for generating reports.
Purchase Details: Clearly list the items bought, including quantities, prices, and product descriptions. If applicable, break down taxes and discounts, so everything is transparent. This is key for ensuring both parties understand the financial exchange.
Transaction Information: Include payment method, transaction date, and any order numbers or reference codes. This helps track purchases and can be used for returns, exchanges, or future reference.
Final Total: Always summarize the total amount due, including any additional fees or taxes. Double-check the figures before finalizing the receipt to avoid confusion later.
This template can be customized to suit different business types. By keeping it simple and clear, you ensure a smooth transaction process that benefits everyone involved.
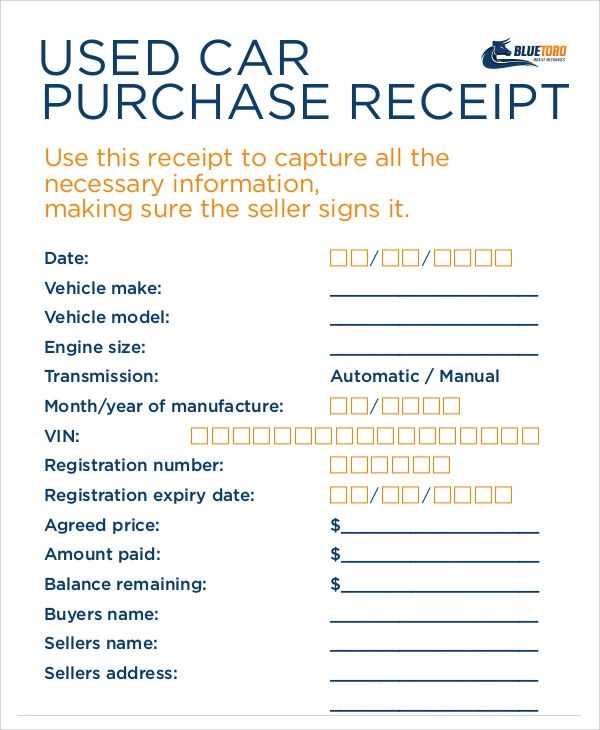
Template for Purchase Receipt
Creating a clear and concise purchase receipt template is key for both record-keeping and customer satisfaction. Begin with the following essential components:
1. Store Information: Include the name, address, contact number, and website of the business. This ensures customers know where the purchase originated from. Position this at the top of the receipt.
2. Date and Time: Always include the date and time of the transaction. It helps both parties keep track of purchase details and provides a reference for potential returns or issues.
3. Itemized List: Clearly display the purchased items, including the quantity, price per unit, and total price. Ensure each item is listed on a separate line for easy readability.
4. Payment Details: Provide a summary of the payment method (cash, card, online transfer, etc.). Specify the amount paid and, if applicable, any discounts applied. Also, include the tax breakdown if relevant.
5. Transaction ID: Assign a unique transaction ID for future reference or tracking. This can assist in resolving disputes and helps with internal accounting.
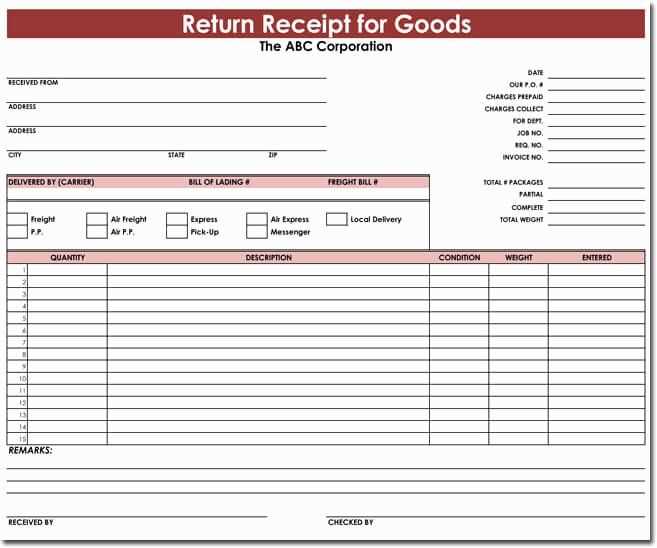
6. Return Policy: Include clear instructions on how the customer can return or exchange an item, along with any time limits for doing so.
7. Signature/Authorized Stamp: If applicable, include a space for a signature or an authorized stamp to verify the authenticity of the receipt.
These elements will provide both the buyer and the seller with all the information needed to confirm the transaction and handle any post-purchase processes effectively.
Customizing Fields in Your Receipt Template
Modify the fields that matter most to your transaction details. Consider adding fields like “Discount” or “Coupon Code” to accommodate special promotions. Use placeholders for dynamic data such as customer name, date, or total amount so that your receipt template automatically updates with each new purchase.
Organize the layout of your fields by grouping similar information. For example, list the product name, quantity, and price next to each other for clarity. Make sure to format the fields in a way that ensures the total amount stands out, either through bold text or larger font size.
Ensure that the payment method and any transaction fees are clearly displayed. You can include a specific area dedicated to taxes, tips, and refunds if applicable. Consider adding a section for notes or instructions at the bottom for any extra details you might want to include with each sale.
To personalize the experience, incorporate fields for customer contact details like email or phone number, especially if you plan on sending receipts via email. Tailor the template to match your business style by adjusting fonts, field sizes, or even the color scheme to make the receipt fit your brand identity.
Incorporating Legal Requirements in Receipt Design
Include all required details in your receipt design to ensure compliance with local regulations. This includes the seller’s business name, contact information, and tax identification number. The receipt should also feature the date of purchase, itemized list of products or services, and applicable tax information. In some jurisdictions, including the total price before tax and after tax is a mandatory requirement.
Tax and Regulatory Information
Clearly display tax rates and amounts, ensuring they are easily distinguishable. Many regions require the breakdown of the price, including the tax portion. Always use the correct tax rate based on the product type or service offered and update it regularly in case of changes. Include any specific tax identifiers like VAT or sales tax numbers if applicable.
Terms and Refund Policies
Provide clear refund and return policy details directly on the receipt. This can prevent confusion and provide legal protection in case of disputes. If a specific refund timeframe or condition applies, state it explicitly. Additionally, in some areas, consumer rights information is required, so verify that all necessary disclaimers are included.
Formatting for Clear and Professional Presentation
Focus on consistency and clarity. Use a clean and structured layout, with appropriate white space between sections to enhance readability.
Choose Legible Fonts

Select simple, easy-to-read fonts like Arial or Helvetica. Stick to one or two font types throughout the document to maintain uniformity. Limit font size to 10-12 points for body text, and make headings larger to differentiate sections.
Align Information Properly
- Align text to the left to improve flow and avoid distractions.
- Ensure the header and footer are consistently placed, offering space for your company logo and contact information.
- Use a table to neatly organize itemized lists like purchases, prices, and totals.
Use Color Sparingly
Keep colors minimal, using only one or two accent colors for headings or highlights. Avoid overly bright or distracting tones. Use subtle contrasts between text and background for better legibility.
Break Content into Sections
- Divide your receipt into clear sections such as contact details, purchased items, subtotal, and taxes.
- Use bold text to highlight key information, such as totals and payment methods.
Provide Clear Item Descriptions
- Each item listed should have a concise description, ensuring customers can easily identify what was purchased.
- For services, include details about the service provided, time spent, or any additional notes.
Including Payment Methods and Transaction Details
Specify the payment method used for the transaction clearly. Include the type of card, e-wallet, or alternative payment method. Additionally, mention any transaction IDs for verification.
Payment Method Breakdown
| Payment Method | Transaction ID | Amount |
|---|---|---|
| Credit Card | ABC123XYZ | $150.00 |
| PayPal | TXN987654 | $250.00 |
Ensure to include tax information and any additional fees if applicable. If the payment method is installment-based, list each payment’s amount and due date to avoid confusion.
Transaction Summary
| Transaction Date | Amount Paid | Balance Due |
|---|---|---|
| 2025-02-05 | $100.00 | $200.00 |
| 2025-02-10 | $100.00 | $100.00 |
This detailed format ensures clear understanding of the payment process, providing customers with transparency on the method used, the transaction status, and remaining balances.
Designing for Easy Printing and Digital Delivery

Optimize your receipt layout for clear readability both on paper and screen. Ensure that all important details, such as item names, prices, and totals, are presented in an easy-to-scan format. Use legible fonts, like sans-serif, with enough spacing to avoid clutter. Align text neatly and provide adequate margins for printing, ensuring nothing is cut off on standard paper sizes.
Consider including a dedicated section for customer contact information, which is clear on digital and printed versions. For online delivery, provide a “Download PDF” option with a properly formatted file that retains layout consistency on different devices. Keep the design responsive so it scales well on both large and small screens, without sacrificing legibility.
Test your design across different devices to verify that all elements, including logos and contact details, appear correctly on both printed receipts and digital copies. Use high-quality images and logos that are scalable to avoid pixelation. For better printing, keep the color palette simple and contrast-rich to ensure readability in black and white as well as color printing.
Ensuring Compatibility with Accounting Software

Integrating purchase receipts with accounting software requires a careful approach to ensure smooth data transfer. Follow these steps for seamless compatibility:
- Check for Data Export Options: Ensure the receipt template can export data in formats that are compatible with the software, such as CSV, XLSX, or XML.
- Include Required Fields: Confirm that the receipt includes all fields necessary for accounting software, such as date, item details, prices, taxes, and total amounts.
- Standardized Codes: Use standardized codes for items, services, and taxes. This allows the software to categorize transactions automatically.
- Maintain Consistent Number Formats: Ensure the format for currency and numerical values matches the requirements of the accounting system to prevent errors during import.
- Automate Import Features: Look for features within the accounting software that allow for automatic receipt imports from email or cloud storage to reduce manual input.
By aligning the receipt template structure with the specifications of the accounting software, you avoid data errors and streamline accounting processes.