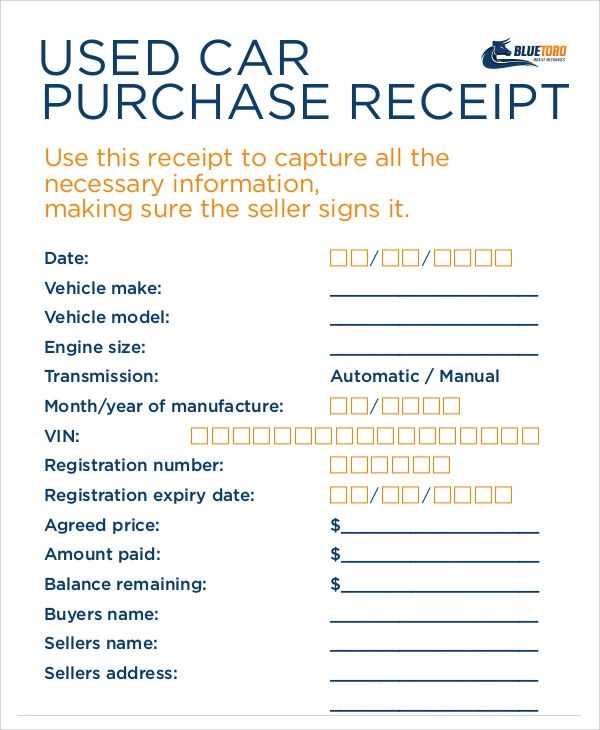
Creating a proof of purchase receipt doesn’t have to be complicated. Use a template that includes key details like transaction date, item description, price, and method of payment. This ensures your receipt meets basic requirements for returns, warranties, or any legal purposes.

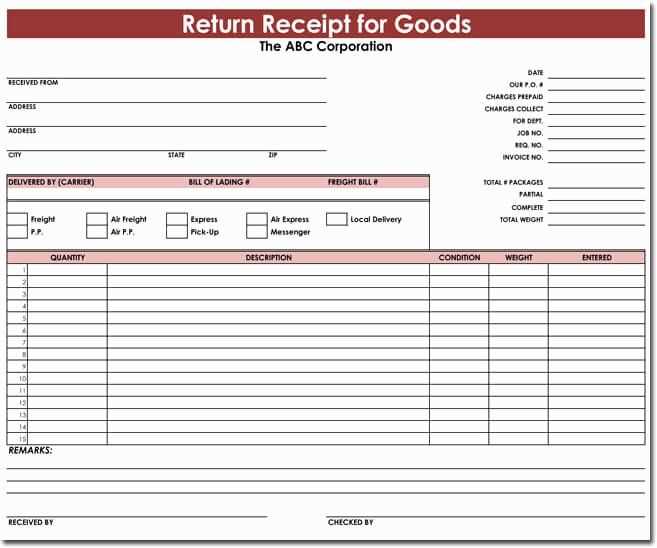
Start with a clear layout. Include the store or business name, contact information, and a unique transaction ID. Make sure the item’s name and price are easy to read. Offering a detailed breakdown of taxes or discounts is helpful for both the customer and the seller.
For best practices, include a note on return policies or warranty conditions. This helps prevent confusion in case the buyer needs to refer back to the receipt. Tailor the template to suit your business needs, but always focus on clarity and accuracy in the details provided.
Here is the revised version of the text with reduced repetition:

To create a clean and professional proof of purchase receipt, include the following key elements: the vendor’s name, address, and contact information, as well as the date of the transaction and a unique receipt number. Clearly list the purchased items along with their quantities and prices. Ensure the total amount is accurate and includes any applicable taxes or discounts. Lastly, provide a method of payment and, if relevant, the warranty or return policy details.
Focus on clarity and precision. Avoid adding unnecessary information that could clutter the receipt. Each section should be distinct, and the font should be readable. Consider including a thank-you note or customer service contact at the bottom for a personal touch.
Proof of Purchase Receipt Template
What Information Should the Template Contain?
How to Structure a Professional Receipt?
Selecting the Ideal Design for Your Template
Legal Guidelines for Proof of Purchase
Top Software for Creating a Receipt Template
How to Tailor for Various Products or Services
Include key transaction details: A proof of purchase receipt must clearly show the seller’s name, buyer’s name, and the transaction date. List the items or services purchased, including quantity, price, and any applicable taxes. If relevant, add a transaction number for easy reference.

Organize for clarity: Arrange the information logically. Place the vendor details and date at the top, followed by a breakdown of products or services. The total cost should appear at the bottom, with any discounts or taxes clearly outlined. Use clear section labels, such as “Item Description,” “Price,” and “Total Amount.”
Design for readability: Keep your receipt design clean and straightforward. Use a simple font and avoid overcrowding the template with unnecessary details. A well-structured design can greatly enhance its professional appeal. Ensure there’s ample space between sections for easy scanning of information.
Adhere to legal requirements: Some jurisdictions require receipts to include specific data, such as a tax identification number or refund policies. Check your local regulations to ensure compliance. Including this information helps avoid future disputes and clarifies the rights of the buyer.

Best software options: Programs like Microsoft Word, Google Docs, and dedicated receipt software like Wave or FreshBooks provide customizable templates for creating professional receipts. These tools allow for easy adjustments and ensure that you can modify templates for different transaction types.
Customize for different needs: Tailor the template for specific transactions, such as product sales or services rendered. For services, you may want to include a description of the service and its duration. For product sales, include a detailed item list with serial numbers or model names, if necessary.