Creating a clear and simple purchase receipt template is a must for any camper-related transactions. A well-structured receipt not only ensures that both the buyer and seller have a record of the transaction but also helps keep finances organized for future reference. Start by including the basic details: date, itemized list of purchased goods or services, price, and payment method. This provides both clarity and transparency.
To make the receipt more practical, consider adding a section for the buyer’s contact information, as well as the seller’s details. Include a unique receipt number for tracking purposes. This is especially helpful for campers who may need to return items or require warranty services in the future. A short description of the purchased items or services also adds value by providing context for what was bought.
Always leave space for the total amount and any taxes or discounts applied. By clearly presenting this information, you avoid confusion and ensure both parties are on the same page. With this template, you can easily generate receipts for all your camper-related purchases while maintaining organization in your financial records.
- Purchase Receipt Template for Camper
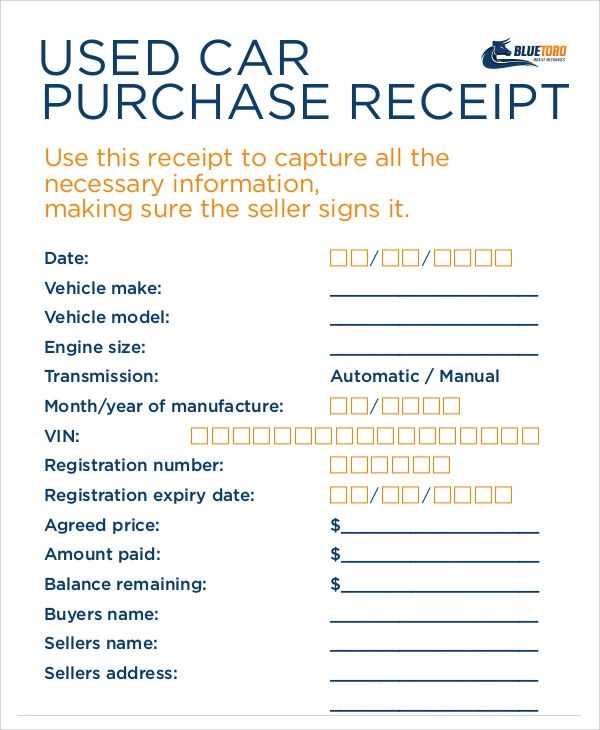
Ensure your camper purchase receipt includes specific details to maintain transparency and avoid future complications. Start with the seller’s name, address, and contact information. Clearly list the items purchased, including the camper’s make, model, year, and any accessories or add-ons. Each item should have its individual price, with the total cost visible at the bottom.
Include the payment method, whether it was cash, credit card, or financing, along with the transaction date. A unique transaction or receipt number will help for tracking purposes. If applicable, add warranty details, return policies, and any agreements related to after-sales services.
Ensure that both the buyer’s and seller’s signatures are included, confirming the transaction’s authenticity. Double-check for accuracy in all entries, as this document could be useful for insurance or registration purposes later on.
Place your business name, logo, and contact information at the top of the receipt. This establishes your brand identity and ensures customers know how to reach you if needed.
Incorporate a section for customer details, including their name, address, and phone number. This makes each receipt unique and personalized to the customer.
Customize the item list by adding categories related to camper products or services, such as “camping gear,” “vehicle rental,” or “maintenance fees.” This helps organize the receipt for better clarity.
Include payment information with specifics on the method used, along with any taxes or discounts. For clarity, break down the total amount so the customer can easily understand what they’ve paid for.
End with a brief, personalized message or a thank-you note. A small touch can leave a positive impression and encourage return business.
Ensure the font, layout, and colors match your business style. A clean, professional design makes the receipt easy to read while reflecting your brand’s aesthetic.
Start by listing the purchase date and time. This helps both the buyer and seller track the transaction clearly.
Item Details

Provide a detailed description of the items purchased. Include quantities, sizes, and any specific features that distinguish each item.
Price Breakdown

Ensure the unit price of each item is clearly stated. Total costs, including taxes and any additional fees, should be displayed separately for transparency.
Seller Information
Include the seller’s name, business name, contact details, and location. This makes it easy to reach out in case of issues or returns.
Payment Method

Clearly specify how the payment was made (e.g., credit card, cash, bank transfer). This can be helpful for both financial tracking and any potential disputes.
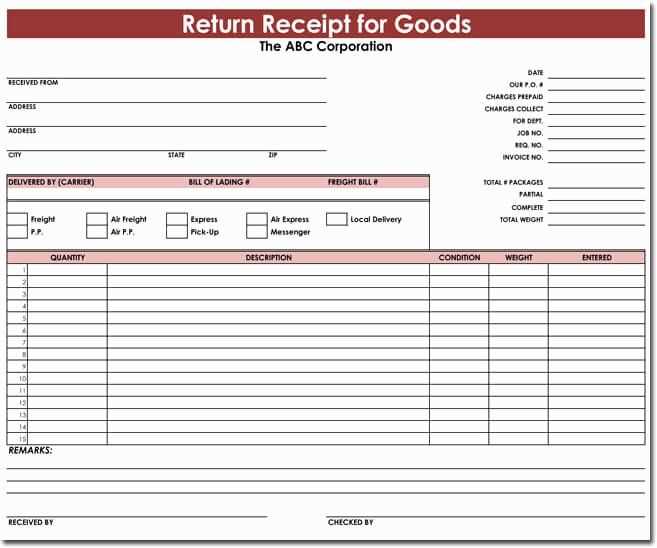
Return or Refund Policy
If applicable, briefly outline the return or refund policy. This ensures both parties are aware of the terms in case the purchase needs to be reversed.
Receipt Number

Assign a unique receipt number for each transaction. This allows for easy reference and retrieval of past transactions.
Ensure that camper receipts include specific legal details, such as the seller’s name, business address, and contact information. Clearly state the terms of sale, including any warranties or guarantees provided. This helps avoid misunderstandings and legal disputes down the line.
Verify that your receipt template complies with local tax regulations. For example, the receipt may need to include the tax identification number of the seller and specify the sales tax applied. This ensures the transaction is documented correctly for tax purposes.
When creating a receipt for a camper sale, be transparent about any refund or return policies. Outline the procedures for returns, repairs, or exchanges, ensuring they align with consumer protection laws in your region. Clear policies reduce the risk of legal challenges in case of disputes.
Include accurate descriptions of the camper’s condition, including any defects or damages. This protects both the buyer and seller by providing a reference point for the state of the vehicle at the time of sale. Detailed information helps prevent disagreements about the camper’s condition after the purchase.
Lastly, include a clear payment method section, noting whether the transaction was completed via cash, credit, or financing. This provides an official record of the payment process and protects both parties in case of any future claims or disputes regarding the payment status.
Make sure your camper purchase receipt template includes all the key details to avoid confusion later. Start by clearly stating the date of purchase, along with the full name and contact information of the buyer and seller. This ensures that both parties are easily identifiable in case of any issues. Include a detailed description of the camper, including its make, model, year, and any other important specifications like VIN or serial numbers.
Pricing Breakdown
Provide a transparent pricing breakdown. List the total purchase price and any additional charges, such as taxes, registration fees, or delivery costs. If a down payment was made, show the amount paid and the remaining balance. This transparency helps both parties track the financial details clearly.
Payment Method
Include a section specifying the payment method used–whether it’s cash, check, bank transfer, or credit card. If installment payments are involved, outline the payment schedule and due dates for each installment. This helps avoid misunderstandings and confirms the terms agreed upon by both parties.