Creating a reliable and clear sales receipt template is key to maintaining smooth transactions with customers. A well-structured template helps both buyers and sellers keep track of purchases while providing all the necessary information for proper documentation.
Focus on including essential details like the buyer’s and seller’s names, item descriptions, prices, tax calculations, and the total amount. It’s also a good practice to add space for the transaction date and a unique receipt number to easily reference each sale.
Make sure your template is easy to read and follow. Organize the information in a way that feels natural. Separate the item details from the totals, and make sure the tax and final price stand out. This format will improve clarity and reduce errors.
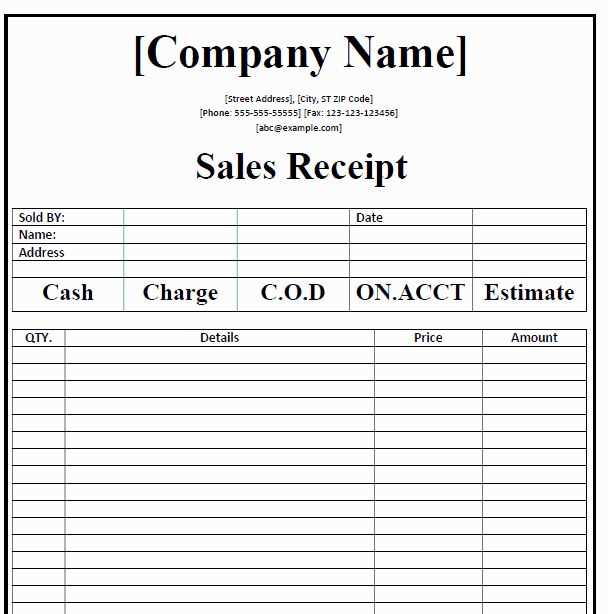
Always include a payment method section. Whether the customer pays by card, cash, or any other method, having this clearly documented helps avoid confusion later on. It’s a simple but effective way to enhance the professionalism of your business operations.
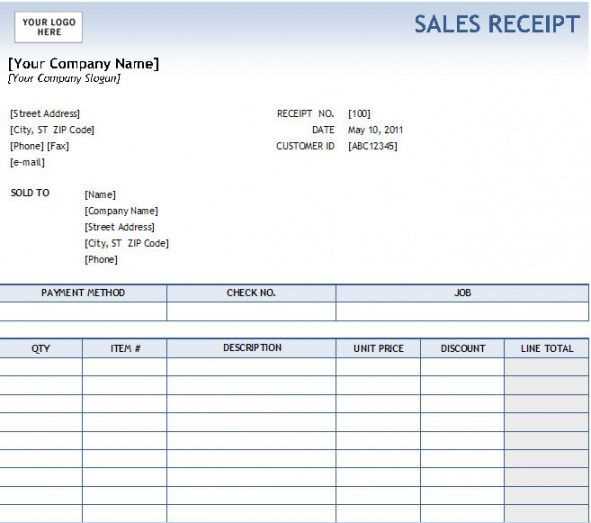
Generic Sales Receipt Template
To create a clear and functional sales receipt, include the following sections to ensure accuracy and clarity for both parties:
Receipt Information

- Date and Time of Transaction: Clearly note the exact date and time when the sale occurred.
- Transaction ID or Receipt Number: Assign a unique identifier to each receipt for easy tracking.
- Seller Details: Include the seller’s name, business name, address, and contact information.
- Buyer Details: If applicable, include the buyer’s name and contact details.
Itemized List

- Product Description: Provide a detailed description of each item sold, including quantity and unit price.
- Total Amount: List the total price for each item and calculate the subtotal.
- Taxes and Fees: If applicable, break down any taxes, discounts, or additional charges that apply.
- Total Due: State the final amount payable, including all taxes and fees.
Use clear and legible formatting to avoid confusion. This template helps ensure transparency and can be easily adapted to any sales situation.
Customizing a Template for Specific Products

Adjust the layout to highlight key details relevant to each product type. For physical items, ensure the fields for size, weight, and color are prominent, while digital goods should emphasize license codes or download instructions.
Include specific tax rates or shipping costs associated with each product. Use conditional fields to apply custom charges automatically, depending on the product’s category or shipping destination.
Add product images or SKU numbers for quick identification. Ensure these details are aligned neatly to avoid clutter while keeping them easy to scan.
Customize the invoice number format for different product types if needed, creating clear distinctions between various product categories for internal tracking.
Make sure the terms and conditions are tailored to the product’s requirements, such as return policies for electronics or warranties for high-value items. Include these at the bottom for easy reference without overwhelming the main content.
Integrating Payment Methods and Taxes

Ensure your receipt template includes clear sections for payment method and tax details. List each payment type used, such as credit card, cash, or digital wallets. Clearly label the amount paid via each method and provide totals for easy reference. If multiple payment methods are used, break down the amounts accordingly.
For taxes, include a dedicated line item showing the tax rate applied, followed by the total tax amount. Make sure to indicate whether tax is included in the price or calculated separately. If your region has varying tax rates, ensure your template allows flexibility for different rates based on product categories or locations.
Always round the final tax amount to the nearest cent to avoid confusion. Provide a total that sums both the subtotal and tax, clearly separating the two. This approach helps customers easily verify their payment breakdown and provides clarity for record-keeping.
Ensuring Compliance with Legal Requirements

Verify that your sales receipt includes all mandatory details required by local laws. These typically include the business name, address, contact information, and a unique transaction identifier. You must also display the transaction date and a clear breakdown of the purchased items or services, with their respective prices and applicable taxes.
Be mindful of tax regulations in your region. Depending on the jurisdiction, tax rates may vary. Ensure your receipt clearly reflects the tax applied to the total amount, and make provisions for any potential exemptions or special rates. For instance, some items or services might qualify for tax reductions, which should be reflected separately on the receipt.
Include refund and return policies if required by local consumer protection laws. Having this information on the receipt helps avoid disputes and enhances transparency for customers. Ensure these policies are clear and easy to understand, without ambiguous language that could lead to misinterpretation.
Retain accurate records of all transactions. Most regions require businesses to keep copies of receipts for a specific duration, ranging from a few months to several years, depending on the nature of the business. Set up a system for archiving receipts that allows easy retrieval if needed for audits or customer inquiries.
Lastly, stay updated on any amendments to consumer protection and tax laws in your area. Regularly review your receipt template to ensure it remains compliant with any new requirements that may arise.