To create a professional business bill receipt, start with clear and precise details. The header should feature your business name and contact information, followed by the date of the transaction and a unique receipt number. This helps both parties keep track of the exchange for record-keeping and legal purposes.
List the products or services provided, including quantities, unit prices, and a total for each item. Ensure that the subtotal and applicable taxes are clearly outlined. Adding a line for any discounts or special offers applied to the transaction can enhance transparency.
Close the receipt with the total amount due, payment method used, and any other necessary instructions such as payment deadlines or return policies. A well-structured receipt promotes trust and smooth transactions, ensuring that your clients are fully informed about their purchases.
Here is the improved version:
Focus on clarity and simplicity when creating a business bill receipt template. The layout should be straightforward, emphasizing key details for easy reference.
- Header: Include your business name, logo, contact information, and bill number at the top. Make sure it’s easy to find and read.
- Customer Details: List the customer’s name, address, and contact info to ensure the bill is easily traceable to the right individual.
- Itemized List: Break down each product or service provided, showing quantity, price per unit, and total cost.
- Total Amount: Clearly state the total amount due. Include taxes and any discounts applied for full transparency.
- Payment Instructions: Provide clear instructions on how payments can be made, including bank details or other payment options.
- Terms and Conditions: Briefly outline payment terms, return policies, or any other relevant agreements.
Ensure the template has a professional design but avoids unnecessary decoration, keeping the focus on the essential information.
- Business Invoice Receipt Template
Design a clean and organized invoice receipt template to ensure all necessary details are captured. Begin with your business name and contact information at the top, followed by the client’s name and address. Include the invoice number and the date the invoice is issued. This will help both you and your client track transactions easily.
Next, clearly outline the products or services provided, along with their respective costs. Use a table format for clarity–list the description, quantity, price per unit, and total cost for each item or service. At the bottom, include the payment terms and total amount due. Make sure to indicate any applicable taxes or discounts separately for transparency.
Lastly, add a section for payment details, specifying the accepted methods and any relevant instructions. Include space for a thank-you message or a note of appreciation to enhance client relations.
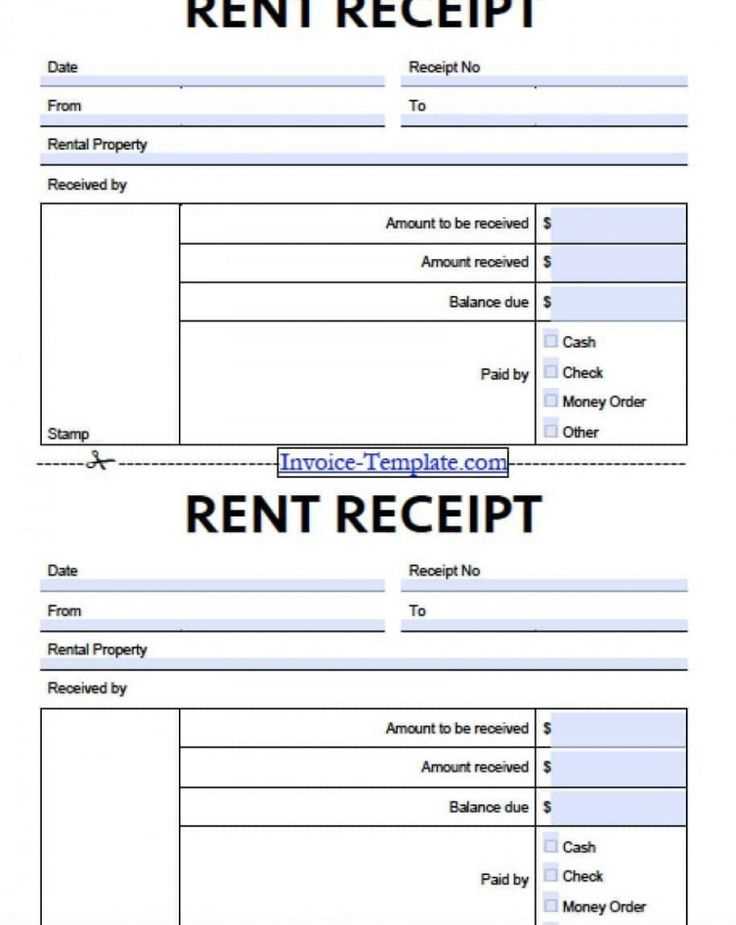
Begin with a clear, concise header that includes the business name, address, and contact details. Make sure this information is visible at the top of the receipt.
- Include transaction details: List the items or services purchased, their quantities, and the individual prices. Provide a subtotal for clarity.
- Show payment method: Specify whether the payment was made by cash, card, or another method. If applicable, include the last four digits of the card number for reference.
- Incorporate tax information: Display the tax rate and the amount of tax charged separately from the subtotal. This ensures transparency for both the customer and the business.
- Add a unique receipt number: Assign a number to each receipt for tracking purposes and to avoid confusion with similar transactions.
- Provide a total: Clearly highlight the total amount paid, including taxes and any other additional charges.
- Offer return/exchange policy: Include any relevant policy details at the bottom, especially if the business offers refunds or exchanges.
Finish with a thank you message or a note that invites feedback. This adds a personal touch to the receipt while maintaining professionalism.
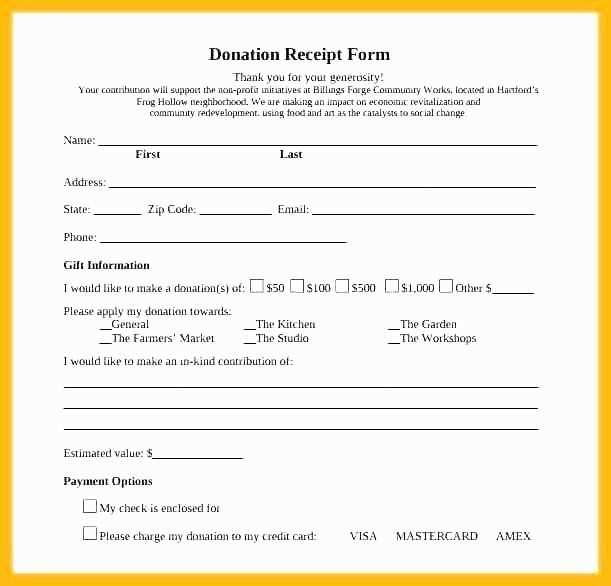
Include the following key elements to make your business receipt clear and professional:
1. Company Information

List your business name, address, contact number, and email. These details help customers easily identify the seller, should any issues arise later.
2. Receipt Number
A unique receipt number is vital for record-keeping and tracking. This helps to organize transactions and provides a reference in case of returns or disputes.
3. Date and Time
Always include the date and time of the transaction. This provides a timeline for both you and your customer, offering clarity in case of future inquiries.
4. Description of Items or Services
Clearly describe the products or services purchased, including quantity and unit price. Accurate details prevent confusion and help verify the purchase in case of a return.
5. Total Amount

The total amount should include any taxes or fees. Displaying the breakdown of the cost ensures transparency and avoids misunderstandings with your customer.
6. Payment Method
Indicate how the transaction was completed, whether by cash, card, or another method. This helps with accounting and provides a record of how funds were transferred.
7. Refund or Return Policy

Clearly state your refund or return policy. This helps set expectations and protects both parties in case a customer needs to return a product.
Use your logo and company colors to create a unique and professional look. A branded invoice fosters trust and reinforces your company identity. Incorporate your brand’s font style and color scheme to maintain consistency across all communication materials.
Ensure clear categorization of items or services. Group related products or services together and label each section appropriately. This helps clients quickly understand their charges and minimizes confusion.
Include a concise payment section with clear terms. Add a prominent payment due date, payment methods, and any penalties for late payments. Clear terms streamline the payment process and encourage timely action.
Keep the layout simple and organized. A clutter-free design allows customers to focus on key details without feeling overwhelmed. Avoid unnecessary graphics and opt for a clean, minimalistic format.
Make sure your contact information is easily visible. Include your business address, phone number, and email in a consistent location. Having this info readily available saves your clients time when they need to get in touch.
Use a numbering system for your invoices. A simple invoice numbering system helps you track payments and identify potential issues with your invoicing process.
Use the </ol> tag properly by closing the ordered list. This ensures that the document’s structure remains clear and organized. The </ol> tag should always be placed after the last <li> element, marking the end of your numbered list.
Example:
| HTML Structure | Explanation |
|---|---|
<ol> |
Marks the beginning of an ordered list |
<li>Item 1</li> |
Defines a list item in the ordered list |
</ol> |
Closes the ordered list |
By following this format, you maintain readability and ensure that browsers correctly interpret your list structure.