For tenants and landlords in New South Wales (NSW), having a clear and professional rent receipt is a practical way to keep track of payments. A rent receipt acts as both proof of payment and a record of transaction, which benefits both parties in case of disputes or future references.
The template should include specific details such as the tenant’s name, property address, rent amount, payment date, and the payment method. Always make sure to list the rental period covered by the payment. This ensures that all information is clear, reducing potential confusion down the road.
Ensure that the receipt is signed by the landlord or authorized representative. A printed receipt can serve as legal evidence in case of a disagreement over rent payments. If you’re unsure about the format or details, templates are available online to simplify the process, providing a professional touch to every transaction.
Rent Receipt Template NSW

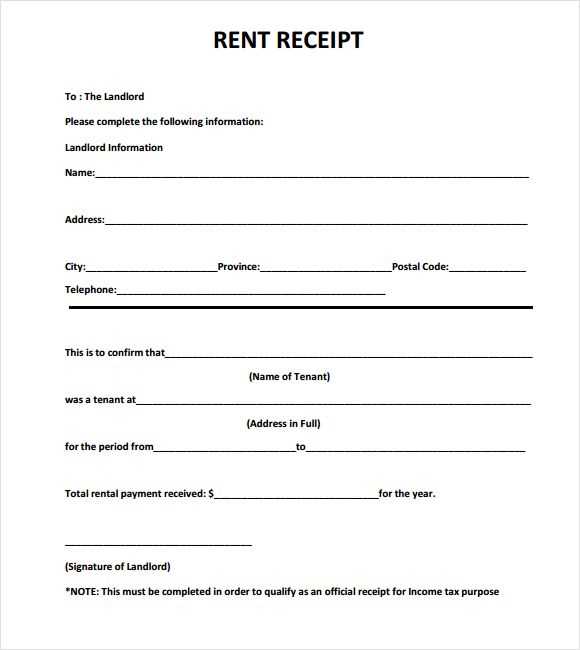
A rent receipt template in NSW should include specific details to comply with local regulations. Ensure the receipt contains the following elements: the tenant’s name, address of the rental property, the amount of rent paid, the date the payment was made, and the landlord’s name and signature. It’s crucial to include a clear reference to the rental period being covered, such as weekly or monthly payments. Additionally, the receipt should state the method of payment, whether it’s via cash, bank transfer, or another method.
For accuracy, use a template that can be customized with each payment. This makes record-keeping easier for both tenants and landlords. You may also want to include an invoice number for tracking purposes. Keep the format simple, clear, and professional. A well-structured receipt avoids confusion and ensures proper documentation for both parties.
In some cases, landlords are required to provide receipts for cash payments. Even if rent is paid electronically, it’s a good practice to issue a receipt for transparency. Remember, having a proper rent receipt template can help prevent disputes related to rent payments, providing clear proof of transactions when needed.
Creating a Legally Compliant Rent Receipt
Ensure your rent receipts meet all legal requirements by including specific information. Start with the landlord’s or agent’s name, address, and contact details. Clearly state the tenant’s full name and the property address. Include the rental period covered by the payment, such as the start and end dates. Specify the amount paid, the payment method, and if the payment was for rent, a bond, or any other fees.
It’s also important to have a unique receipt number for tracking purposes. Add the date the payment was received and ensure the signature or name of the landlord or agent is present. This helps maintain transparency and avoids potential disputes.
Key Elements to Include

- Landlord’s/Agent’s Information: Full name, address, and contact details.
- Tenant’s Information: Full name and property address.
- Payment Details: Amount paid, payment method, and purpose (e.g., rent, bond).
- Receipt Number: Unique identifier for each transaction.
- Date: Date the payment was received.
Why It Matters
By incorporating these elements, you maintain a clear record for both parties. This ensures legal compliance and provides a solid foundation in case of any future disputes. It’s a straightforward process that helps safeguard both tenant and landlord interests.
Essential Information to Include in the Receipt
Begin with the full name of the landlord or property management company. This establishes the source of the transaction and ensures clarity for both parties.
Next, include the tenant’s name and address. This identifies who is receiving the payment and matches it with the property involved.
Specify the property address clearly. This ensures there is no ambiguity regarding the rental unit associated with the payment.
Payment Details

State the exact amount of rent paid. Include both the numeric and written version to avoid any misunderstandings.
Clearly indicate the payment date. This helps track rent payments and may be useful in case of disputes over late payments.
Payment Method

Indicate how the rent was paid, such as by cash, bank transfer, or cheque. This adds transparency to the transaction.
For digital payments, provide transaction details or reference numbers to support proof of payment.
Lastly, ensure there’s a space for the landlord’s signature or a digital equivalent. This confirms the transaction and acts as a receipt for both parties.
Formatting and Customizing the Template for Your Needs

To customize your rent receipt template, focus on adjusting key elements like layout, fonts, and fields to match your preferences and requirements. Begin by ensuring the template includes all necessary sections, such as tenant and landlord information, rent amount, payment date, and the payment method.
Consider these adjustments for better clarity and usability:
- Adjust Field Sizes: Resize fields like the rent amount or date to accommodate specific input needs. This ensures the template remains clear and organized.
- Use Custom Fonts: Choose fonts that are easy to read and align with your style, such as sans-serif for a modern touch or serif for a more formal look.
- Modify Layout: Reorganize sections if necessary. For example, place tenant information at the top or near the payment details for quick reference.
- Customize Payment Method Options: Include specific payment methods you accept (e.g., bank transfer, cash, cheque) to avoid confusion.
- Include Additional Details: Add fields for any other relevant data like late fees, discounts, or payment periods that suit your rental agreements.
Make sure to test the customized template with real information to ensure it’s user-friendly and meets your needs before using it regularly. Adjusting the template allows you to create a practical and personalized receipt for both landlord and tenant.