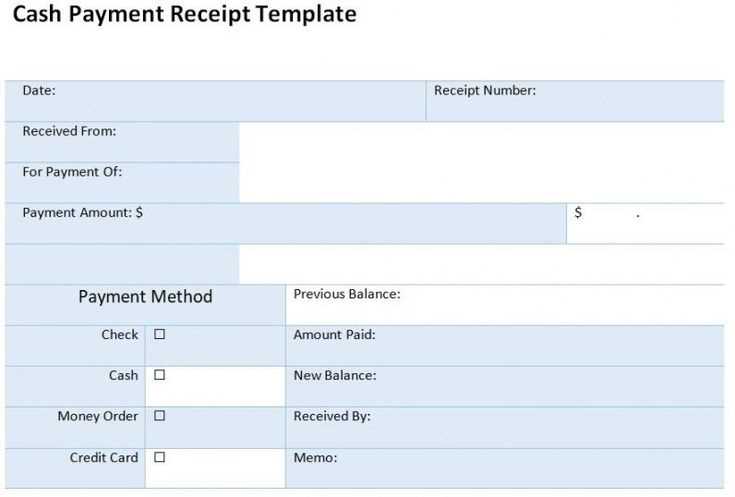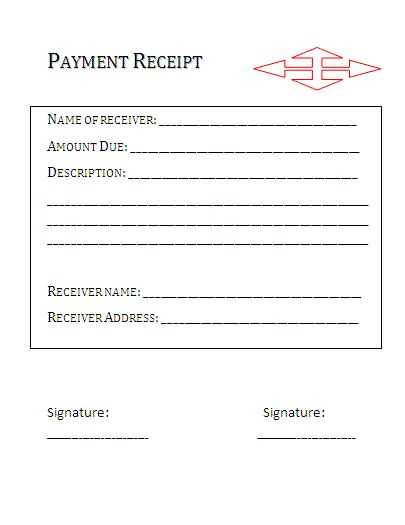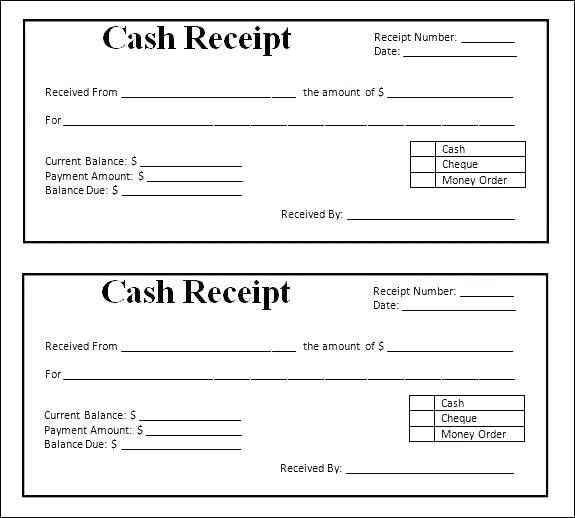
Use a Microsoft Word template for creating clear and professional receipts of payment. This method simplifies the process, ensuring you capture all necessary details while maintaining a polished appearance. The template includes sections for the payer’s name, the amount paid, payment date, and the services or products received, making it easy to track and reference transactions.
Customize the template to match your specific business needs, whether you’re accepting payments for services or products. Include the business name, contact details, and a unique receipt number to make it easy for both parties to track payments. A simple yet well-organized format will help ensure clarity for your clients and streamline your accounting process.
When filling out the template, double-check all details to ensure accuracy. This includes verifying payment amounts, ensuring dates are correct, and matching the payment method (cash, check, credit card, etc.). A well-organized receipt not only aids in bookkeeping but also enhances your professional image with clients.
Microsoft Word Receipt of Payment Template
To create a professional receipt of payment in Microsoft Word, start with a clean layout that includes clear sections for the key information. Include the payer’s name, payment amount, payment method, and the date of the transaction. Make sure the title “Receipt of Payment” is placed prominently at the top. You can also add a unique receipt number for easy reference.
In the body, provide space for details such as a description of the goods or services paid for, the total amount received, and any applicable taxes. It’s a good idea to include a section for your company’s contact details or logo for added professionalism. Ensure that the payment method is specified, whether it’s cash, credit card, or bank transfer.
For easy customization, you can use a pre-designed template available within Microsoft Word. These templates come with placeholders, which you can quickly replace with your transaction information. Adjust font sizes and alignments to match your brand’s style.
Tips: Use tables to neatly organize the payment details. You can also consider adding terms and conditions or a thank-you note at the bottom of the receipt to leave a positive impression.
Key Elements to Include:
- Receipt title
- Payer’s name
- Payment amount
- Payment method
- Description of goods/services
- Date of transaction
- Receipt number
- Contact information
Creating a Custom Receipt Template in Microsoft Word
To create a receipt template in Microsoft Word, first open a blank document. You can begin by adjusting the page layout according to your needs–choose a size and orientation that fits your intended receipt format. Set the margins to narrow or customize them for better use of space.
Adding Basic Elements

- Start with the header section, where you can include your business name and contact information. Use a larger font size to make it stand out.
- Insert a table for the receipt details. A simple table with two columns works well–one for the description and the other for the amount. This makes the information clear and organized.
- Consider adding rows for itemized details, such as the quantity, unit price, and total cost.
Customizing the Template

- Modify fonts and styles to match your branding. Highlight important details like the payment method or transaction ID by using bold or italic text.
- Add a footer for additional notes, like a return policy or thank you message. Adjust the font size to keep the footer unobtrusive.
- Once the layout is complete, save the document as a template for future use. This saves time on repetitive tasks.
With these steps, you can create a personalized and professional receipt template in Microsoft Word that suits your business needs.
How to Incorporate Branding and Legal Information
Include your company logo at the top of the receipt to immediately establish your brand identity. Make sure the logo is clear and appropriately sized, not overwhelming the content. Place the business name next to the logo, ensuring it is easily readable. Using brand colors for headings and text can enhance the branding consistency, but ensure the text remains legible. Keep fonts aligned with your overall branding guidelines for a cohesive look.
Adding Legal Details

Include your business address, contact information, and company registration details at the bottom of the receipt. It’s important to display your tax identification number if applicable. Legal disclaimers should be concise, positioned in a way that doesn’t overcrowd the receipt, but ensures clarity for the customer. If there are return policies or warranties that apply to the payment, include them in a footer section.
Table for Legal Information Example

| Information | Details |
|---|---|
| Company Address | 123 Business St, City, Country |
| Tax ID | XYZ12345678 |
| Return Policy | Returns accepted within 30 days of purchase |
Saving and Reusing Your Receipt Template for Future Transactions
To save time on future payments, create a reusable template in Microsoft Word. Start by opening your receipt template and save it in a location you can easily access, such as your desktop or a dedicated folder. Use the “Save As” option and choose the .docx format to retain full editing capabilities for future adjustments.
Next, make your template easily identifiable by giving it a clear, specific name like “Payment Receipt Template” or “Invoice Template.” This will help you find it quickly when needed.
Whenever you need to issue a receipt, open the template, update the payment details, and save it under a new file name. This approach prevents overwriting the original template, ensuring that you always have a fresh copy for the next transaction.
If you regularly use the same format for payments, consider setting up a shortcut to the template for quicker access. You can even pin it to your taskbar or add it to your “Quick Access” in File Explorer to make it even more convenient.
To keep your templates organized, you can also store them in cloud storage or an online file-sharing platform. This will allow you to access the template from any device and ensure you always have the latest version available, no matter where you are.


