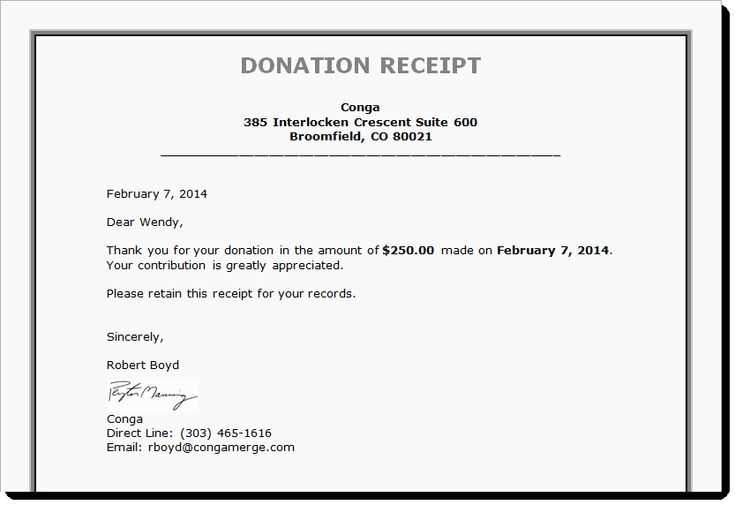
To create an email donation receipt, begin by including the donor’s name, the donation amount, and the donation date. This information should be clearly displayed at the top of the email. Adding a thank-you message reinforces gratitude and helps personalize the communication. Be sure to highlight any tax-deductible information if applicable, along with your nonprofit’s registration details to ensure compliance with legal standards.
Include a brief description of the donation’s intended use, if relevant, so the donor understands the impact of their contribution. It’s a nice touch to offer any follow-up details, such as how the donation supports specific programs or initiatives. If a recurring donation was made, make sure to note this in the receipt along with the next payment date to keep the donor informed about future transactions.
Lastly, end the email with a call-to-action, encouraging further involvement or offering a link to your nonprofit’s website for additional information or ways to contribute. Always maintain a friendly and professional tone, ensuring the donor feels valued and appreciated for their support.
Here are the corrected lines:
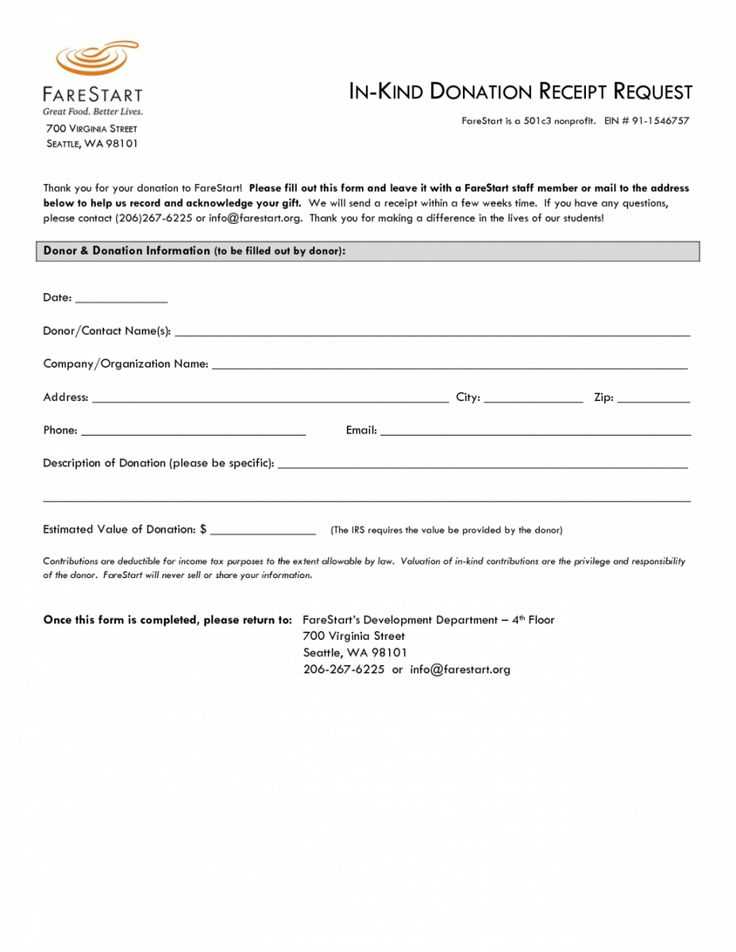
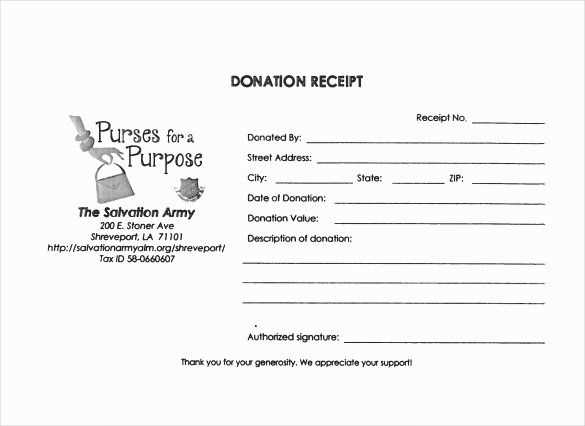
Ensure your donation receipt is clear and concise. Begin with the donor’s name, the donation amount, and the donation date. It’s important to include the nonprofit’s name and tax identification number (TIN) for tax purposes.
Receipt Structure

First, list the donor’s information followed by a brief description of the donation type (cash, goods, services). If applicable, specify whether the donation was in exchange for goods or services, and include their estimated fair market value. This transparency helps donors track their contributions for tax deductions.
Additional Details

Include a statement such as “No goods or services were provided in exchange for this donation” if applicable. If goods or services were provided, the value should be noted. Always make sure the total donation amount matches the one the donor expects.
Email Donation Receipt Template
Provide a clear and professional structure for your donation receipts. Use the following key elements:
- Donor Information: Include the donor’s name, address, and email.
- Donation Details: Specify the donation amount, date, and method (e.g., credit card, check, or cash).
- Tax Information: Include any tax-exempt status information or disclaimers for deductions.
- Organization Details: Provide the name, address, and tax ID number of your nonprofit organization.
- Receipt Number: Assign a unique number for tracking purposes.
- Thank You Message: Add a short, sincere thank-you note to acknowledge the donor’s contribution.
- Contact Information: Offer a way for the donor to reach out for questions or further details.
Ensure your template is simple and easy to read, with all necessary details included for the donor’s records. Consistency across receipts will also help establish trust and professionalism.
Use a simple, structured format to ensure all key details are clearly visible. A well-organized receipt allows donors to easily verify their contribution.
1. Organize Key Information

Present the following details clearly: donor’s name, donation amount, date, and payment method. You can use a table for a clean presentation.
| Donor Name | Donation Amount | Payment Method | Donation Date |
|---|---|---|---|
| John Smith | $100 | Credit Card | February 12, 2025 |
2. Include Your Organization’s Details

Include the organization’s name, tax ID, and address. Donors will need these for tax purposes and to verify the receipt.
This approach helps create a professional receipt that is both clear and functional for your donors.
Provide a clear acknowledgment of the donation, including the donor’s name, donation amount, and date. This helps the donor track their contribution for tax purposes.
Include a statement that the donation is tax-deductible. If applicable, make sure to mention the organization’s tax-exempt status. For example, include phrases like, “Your donation is tax-deductible as allowed by law” and “XYZ Organization is a 501(c)(3) nonprofit.” This is important for the donor’s records.
State whether any goods or services were provided in exchange for the donation. If something was given in return, it may reduce the donor’s tax deduction. Make it clear what the donor received and its estimated value. For example, “No goods or services were provided in exchange for this donation” or “You received a gift valued at $20, which reduces your deductible amount.”
Provide the organization’s full legal name and physical address. This is often required for nonprofit tax reporting and is necessary for the donor’s documentation purposes.
Include the IRS-required disclaimer for donations of $250 or more. The receipt should explicitly state that no goods or services were provided in exchange for donations of this amount, or describe what was provided, along with its fair market value.
Offer a contact point for any questions about the donation. Provide an email address or phone number where the donor can reach you for clarification or assistance.
Tailor your donation receipt template to match the donation type. For one-time donations, make the receipt concise and direct, thanking the donor and confirming the amount. Include a clear subject line like “Donation Confirmation” to immediately convey the purpose of the email.
For recurring donations, emphasize the ongoing support and commitment. Use a more personal tone, and highlight the donor’s consistent contribution. Include details like the frequency and total amount donated so far to reinforce the donor’s impact.
If the donation is for a specific campaign or project, include relevant details about the cause. Acknowledge the donor’s specific contribution towards that goal, and provide updates or success stories related to the campaign. This shows transparency and builds trust.
For major gifts or corporate donations, customize the template to include personalized acknowledgments. Address the donor by name and offer specific recognition for their contribution. You might also want to include options for the donor to request further engagement, like a meeting with the team or a tour of the project they’ve funded.
Consider adding clear calls to action for all donation types. Whether it’s encouraging social sharing, signing up for newsletters, or learning more about future initiatives, offering next steps can help maintain the donor’s connection with your organization.
Make sure your template is mobile-friendly. Donors often check receipts on their phones, and a responsive design ensures your message is clear on any device. Additionally, keep the tone professional, but approachable, making donors feel appreciated without overloading them with information.
For a clean and organized donation receipt email, always ensure the following key elements are included in your template:
- Donor’s Name and Contact Information: Start by clearly stating the donor’s full name and providing any contact details if needed.
- Donation Amount: Clearly mention the amount of the donation, along with the currency.
- Date and Time: Indicate when the donation was made, including the exact date and time for transparency.
- Receipt ID: Assign a unique receipt ID for record-keeping and future reference.
- Tax Information: Include tax-deduction information if the donation qualifies, and provide necessary legal disclaimers.
- Thank You Message: Add a personal note expressing appreciation for the donor’s support.
Formatting Tips
Keep your email visually simple and easy to read. Use bullet points, short paragraphs, and bold text for key details. This ensures clarity, especially for users quickly scanning through the receipt.
Personalization
Personalize the message where possible, addressing the donor by name and including any relevant details specific to their donation (e.g., project or cause supported). This creates a more engaging and meaningful experience.