Using an IIF sales receipt template streamlines the process of managing transactions in QuickBooks. This template helps you input sales data quickly and accurately, minimizing the risk of errors in accounting. It enables the automatic posting of sales receipts to QuickBooks, saving you valuable time and effort.
When creating an IIF file, structure the sales receipt details correctly. Make sure each entry includes the proper customer name, items sold, amounts, and tax information. Ensure the transaction date and payment method are also specified. This precision guarantees that QuickBooks processes the receipt smoothly, preventing any discrepancies during the reconciliation process.
Key fields such as Customer Name, Item Code, and Amount are crucial. They help QuickBooks recognize the data and map it correctly into your accounts. Avoid leaving out necessary details like tax rates or discounts, as these can affect the accuracy of your records.
Regularly saving and backing up your template will prevent data loss and help maintain a seamless workflow. Once you’ve created your IIF template, ensure it is easy to access for future sales, making it simpler to update or modify as needed.
Here is the revised version with reduced repetition of words:
The template for an IIF sales receipt should include all necessary transaction details while maintaining clarity. Focus on accurate fields like item descriptions, quantities, and prices. Be sure to list tax rates and total amounts clearly. Avoid redundant text by using concise terms and ensuring proper spacing between sections.
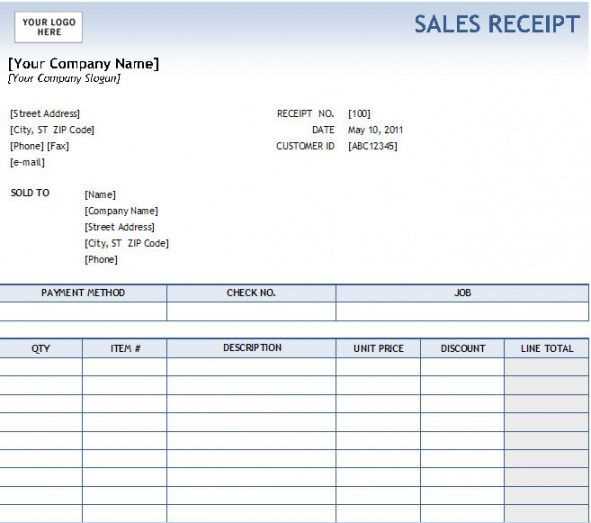
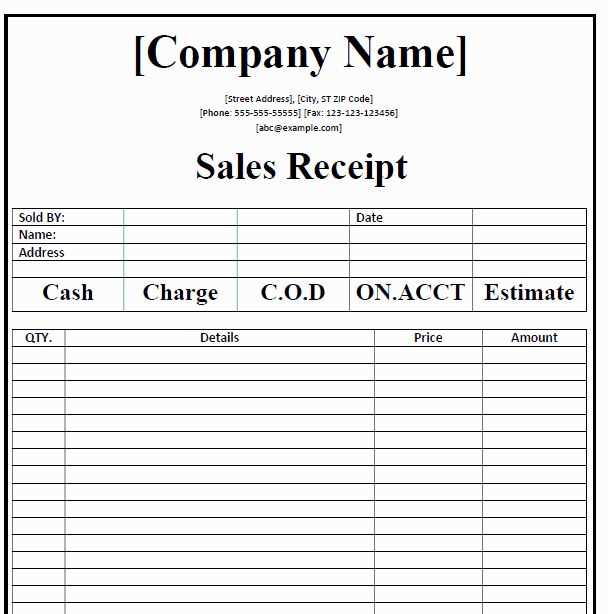
Key Information to Include

Include buyer and seller details, including names and addresses. Add transaction dates, along with invoice or receipt numbers for easy reference. For each item sold, list a description, quantity, unit price, and extended total. Include any applicable tax or discounts separately. Clearly display the final amount due at the end of the document.
Formatting Tips
Use a simple layout with defined sections for each piece of information. This enhances readability and ensures nothing important is overlooked. Organize the details logically from top to bottom, making it easier for both the seller and buyer to understand the receipt. Keep the text aligned and use bold for headings or key values to highlight them.
Creating an IIF Sales Receipt Template

Begin by setting up a basic template structure that follows the required IIF format. Define the columns for each data field, such as item description, quantity, and price. Make sure the first row includes headers to identify each field clearly, like “Item,” “Amount,” and “Account.” This will help in keeping the import process clean and organized.
To customize the fields, modify the headers and add any additional data columns you may need for specific transactions. For example, if you need a “Discount” or “Tax” column, include them after “Amount.” Each line entry in the IIF file should be carefully filled with accurate data that aligns with the header format you’ve defined in the first row.
How to Customize Fields in an IIF Receipt Template

For customizing fields in your IIF template, identify which data you wish to include. Add custom fields after the essential ones, and ensure the formatting is consistent. Fields such as “Customer,” “Date,” and “Payment Terms” can be added with specific codes to match your sales receipt’s requirements. If you’re importing into accounting software like QuickBooks, ensure that each custom field corresponds to a field in the software’s system for proper integration.
Common Errors When Importing Sales Receipts with IIF Files
One common error is mismatched field names between the IIF file and the software’s field structure. Double-check the headers to ensure they match the corresponding software’s expected format. Another issue arises when the data is incorrectly formatted or contains invalid characters, which can cause the import process to fail. Lastly, ensure that dates and amounts are properly formatted to avoid errors during the import process.
Best Practices for Organizing and Storing IIF Receipt Files

Store your IIF files in a dedicated folder for easy access. Use a consistent naming convention, such as including the date or receipt number in the file name. Keep a backup of all files before importing, especially when dealing with large batches. Regularly clean up outdated files and ensure they are properly archived in case you need to reference them in the future.