For anyone handling business expenses or keeping track of purchases, an itemized receipt template in Excel can simplify organization and increase accuracy. This template helps break down each item’s cost, taxes, discounts, and other details, which makes financial tracking straightforward.
The most useful itemized receipt template will have columns for item description, quantity, unit price, total price, taxes, and additional charges. These elements ensure clarity and avoid confusion when reviewing the receipt at a later time. By customizing the spreadsheet to fit your specific needs, you can track any additional fields you require, such as payment method or transaction ID.
A good starting point is using Excel’s built-in features such as formulas to calculate totals automatically, which eliminates the possibility of manual errors. Additionally, formatting tools like borders, bold text, and color coding can make important information stand out, ensuring the details are easy to read and interpret.
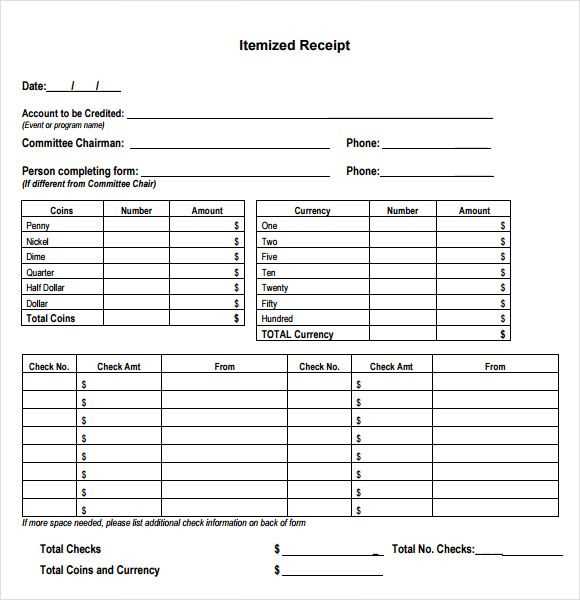
Itemized Receipt Template for Excel Spreadsheet

Use this template to create clear and organized itemized receipts for your transactions. The Excel format allows for easy editing and customization to suit different needs.
Key Elements of the Template
- Date of Transaction: Include the date for record-keeping and reference purposes.
- Itemized List of Products or Services: List each item or service purchased along with a brief description. Include quantity, unit price, and total for each entry.
- Subtotal: Add up the total cost of the items before taxes and discounts.
- Taxes: Specify the tax rate applied and calculate the tax amount based on the subtotal.
- Discounts: If applicable, apply any discounts and indicate the amount subtracted from the total.
- Total Amount: The final amount after taxes and discounts are applied.
Formatting Tips
- Columns: Use separate columns for each detail: item description, quantity, price, and total.
- Clear Formatting: Bold headers for easy reading and use borders to separate sections.
- Currency Formatting: Apply currency formatting for amounts to make the document professional and easy to understand.
By structuring your Excel receipt this way, you ensure that all transaction details are transparent and easy to track. Customize the template to reflect your business style or specific transaction needs.
Creating a Simple and Customizable Template in Excel
Open a new workbook in Excel and begin by organizing the structure. Set up your columns with clear headings, such as Item Description, Quantity, Price, and Total. This simple layout will help you easily calculate the total cost of each item and the overall amount.
Next, use Excel formulas to streamline calculations. In the Total column, multiply the quantity by the price using the formula =B2*C2, where B2 is the quantity and C2 is the price. This allows Excel to automatically calculate the total cost for each item.
For the grand total, sum up all values in the Total column using the formula =SUM(D2:D10), adjusting the range to match your data. This ensures that the final amount is calculated without any manual input.
To make your template customizable, add drop-down lists for quantities or item categories. Select the cell where you want the list, go to the Data tab, and choose Data Validation. In the settings, select List and enter your options, such as “1, 2, 3” for quantity or a list of product types. This will limit input to predefined options, improving consistency.
Lastly, format the cells to enhance readability. Apply bold formatting to headings and use currency formatting for price and total columns. Adjust column widths to fit your data properly, ensuring a clean and easy-to-read template.
Adding Formulae for Automatic Calculations of Totals and Taxes

To simplify your receipt template, use formulas that automatically calculate totals and taxes as you enter data. Begin by calculating the subtotal of all item prices. In Excel, input the formula in the cell below the last item price: =SUM(B2:B10), where B2:B10 represents the range of item prices. This will automatically add up the prices in that range.
Calculating Taxes
Next, set up a formula to calculate tax based on the subtotal. If your tax rate is 8%, enter the following formula in a new cell: =B11*0.08, where B11 is the cell containing the subtotal. This formula will multiply the subtotal by the tax rate and provide the tax amount.
Calculating Total

To get the total amount, add the tax amount to the subtotal. In a new cell, input: =B11+B12, where B11 is the subtotal and B12 is the tax amount. This formula will give you the final total, including tax.
Formatting the Template for Professional Appearance and Easy Use

Set clear columns for item details such as name, quantity, price, and total. Use bold text for headers to distinguish them from the data below. Keep a consistent font throughout, and avoid using more than two font types. Align text left for item descriptions and right for numbers to ensure readability.
Apply alternating row colors for easier tracking of information. Light gray or soft blue works well without distracting from the content. Add a subtle border between rows and columns to help visually separate different data points. Make sure the totals are easy to spot by using a larger font size and applying bold text.
Ensure that the template is scalable by leaving space for additional items without disrupting the layout. Use cell formatting to automatically adjust column widths based on the text or number length. This way, the sheet remains neat even as you add or remove entries.
Include a summary section for quick calculation of totals, taxes, and discounts. Keep formulas simple and accessible by placing them in clearly marked cells, making it easy to adjust values without confusion.


