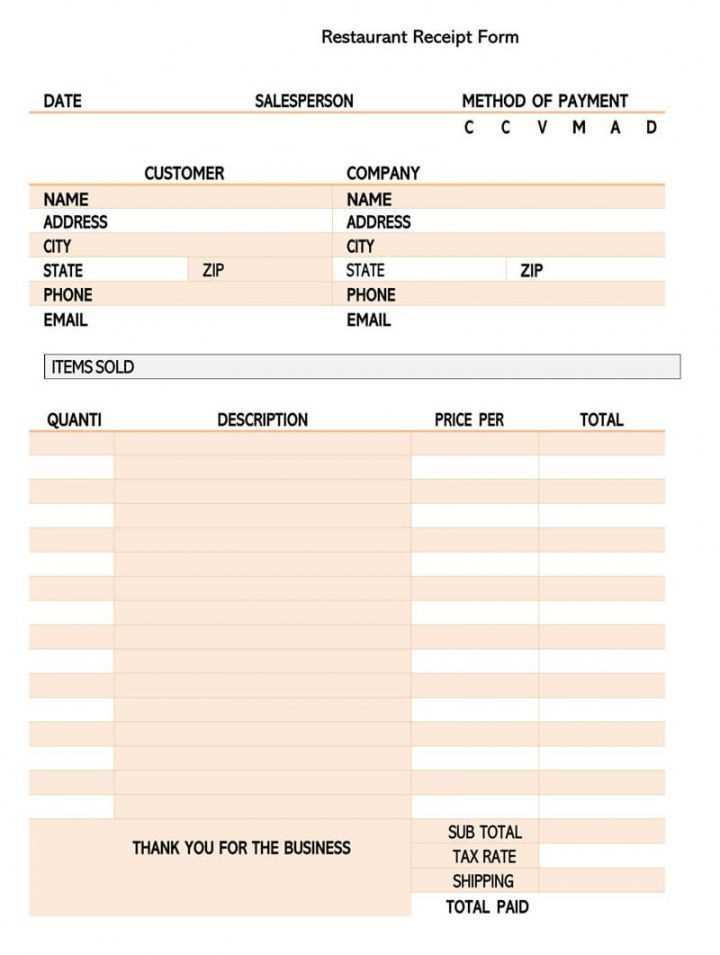
For restaurant owners looking to create a professional and clear receipt template, it’s important to ensure that all relevant information is included. Start by listing the restaurant name and address at the top, followed by the date and time of the transaction. This helps customers identify their purchase quickly and easily.
Include a detailed itemized list of all food and beverages ordered, with individual prices for each item. Make sure to clearly display taxes and service charges, if applicable. This provides transparency and avoids confusion. At the bottom, leave space for a total amount that combines all charges and the final cost after any applicable discounts or tips.
To make your receipt user-friendly, consider adding a payment method section that clearly marks whether the transaction was made by cash, credit card, or another option. Include a transaction ID for reference, ensuring easy tracking and record-keeping for both customers and your restaurant.
Restaurants Receipt Template Guide
Start with clear sections for key details like the restaurant name, address, and contact information at the top of the receipt. Include a space for the date and time of the transaction for easy tracking. Itemize the purchased items with brief descriptions, quantities, and unit prices. Make sure to calculate the subtotal before adding taxes and service charges. Include a final total at the bottom for easy reference.
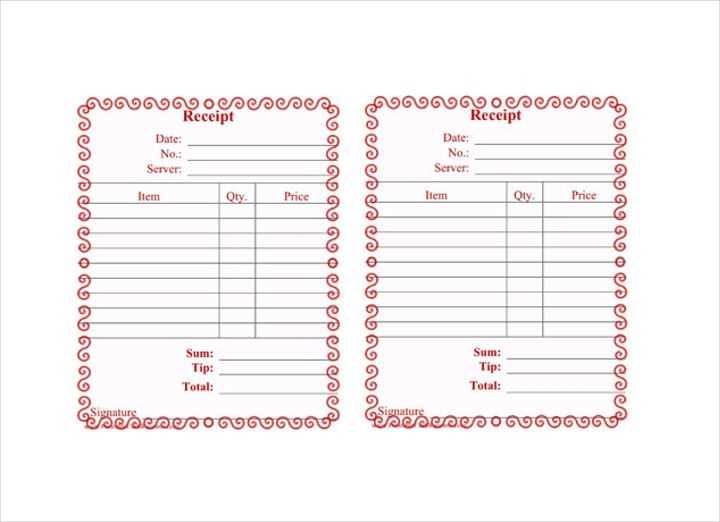
For accuracy, provide a unique receipt number for each transaction. This helps with organization and future reference. If applicable, include payment methods (cash, card, etc.) and any tips provided. It’s helpful to include a space for additional notes, like special requests or customer feedback.
Ensure the font is readable and the layout is neat. Using bold for section headings makes the receipt easy to navigate. Avoid cluttering the template with unnecessary information or excessive design elements–simplicity works best.
How to Design a Functional Template for Your Restaurant
Begin with clear sections that display key details, like the restaurant’s name, address, and contact information. Keep the layout clean and easy to navigate. Use larger fonts for headings and a legible size for item descriptions. Group related items together, such as appetizers, mains, and desserts, to make it intuitive for customers.
Include a space for the date and time of the order. This helps with organization, especially for multiple orders. You can also add a small section for special instructions or requests, allowing flexibility without cluttering the design.
Integrate a clear breakdown of pricing. Each item should be followed by its price, with taxes or service charges displayed separately, making it simple for customers to understand the total cost. If there are any discounts, include them in a designated area for transparency.
Ensure there is room for a tip section, as many customers like to calculate tips themselves. This can either be a blank space or pre-defined options based on total amounts. It encourages tipping without adding complexity.
Use a simple color scheme that aligns with your brand. Avoid using too many colors or fonts, which can make the receipt look cluttered. Opt for a design that looks professional yet approachable. Prioritize readability over decoration.
Include your logo in the header or footer for branding purposes. Make sure it doesn’t overpower the important details, like the order summary and total amount.
Key Information to Include in Your Restaurant Receipt

Make sure your receipt covers the following key details for clarity and transparency:
- Restaurant Name and Address: Clearly display the name of the restaurant, along with its physical address or location. This helps customers identify where the transaction took place.
- Date and Time: Always include the exact date and time of the transaction. This allows both you and your customers to track the purchase and manage records effectively.
- Receipt Number: Assign a unique identifier to each receipt for easy reference and tracking in your system.
- Items Ordered: List every item ordered with the corresponding prices. This gives customers a breakdown of what they are paying for.
- Subtotal: Include the total amount before taxes and discounts. This helps customers see the cost of their items before any additional charges are applied.
- Taxes and Service Charges: Clearly show any taxes or additional service fees. This ensures customers are fully aware of the charges applied to their bill.
- Total Amount: Display the final amount due, which includes the subtotal, taxes, and any service charges. This is the amount the customer is expected to pay.
Payment Method

- Method of Payment: Indicate whether the customer paid with cash, credit card, or another method. If the payment was made by card, avoid showing sensitive information like card numbers for security reasons.
- Change Given: If the payment was made in cash, show the change provided. This confirms the accuracy of the transaction.
Additional Information

- Tips or Gratuity: If a tip was added, list it separately for transparency. This is especially important in cases where tips are added automatically to the bill.
- Discounts or Promotions: If the customer used a coupon or received a discount, mention it on the receipt along with the value of the discount.
- Contact Information: Provide a phone number or email address for customer inquiries or feedback.
Customizing Your Template for Different Payment Methods

Adapt your receipt template to reflect various payment options by adding clear sections for each method used. For card payments, include space for transaction details like authorization codes and card type. For cash payments, list the exact amount tendered and change given. If you accept digital wallets, ensure fields for transaction ID and payment provider name are visible.
Use distinct fonts or colors to differentiate between payment methods, ensuring that each section stands out but remains cohesive with the overall design. Include specific labels like “Credit Card,” “Cash,” or “Digital Wallet” for easy identification by both customers and staff.
When offering multiple payment options, make sure your template provides enough space to accurately display all necessary details. Keep the layout clean, allowing for easy scanning of the payment method and amount. Be sure to include a clear total amount at the bottom, regardless of the payment method.
Consider incorporating a checkbox or dropdown list for easy selection of payment types, reducing confusion when multiple methods are used on a single transaction.