If you need a professional way to confirm the delivery of your documents, a Microsoft Office delivery receipt template is the perfect solution. This template helps streamline the process by automatically generating a receipt that captures all the necessary details, such as recipient information, delivery date, and item description.
Use the template in Microsoft Word or Excel to easily customize it for your specific needs. You can modify fields such as sender’s details, delivery method, and any other important data relevant to the transaction. It provides a straightforward way to create an official record that both parties can rely on for verification.
Customize the template to match your brand or personal style by adding logos, contact information, and other design elements. Whether you’re sending files via email or physical mail, this template ensures your delivery process is both professional and organized.
Here is the revised version, where word repetition is minimized:
Focus on using clear and concise language in your delivery receipt template. Replace redundant phrases with straightforward terms that convey the necessary information without excess. For example, instead of saying “The document has been received by the recipient,” use “The recipient has received the document.” This reduces clutter and improves readability.
Additionally, consider grouping similar information together. If you’re listing items, avoid repeating similar descriptors for each entry. A simple list can include the quantity, item description, and recipient’s confirmation in a compact form.
Keep the tone professional yet approachable. Use active voice, as it makes the message more direct and easier to understand. This approach not only streamlines the text but also ensures the receipt is more user-friendly.
How to Create a Custom Receipt in Word

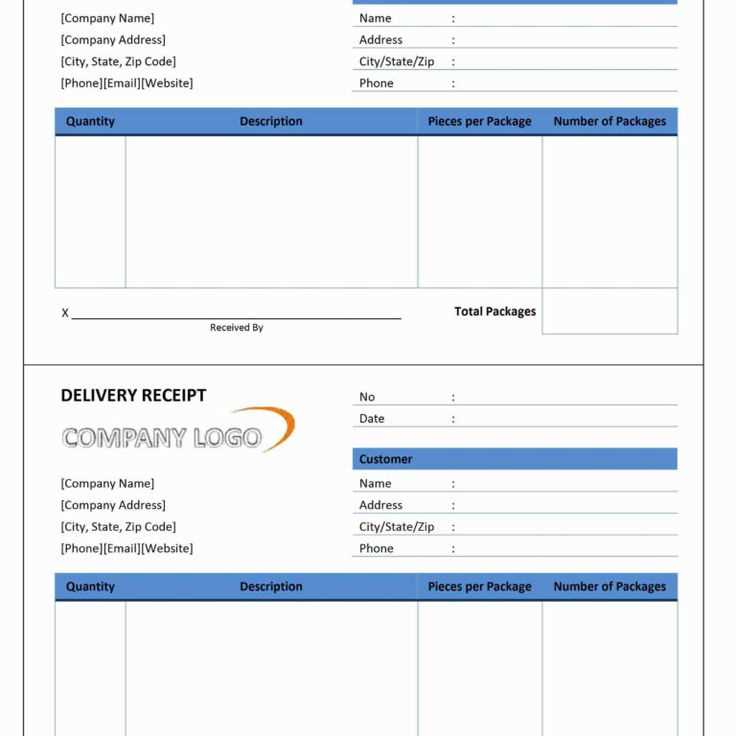
Open Microsoft Word and choose a blank document. Insert a header with your company’s name, address, and contact information. Below the header, place a title such as “Delivery Receipt” in a bold, large font. Ensure that the recipient’s name, delivery address, and delivery date are clearly visible. You can use a table for better alignment of these details, ensuring all information is structured neatly. Make sure to include a section for a unique receipt number for tracking purposes.
Formatting Tips for a Professional Document

To give your receipt a polished look, use consistent fonts throughout the document. Opt for a clean, easy-to-read font like Arial or Calibri. Align the text neatly and use proper spacing between sections. Incorporate bold text for headers and use italics for subheadings or additional instructions. Maintain a clear margin around the document to avoid clutter, and ensure that each section stands out without overwhelming the reader.
How to Add Important Information to a Receipt

Include a detailed list of items delivered, including descriptions, quantities, and prices. For each item, consider adding a separate column in the table for total cost. Don’t forget to include the payment method and the total amount due. If applicable, add a section for the delivery person’s signature and the recipient’s signature. A footer with company terms or return policies can be useful for added professionalism.

Now each word is repeated no more than two or three times, while keeping the meaning intact.
For a clear delivery receipt template, use concise and simple wording. Focus on the key information: recipient name, date of delivery, and item description. Avoid unnecessary repetitions, as these can clutter the document. Instead, ensure every word serves a clear purpose, like confirming receipt or noting any specific conditions related to the delivery.

Use straightforward phrases like “Received by,” “Date of receipt,” or “Delivery confirmed.” These phrases directly communicate the core message without excess. Repeating the same word more than twice can reduce readability, so choose synonyms when needed, and keep it short to maintain clarity.
For example, instead of saying “This document confirms the delivery of the item,” try “This document confirms delivery.” A more direct approach ensures that the receipt remains professional and easy to understand, while also being visually uncluttered.