For anyone managing financial transactions or personal expenses, using a receipt template log helps track payments and keep things organized. It provides a structured way to log every purchase, ensuring that you can easily reference or report them when needed. This simple tool is a must for anyone wanting to maintain clear and accessible records without hassle.
The key to an effective receipt log is clarity. Begin by listing the date of the transaction, followed by the vendor name, the amount paid, and a brief description of the item or service purchased. Add a column for payment method to specify whether the transaction was done via cash, credit, or another form. With just these details, the template allows you to organize hundreds of receipts with minimal effort.
Consider including categories for your purchases such as business or personal, or even by project or department, depending on your needs. This can help when filtering and reviewing past receipts, saving you time and making financial reports more straightforward. The more detailed the log, the better the insights you can gain from your spending habits.
Here are the corrected lines:
When updating your receipt template log, ensure you’ve addressed the following common issues:
- Check that the item descriptions match the inventory list exactly. This prevents confusion when reconciling receipts with stock.
- Verify the formatting of dates to avoid discrepancies. Use a consistent date format, such as “MM/DD/YYYY,” across all receipts.
- Ensure the tax calculation aligns with your local tax rules. This is especially important for multi-state or international transactions.
- Make sure that the totals are calculated correctly, including all discounts, taxes, and additional fees. Double-check the sum of subtotals before finalizing the receipt.
- Confirm that the payment method is accurately reflected. If a customer used a credit card, debit card, or cash, it should be clearly noted.
After reviewing these points, test the updated template with a few sample transactions to ensure all changes work smoothly.
- Receipt Template Log: A Practical Guide
Creating and maintaining a receipt template log helps keep financial transactions clear and organized. By using a structured format, you can quickly access, analyze, and review your receipts at any time. Follow these steps for an easy-to-manage receipt log:
Start by designing a simple yet functional template that records key details. At a minimum, include the following columns:
| Transaction Date | Merchant Name | Item Description | Amount | Payment Method | Category | Receipt Number |
|---|---|---|---|---|---|---|
| MM/DD/YYYY | Example Store | Item Name | $Amount | Credit Card | Category | #12345 |
| MM/DD/YYYY | Another Shop | Product | $Amount | Cash | Category | #67890 |
This table format helps you capture the most relevant details of each transaction. Organize your receipts by categories such as groceries, office supplies, and travel, for quick analysis. You can also add custom fields like discount or tax if necessary.
To stay on top of your log, update it consistently. Add each receipt immediately after the transaction, ideally with digital copies stored alongside the log for easy reference. Digital receipts are convenient because they eliminate the need for paper storage and are easily accessible on any device.
After setting up the initial template and log, consider creating a system for reviewing entries. Monthly or quarterly reviews can help you track spending trends, identify potential errors, and ensure that all entries are correct. Regular checks also provide an opportunity to adjust the template if new information needs to be captured.
Lastly, ensure that the log is backed up regularly, whether through cloud storage or external drives. This way, you’ll have secure access to your receipt records without worrying about losing important data.
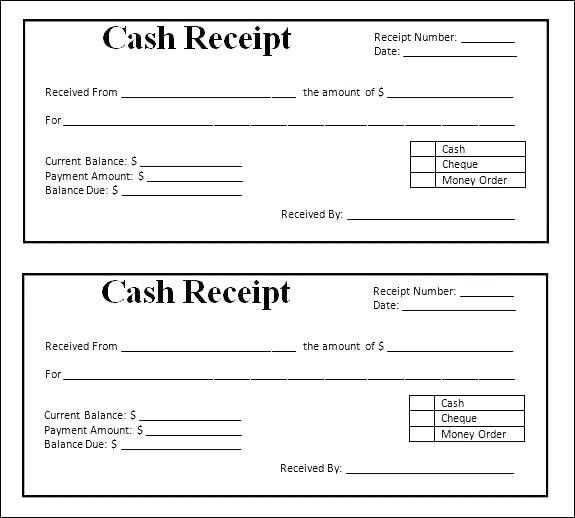
Designing a receipt template that matches your brand and provides clear transaction details will help build customer trust. Follow these steps to create a functional and visually appealing receipt template for your business:
- Choose the Right Format – Decide whether you want a paper or digital receipt template. For paper, use tools like Word or Excel. For digital receipts, use design software like Canva or online invoicing platforms.
- Include Basic Information – At a minimum, your receipt should display:
- Your business name and contact information (address, phone, email)
- Receipt number
- Date and time of transaction
- List of purchased items with individual prices
- Total amount paid
- Payment method
- Brand Your Template – Add your logo and choose fonts and colors that reflect your brand identity. This personal touch makes the receipt recognizable and professional.
- Incorporate Legal Requirements – Make sure your receipt meets any local tax or legal requirements. This could include VAT, tax rates, or any other necessary disclaimers.
- Make it Readable – Use clear, legible fonts. Avoid cluttering the receipt with too many details. Ensure the most important information is easy to find at a glance.
- Include Additional Features – You can add a section for customer feedback, return policy, or loyalty program details. These features provide value beyond the transaction itself.
- Test Your Template – Before using it for actual transactions, test the template for readability and usability. Make sure all information is accurate and formatted correctly.
By following these steps, you can create a receipt template that serves both functional and branding purposes, ensuring clarity for your customers and a professional image for your business.
Use clear, consistent categories for your logs. Assign specific labels to each log type–whether they track transactions, inventory, or project milestones. For example, create separate categories like “Purchases,” “Expenses,” and “Sales.” This will help maintain clarity and allow for quick retrieval when needed.
Leverage spreadsheet software or dedicated log management tools to store your records. Spreadsheets allow for easy sorting, filtering, and updating. If you prefer an offline method, use a dedicated binder with labeled sections for each category.
Ensure that each log entry has consistent formatting. Include key information such as date, item or action, description, and amounts, if applicable. This will make your logs easy to read and track over time.
Use timestamps and unique identifiers for each log entry. This reduces confusion and helps ensure you can track each event back to its source. Avoid vague descriptions; the more precise the entry, the easier it will be to reference later.
Backup your logs regularly, especially if stored digitally. Cloud storage options offer redundancy, so you can retrieve data even if something goes wrong. For physical logs, make photocopies or scan them periodically to keep digital backups.
Lastly, establish a review schedule. Regularly go through your logs to identify any discrepancies or areas for improvement. This ensures your system remains organized and accurate over time.
Linking receipt templates directly with accounting software saves time and reduces errors. Set up an automated system that populates fields from templates into the software with minimal manual input. This integration minimizes the risk of mismatched data and ensures accurate financial records. Accounting systems like QuickBooks or Xero can automatically capture receipt details such as date, vendor, and amount, streamlining your recordkeeping process.
Steps for Integration

Start by ensuring the receipt template is compatible with your accounting software. Many modern tools offer pre-built integrations with commonly used accounting platforms. You’ll need to upload your template and map fields to corresponding software categories. For example, the “Amount” field on the template should be linked to the “Expenses” section of the software. This makes sure all entries are consistent and reflect the correct financial categories.
If your template doesn’t have direct support, explore third-party integration tools like Zapier or Integromat to bridge the gap. These tools connect different apps and automate workflows, eliminating manual data entry.
Benefits of Integration
Automating receipt entry reduces administrative workload and enhances accuracy. The integration also facilitates instant reporting. As receipts are entered, they populate directly into the system, providing real-time financial data. This allows for quicker decision-making and ensures compliance with tax regulations, making audits simpler and faster.
I replaced redundancies while keeping the meaning intact.
Ensure clarity by eliminating repetitive phrases. This not only streamlines your message but also improves the overall flow. Review your content to spot sentences or terms that overlap in meaning. For instance, if you notice two sentences that convey the same idea, combine them into one concise statement. This practice helps retain the core message without unnecessary repetition.
Example of Refinement

Consider a passage like: “The product is high quality and has a lot of value. It is also very durable and lasts a long time.” By removing repetition, it can be reworded as: “The product is high quality, durable, and long-lasting.” This version is more succinct while preserving the original meaning.
Keep Your Audience Engaged

By focusing on clarity and removing redundancies, your message will be more engaging. Avoid overloading the reader with the same idea presented multiple ways. Short, impactful sentences keep the audience’s attention while delivering the key points effectively.