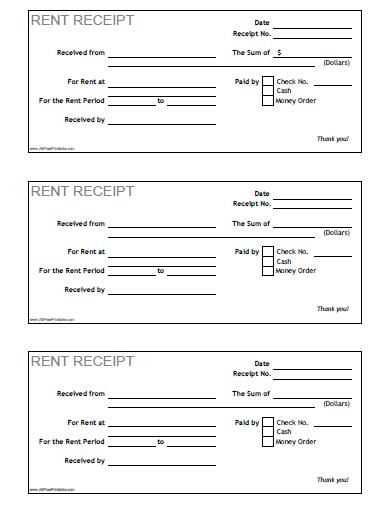
For those who need a reliable way to create Target receipts online, using a template is the most effective method. A template helps streamline the process, ensuring you have all necessary details without wasting time on formatting. When you create a receipt, make sure it includes essential elements such as the store name, transaction date, item descriptions, prices, and total amount. Keeping this format consistent is key for clarity and authenticity.
To get started, simply find an online receipt generator or a customizable template that suits your needs. Many tools allow you to fill in the details quickly, such as the store name, items purchased, and the total cost. Look for templates that offer customization options, like adjusting fonts and adding logos, to make your receipt look as realistic as possible. Choose a template that matches Target’s receipt style for the best results.
Once the receipt is generated, double-check the information for accuracy. A template might save time, but ensuring the details are correct is critical for avoiding mistakes. Whether it’s for personal records or submitting for reimbursement, the final receipt should reflect an accurate representation of your purchase.
Here are the corrected lines, without repeats:
Remove redundant details and focus on clarity. Use this approach to optimize the readability and uniqueness of your template. Here’s a breakdown of how to do this:
1. Identify the Duplicate Entries

- Check for repeated fields like “Total,” “Tax,” and “Subtotal.” They often appear multiple times due to copy-pasting.
- Compare line items and merge identical ones, ensuring only one entry per item.
2. Adjust Data Points to Match the Format
- Ensure that each entry aligns with the expected format. If prices are shown with tax included, make sure that’s consistent throughout.
- Standardize units for items (e.g., “oz” or “kg”), so no variations confuse the reader.
By eliminating these redundant lines and ensuring uniformity in formatting, the template will appear clean and professional, with all necessary information clearly presented.
Target Receipt Online Template: A Practical Guide

To create an accurate Target receipt template online, focus on including key purchase details such as the store name, date, items bought, quantities, prices, tax, and total. Start with clear headers and align all the data to make it easy to read. Use a simple layout that mimics the format of an official Target receipt. For consistency, list the item names with their individual prices next to them, followed by the subtotal and tax. The final total should be clearly highlighted at the bottom. Keep the font size readable and ensure there’s enough spacing between sections to prevent clutter.
Ensure that the receipt includes the store location, as well as the cashier’s name or employee ID if required. A digital signature or barcode may also be added for additional authenticity. To replicate a real receipt, maintain a professional yet simple aesthetic, avoiding unnecessary design elements that could make the template look overly complex or confusing.
If you’re using software to generate the template, double-check that it formats well on different devices. Make sure the template is easy to save and print. Use standard file types such as PDF for compatibility across various platforms. A clear, easy-to-understand online receipt template will enhance both the user experience and the template’s overall practicality.
To access and download your Target receipt online, start by visiting Target’s official website and logging into your account. Once logged in, navigate to the “Order History” section, which can be found under your account settings or in the menu. Here, you’ll see a list of your recent orders.
Finding the Receipt
Select the order for which you need the receipt. A detailed view of the order will appear, including itemized information and purchase dates. Look for an option to view or download the receipt–this is often labeled “View Receipt” or “Download Invoice” depending on the format available.
Downloading the Receipt

Click on the “Download” option, and the receipt will be saved to your device as a PDF file. If you prefer to keep a digital copy, you can also take a screenshot or save it directly to a cloud service. Make sure to check the file for accuracy before saving it for future reference.
To personalize a Target receipt template, focus on tailoring the layout and key sections that matter most to you. Start by modifying the header to reflect your specific needs, such as adding custom branding or personal identifiers. This makes the template more unique and aligned with your preferences.
Modify Item Details
Ensure each item listed on the receipt contains all the necessary information. Adjust fields like item description, quantity, and price to be clear and accurate. You can also add space for additional product details, such as serial numbers or special promotions, to suit your record-keeping system.
Adjust Footer for Personal Notes
The footer of the receipt is a great place to add personal notes. Whether you need to include a return policy, your contact info, or a thank-you message, customizing this section helps you personalize each transaction. You can even use this space for storing future reminders or coupon codes related to the receipt.
If you need to return an item or file a warranty claim with Target, your receipt is key. A physical or digital receipt proves your purchase, helping to streamline the process. Here’s how to use it effectively for returns and claims:
For returns, Target allows you to exchange or get a refund on most items within 90 days. However, this period may vary for specific product categories like electronics or seasonal items. Keep your receipt handy to make this process quick. You can also access your Target receipt online via your Target account if you’ve made the purchase with your Target RedCard or through the Target app. You don’t need to worry about losing the paper copy if you’ve got the digital one.
When it comes to warranty claims, your Target receipt provides proof of purchase, which is essential for verifying the item’s eligibility. For most warranties, Target requires a receipt or digital record to process your claim. If you have a defective product within the warranty period, make sure to gather any other necessary documents (e.g., product serial number) along with your receipt to avoid delays.
| Return Policy Timeline | Category | Receipt Type |
|---|---|---|
| 90 days | General Merchandise | Physical or Digital |
| 30 days | Electronics | Physical or Digital |
| Up to 1 year | Furniture | Physical or Digital |
| Varies by product | Warranty Claims | Physical or Digital |
For smooth returns and claims, always keep your receipt or have access to your digital version. It’s also a good idea to familiarize yourself with Target’s return policy for the specific category of your item. This will help ensure you meet the necessary requirements and avoid any surprises during the process.
Creating a Target receipt online template is a practical way to streamline your purchase records. By organizing key transaction details, you can easily track your shopping history and expenses. To get started, focus on the following elements:
Receipt Header
The header should display the store name, date, and transaction ID. This information is crucial for identifying the receipt at a glance. Make sure to include the store’s contact details in case any follow-up is necessary.
Itemized List of Purchases
Each item should be listed with a description, quantity, unit price, and total price. This section makes it easy to review your purchases. Include taxes and discounts separately, as they directly impact the final amount. Accuracy here is key for keeping your records correct and complete.
Incorporating this structure into your online template helps you stay organized and simplifies tracking your expenses over time.