Creating a rent receipt template saves you time and ensures proper documentation for both tenants and landlords. A clear, organized format prevents misunderstandings and simplifies record-keeping. Here’s how to structure one effectively:
Include Key Information: The receipt should contain the tenant’s name, the address of the rental property, and the payment date. Additionally, note the rental amount paid, the method of payment, and any additional fees or charges that apply. This transparency protects both parties in case of disputes.
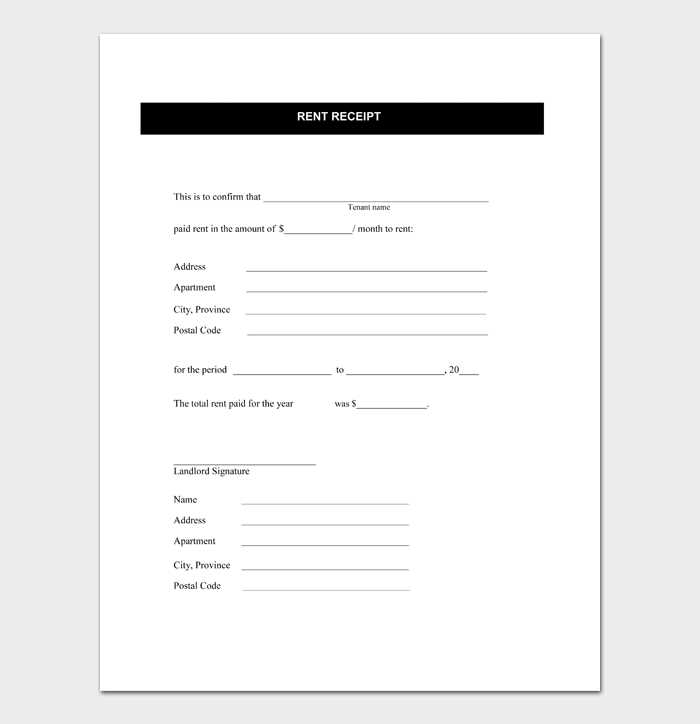
Use a Simple Format: A straightforward design works best. Avoid clutter by using clear headings and easy-to-read fonts. For example, break the document into sections like “Tenant Information,” “Payment Details,” and “Landlord’s Signature” to keep everything organized.
Provide Room for Future Modifications: The template should leave space for noting any adjustments, such as rent increases or payments made outside the regular schedule. It’s important to have flexibility for long-term use.
Here’s the corrected version:
To create an accurate rent receipt, ensure the following key elements are included:
- Tenant’s Name: Clearly state the name of the tenant who made the payment.
- Landlord’s Details: Include the full name and contact information of the landlord or property manager.
- Amount Paid: Specify the exact amount received, along with the payment method used (e.g., cash, check, bank transfer).
- Payment Date: Mention the exact date the payment was made.
- Rental Period: Clearly outline the start and end date of the rental period covered by the payment.
- Property Address: Include the address of the rental property to avoid confusion.
- Signature: Both the landlord and tenant should sign the receipt for confirmation.
Sample Format:
- Tenant Name: John Doe
- Amount Paid: $1,200
- Payment Date: January 15, 2025
- Rental Period: January 1 – January 31, 2025
- Property Address: 123 Main St, Apartment 4B, City, State
- Landlord’s Signature: [Landlord Name]
- Tenant’s Signature: [Tenant Name]
Make sure to keep a copy of the receipt for your records, and provide the tenant with a duplicate for their files.
- Rent Receipts Template Guide
Creating a rent receipt template involves including key details to ensure it serves its purpose legally and for personal records. Focus on clarity and accuracy to avoid potential misunderstandings.
Key Components of a Rent Receipt
Make sure to include the following essential fields in your rent receipt template:
- Tenant Information: Full name and address of the tenant.
- Landlord Information: Full name and address of the landlord or property manager.
- Payment Date: The exact date the rent payment is received.
- Amount Paid: The exact amount of rent paid, including any late fees or additional charges.
- Rental Period: Specify the month or range of dates for which the payment applies.
- Payment Method: Indicate how the payment was made (e.g., cash, cheque, bank transfer).
- Receipt Number: A unique identifier for the receipt.
Why Use a Rent Receipt Template?
A template ensures consistency and reduces the chance of omitting important details. It also serves as proof of payment for both parties. Make the receipt easy to understand, and provide a clear record for future reference.
To create a straightforward rent receipt template, start by including key details: the landlord’s name and contact information, tenant’s name, rental property address, and the date the payment was made. This ensures both parties have clear records of the transaction.
Include Payment Details

Specify the amount paid, payment method (e.g., cash, check, bank transfer), and the rental period covered by the payment. If applicable, note any late fees or discounts applied to the total amount.
Provide a Clear Signature Line

A simple rent receipt template should include a space for the landlord’s signature to confirm the payment has been received. This serves as proof for the tenant and establishes the document’s authenticity.
A rent receipt must clearly indicate the transaction details for both the tenant and landlord. Start by including the full name and address of both parties. This ensures the document serves as proof of the payment and the agreement’s validity.
Payment Amount and Date
Clearly state the amount paid, the payment method, and the exact date the rent was received. This eliminates any confusion regarding payment schedules or overdue amounts.
Property Information

Include the address of the rented property. If multiple properties are involved, list the details for each one separately to maintain clear records.
Adjust the template layout to accommodate various payment methods, ensuring clarity and consistency. Start by adding fields for payment method details such as credit card, bank transfer, or PayPal. For each method, specify the required information, like transaction IDs or bank account numbers, to match the nature of the payment.
Adjust for Transaction Specifics
Include customizable sections where users can input specifics about the payment, like date, amount, or reference number. For card payments, ensure there’s space for card type (e.g., Visa, MasterCard) and the last four digits, while for bank transfers, include the bank name and transfer reference number. Tailor the template to meet these needs for each method.
Visual Formatting for Clarity
For each payment option, differentiate them visually. Use icons or color-coding to help identify the method quickly. This improves both user experience and readability, especially when dealing with multiple transactions on a single document.
Rent receipts must meet specific legal criteria, which can vary depending on the state. In many states, landlords are required to provide rent receipts upon tenant request, especially when rent is paid in cash. It’s essential to understand the regulations in your state to avoid any potential disputes.
California
In California, landlords must provide a written receipt for rent payments made in cash. The receipt should include the date of payment, the amount paid, and the landlord’s signature. If rent is paid by check, a receipt is not mandatory unless the tenant requests one. However, providing a receipt is considered good practice.
New York

New York law mandates that landlords issue a rent receipt for cash payments. This receipt must include the landlord’s name and address, the tenant’s name, the amount of rent paid, and the period for which rent was paid. For payments made by check or other methods, a receipt is not legally required unless requested by the tenant.
Make sure to check local laws, as some cities or counties within a state might have additional regulations concerning rent receipts.
To digitally sign and share rent receipts, follow these steps:
- Choose a Digital Signing Tool: Use a trusted e-signature service like Adobe Sign, DocuSign, or HelloSign. These platforms allow you to easily add a legally recognized signature to your rent receipt.
- Prepare the Document: Upload your rent receipt to the signing platform. If it’s not already in PDF format, convert it into one for easy editing and signing.
- Add the Signature: Place the signature field where appropriate. You can either draw your signature or use a pre-saved one, depending on the tool you’re using.
- Share the Signed Receipt: Once signed, send the receipt to the tenant or landlord via email directly from the signing platform, or download it and attach it manually to your email.
- Verify the Signature: Ensure the recipient can verify the authenticity of the signature. Most platforms offer certificate verification to confirm the document’s integrity.
By using these methods, you can streamline the process and ensure secure, legally binding transactions for both parties.
Always include the full legal names of both the landlord and tenant. Missing or incorrect names can cause confusion if the receipt is ever questioned.
Ensure the receipt lists the exact payment amount. Round figures or vague references to “partial payment” can create disputes later. Specify the exact dollar amount paid for clarity.
Don’t forget to mention the payment method. Whether it’s cash, check, or bank transfer, always indicate how the payment was made to provide a clear record.
Make sure to note the payment period covered by the receipt. Stating the month or dates the rent applies to avoids any future misunderstandings about what was paid for.
Check the date of payment carefully. An incorrect date can lead to discrepancies in payment history, which could complicate any future issues with rent or late fees.
Avoid using vague descriptions of the payment. Always include “rent” or the specific purpose of the payment to ensure there’s no ambiguity regarding the nature of the transaction.
To create a rent receipt, include key details such as the payment amount, the date received, and the tenant’s name. This ensures both landlord and tenant have a record of the transaction. Below is a straightforward template structure to follow.
Basic Structure
| Item | Details |
|---|---|
| Tenant Name | [Enter Tenant’s Full Name] |
| Address of Rented Property | [Enter Property Address] |
| Amount Paid | [Enter Amount Paid] |
| Payment Date | [Enter Date of Payment] |
| Payment Method | [Enter Payment Method, e.g., cash, bank transfer] |
| Receipt Number | [Enter Receipt Number] |
Additional Information

Ensure to provide the tenant with a copy of the receipt. This record helps avoid any future disputes about rent payments. Store your receipts securely for future reference.