If you need to create receipts quickly and accurately, using a template in Microsoft Office is a great option. This tool allows you to generate professional receipts without needing design expertise. The ready-made structure saves time, and you can adjust it to match your specific needs.
Simply open a new document in Word or Excel and select a receipt template. Most versions of Office include several templates, so you can find one that suits your business or personal requirements. From there, customize fields such as the company name, items or services provided, date, and amount paid.
Templates help keep the process streamlined and reduce the risk of errors. For instance, if you frequently issue receipts for the same products or services, saving your customized template for later use will ensure consistency and speed. You can even add your company logo or adjust the font style to better fit your brand.
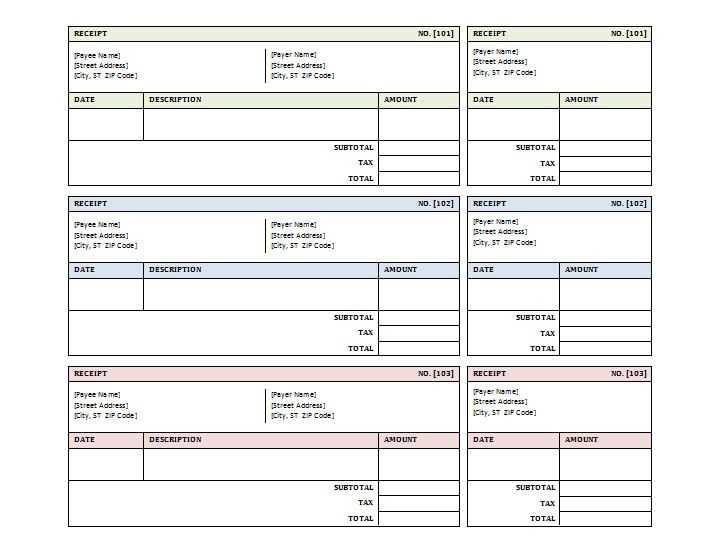
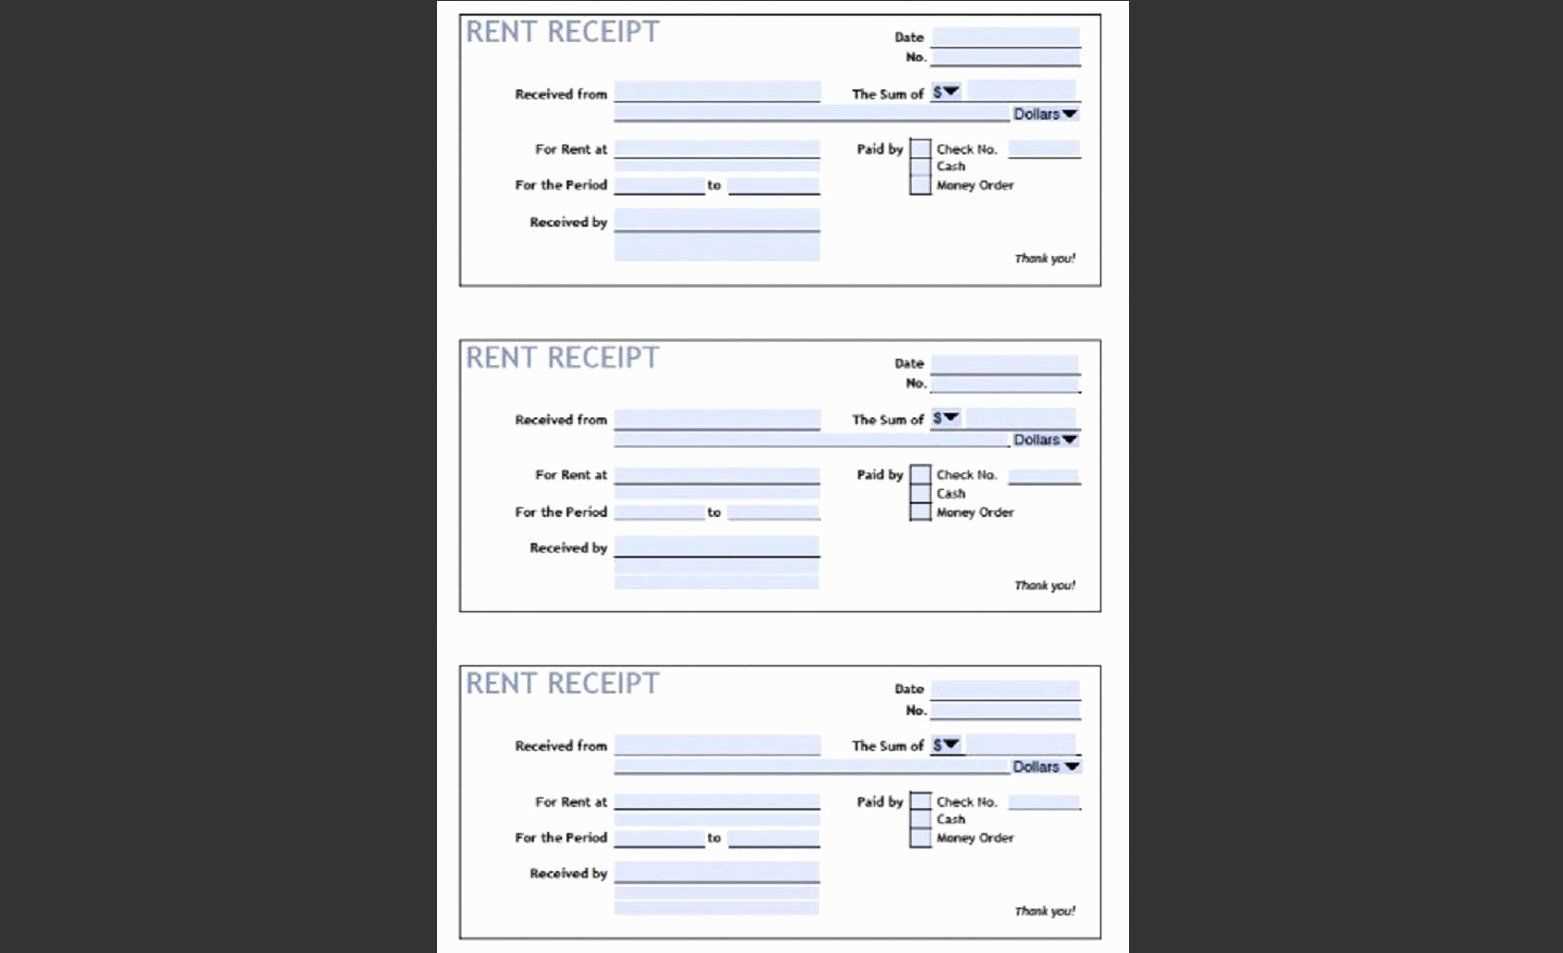
Microsoft Office Receipt Template

Use the pre-built receipt templates available in Microsoft Office to quickly generate professional-looking receipts. Open Word or Excel, and browse the template gallery to find a receipt template that suits your needs. These templates include all the key fields: business name, contact information, itemized purchases, total amount, and payment method. Customize them with your own details to match your brand’s style.
If you prefer to create a receipt from scratch, Excel is a good choice for its calculation functions. Add formulas to automatically calculate totals and taxes. Adjust the columns and rows to fit your items and prices, and format it to look clean and professional. Save your custom receipt as a template for future use to save time with every new transaction.
In Word, you can easily add a header with your business logo or any other relevant design element. With Word’s flexibility, you can also use text boxes for specific item details and payment instructions. Save your personalized template and reuse it as needed, modifying only the necessary fields for each new transaction.
How to Customize Your Template in Word

Open the template you want to customize and go straight to the “Design” tab in the toolbar. Here, you can modify colors, fonts, and effects according to your preference. Adjust the theme by selecting “Themes” for an instant refresh of style elements.
To change the layout, go to the “Layout” tab. Modify the margins, page orientation, or columns to better suit your needs. If you need custom headers or footers, double-click in the header or footer area to activate it, and make your edits.
If you’re working with text placeholders, simply click on them and start typing to replace default content. You can also add new text boxes by going to the “Insert” tab and selecting “Text Box.” Resize and position it as needed.
For a personalized touch, insert your logo or other images by clicking “Insert” and then “Pictures.” Use the resizing handles to adjust the image size, and the “Wrap Text” option to control how text flows around it.
Once you’re satisfied with the changes, save the modified template. To preserve it as a reusable template, save it as a Word Template (.dotx) by selecting “Save As” and choosing the template format. This will allow you to apply it again in the future.
Using Excel for Automated Receipt Generation
Excel can automate receipt creation with minimal effort. Start by setting up a template that includes fields for customer details, items purchased, prices, and total cost. Use formulas to calculate subtotals, taxes, and final amounts automatically, ensuring accuracy with each entry.
Setting Up Your Excel Template

Begin by creating a basic structure: a header with your company name and contact information, followed by rows for the item description, quantity, unit price, and total cost. Add a row for tax calculation and a final row to display the grand total. Link the relevant cells to the formulas that calculate each part of the receipt, such as multiplying quantity by unit price, and then summing them up for the total amount.
Customizing for Different Needs

Tailor the template by adding additional features such as payment method options, invoice numbers, and discounts. You can also include a section for comments or notes to personalize each receipt. Excel’s conditional formatting feature can highlight important information like overdue payments or large transactions.
Saving and Sharing Your Template Across Devices

To save your template and access it across multiple devices, start by storing it in cloud storage. Using services like OneDrive or Google Drive ensures that your template is available wherever you go, as long as you have internet access.
Follow these steps to save and share your template:
- Save your template to a cloud service folder. For Microsoft Office, use OneDrive for seamless integration.
- Ensure you save the file in a commonly supported format, like .xlsx, .docx, or .pptx.
- On any device, log into your cloud storage account to open or modify the template.
For sharing the template with others:
- Share the link directly from the cloud service, allowing others to view or edit the template, depending on your permissions settings.
- Alternatively, download the template and send it via email or messaging platforms, but cloud storage is the easiest for collaborative use.
Syncing across devices is automatic, but make sure to regularly save your changes to avoid data loss. By saving to the cloud, you guarantee access from any location with a connected device.