If you’re looking for a straightforward way to document the receipt of goods, using an XLS template is a practical solution. This method allows you to organize key information in a structured format, making it easy to track and manage deliveries.
The template should include fields like the item description, quantity received, the date of receipt, and any additional notes such as damages or discrepancies. By using a simple XLS format, you can easily update and maintain records as needed. This ensures that all transactions are documented with clear details, reducing the risk of errors or confusion later on.
With an XLS template, you can also create formulas to automatically calculate totals, inventory levels, or discrepancies. This feature can help streamline your workflow, providing instant calculations and saving you time on manual entries. Make sure to tailor the template to your specific needs, such as including columns for the supplier, order number, or location, depending on your business’s requirements.
Here are the refined lines with minimal repetition:
For a cleaner and more organized receipt of goods form, consider using unique column headers for each data type. This prevents confusion and ensures that each section has a distinct purpose. Instead of repeating general terms, focus on providing clear labels like “Received by” and “Verification status” to categorize the information effectively.
Streamlining Data Entry

To reduce redundancy, avoid using similar terms for different sections. For example, instead of “Delivery date” and “Shipment date,” use “Date of receipt” and “Date of shipment.” This reduces repetition while maintaining clarity. Also, incorporate drop-down lists where possible to speed up data entry and reduce human error.
Enhancing Form Usability

Optimize the layout by grouping related fields together. For example, place all product-related fields in one section and all delivery-related details in another. This layout minimizes the need for repetitive actions and keeps the focus on the most relevant information. Simplifying the form not only saves time but also enhances accuracy during data collection.
- Receipt of Goods Form Template XLS
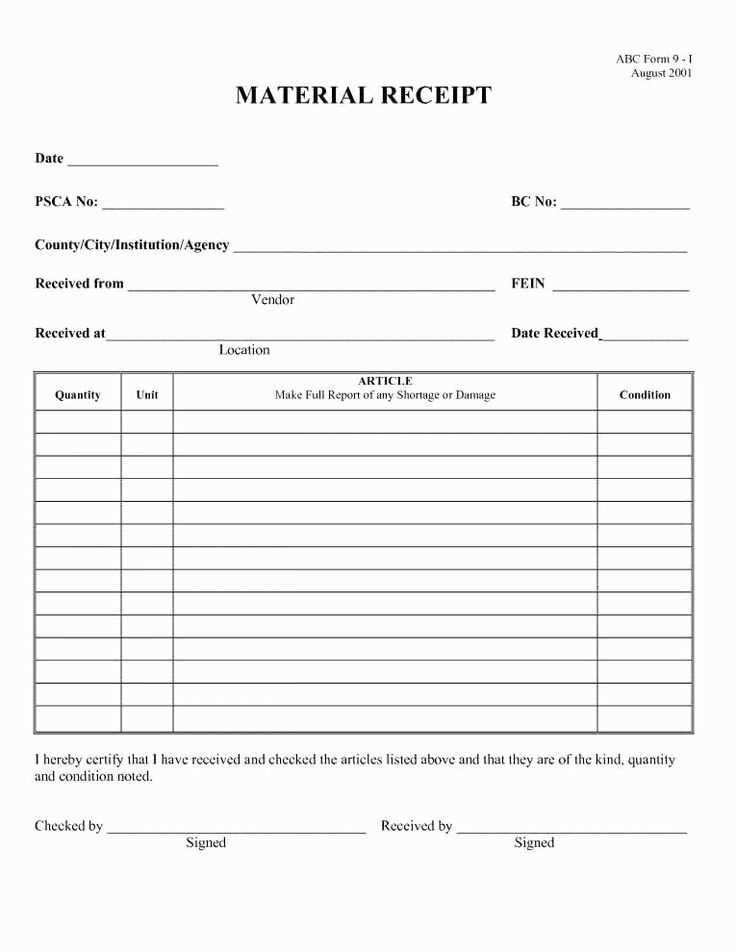
The Receipt of Goods Form Template in XLS format allows you to efficiently record the details of received goods, track inventory, and maintain organized documentation for auditing purposes. Here are the steps to set up a streamlined form:
1. Key Columns to Include
- Date of Receipt: Track when the goods arrived.
- Supplier Information: Include the supplier’s name and contact details.
- Item Description: List the name or description of the goods.
- Quantity Received: Document the number of items received.
- Condition of Goods: Note any damages or discrepancies.
- Purchase Order Number: Link the receipt to the corresponding purchase order.
- Storage Location: Specify where the items will be stored.
2. Tips for Streamlining Data Entry

- Use drop-down menus for suppliers and item descriptions to speed up data entry.
- Implement automatic date entry features for quicker form population.
- Ensure that the quantity fields support decimal values if partial quantities are received.
Once completed, this template will serve as a clear and reliable record for your inventory management needs. Make sure to review it regularly to keep data up to date and maintain transparency across your team.
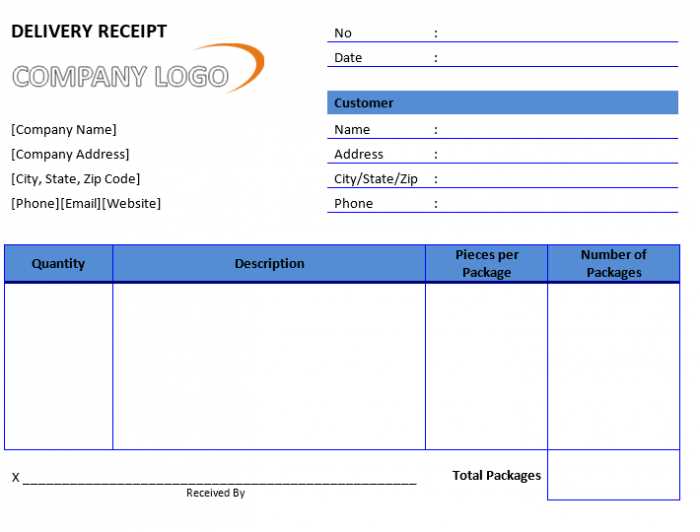
To create a basic goods receipt template, begin with setting up key sections that will capture the necessary details of each delivery. Start with a header that includes the company name, address, and contact details for easy identification. Include the document title “Goods Receipt” at the top for clarity.
Define the Core Fields
The core fields should cover essential information, such as the following:
- Receipt Number: A unique identifier for each transaction to track records.
- Supplier Name and Contact Info: Who delivered the goods, including phone number and email.
- Date of Receipt: When the items were delivered.
- Description of Goods: A list of received items, including quantity, unit price, and total cost.
- Delivery Address: The location where the goods were delivered.
- Signature Section: A space for the receiver’s signature to verify the receipt of goods.
Design the Layout

Arrange these fields in a clean and logical format. Ensure that each section is clearly defined and there’s enough space for filling in details. Use borders to separate different areas and make the template visually easy to navigate. Add instructions in parenthesis for fields where specific formats are needed, such as date formats or quantity units.
Lastly, save the template in Excel format, so it’s easy to edit and update as required. This simple approach will ensure that you can track and verify incoming goods efficiently without any confusion.
Adjust the layout and content of your receipt of goods form to reflect the unique processes and details relevant to your business. A tailored template helps streamline operations and ensures all necessary data is captured.
Adjusting Columns and Fields
- Modify column headers to match specific goods categories or transaction types relevant to your operations.
- Add custom fields to track additional details, such as customer reference numbers or internal order codes.
- Remove any unnecessary default columns that don’t apply to your business to keep the form clean and straightforward.
Adding Conditional Formatting
- Use conditional formatting to highlight key data, such as overdue deliveries or high-value items, for quick identification.
- Set up color coding for certain fields, like delivery dates or quantities, to improve visibility and avoid errors.
By customizing these aspects, you’ll ensure the receipt form aligns with your specific business workflow and improves accuracy in your record-keeping.
To integrate the receipt of goods form with your inventory management system (IMS), start by ensuring that both platforms can exchange data seamlessly. Use an intermediary format such as CSV or XML, which is commonly supported by most IMS software.
Step 1: Match Data Fields
The receipt form will need to capture specific data points such as product name, quantity received, supplier information, and date. These fields must be mapped to the corresponding fields in your IMS. This ensures that the data flows into the correct locations within the system.
Step 2: Automate Data Import

Many IMS platforms allow the automation of data imports from Excel files. Set up the form to export in a compatible format, then use the IMS’s import functionality to upload the data directly into the system. Schedule regular imports to reduce manual data entry.
| Field in Receipt Form | Corresponding IMS Field |
|---|---|
| Product Name | Item Description |
| Quantity Received | Quantity In Stock |
| Supplier | Vendor |
| Date Received | Stock Update Date |
Test the integration by running a small batch of receipts through the system. Check for any errors in the data flow and adjust mappings as needed. After confirming that the system works as expected, consider setting up alerts for discrepancies or missing data.
To create a well-organized receipt of goods form template in Excel, begin by structuring clear sections. Focus on these key elements: item name, quantity, unit price, total price, and supplier details. Include a date field for tracking purposes, as well as a unique receipt number for easy reference.
Set up columns for each of these categories, ensuring proper alignment and spacing for readability. Use formulas to calculate total prices automatically based on quantity and unit price, minimizing errors and saving time. Customize the template to suit your specific needs, whether for inventory management or order processing.
Remember to leave space for comments or additional information, like shipping details or product condition, as needed. Consider adding drop-down menus or data validation to reduce input mistakes and standardize entries. This simple, practical layout will streamline the receipt process and improve accuracy in your records.