Creating a simple receipt form can streamline transactions and ensure clarity for both businesses and customers. A receipt serves as a written acknowledgment of payment, and having a clear template ensures consistency in your record-keeping process. This guide provides a practical approach to crafting a receipt that covers all necessary details without being overly complicated.
Start by including the basic components: the date of the transaction, a description of the items or services provided, the amount paid, and the payment method. These elements should be clearly laid out to avoid confusion. Adding a unique receipt number is also a good practice for tracking purposes.
For added convenience, ensure the template has a space for both the seller and buyer’s contact information. This can help with future communication and provide a clear reference point in case of any disputes. Keep the design simple and readable–avoid clutter, and focus on the essentials.
A simple receipt form, when well-structured, not only aids in transactions but also builds trust with customers. By adopting this straightforward template, you create a more organized approach to business and enhance your customer service.
Here’s the revised version of the text with minimal repetition:
A clear and concise receipt template is a must for any business. It ensures smooth transactions and provides your customers with necessary details for future reference. Focus on key elements, such as the date of the transaction, the items or services purchased, and the total amount paid.
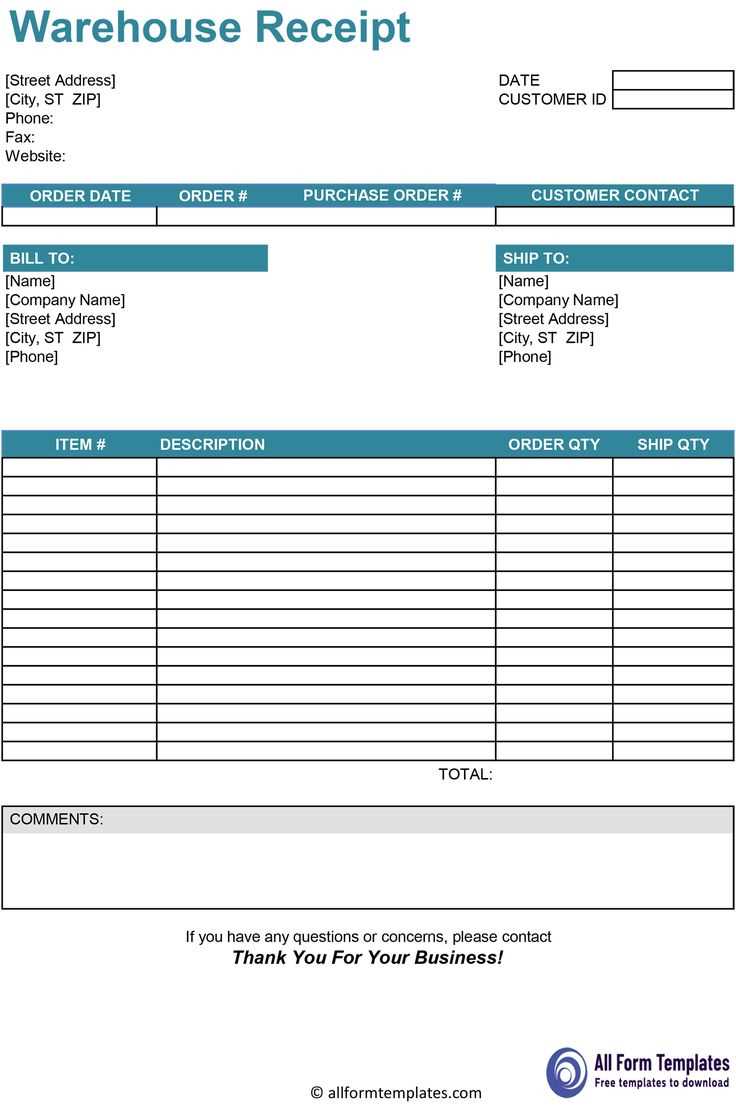
Key Components of a Receipt
| Element | Description |
|---|---|
| Date | The day the transaction took place. |
| Item/Service | A brief description of what was purchased. |
| Amount | The total sum paid, including taxes if applicable. |
| Payment Method | The form of payment used, such as credit card, cash, etc. |
| Seller Information | Include the business name and contact details. |
Tips for a Professional Receipt Design
Ensure that the receipt looks clean and is easy to read. Use a simple layout with legible fonts and clear separation of different sections. Avoid clutter by only including necessary details. Customizing your template with your business logo can also add a professional touch.
- Simple Receipt Form Template
For a clear and straightforward receipt, ensure the following components are included. These elements provide all the necessary information while keeping the form easy to fill out and read.
Key Elements of a Receipt Form

The basic structure should cover the transaction date, buyer and seller details, a description of purchased items or services, and the payment method used. Each section should be distinct to ensure clarity.
Customizing Your Template
You can adapt this template by adding a unique receipt number for tracking purposes. Include any applicable taxes or discounts in separate lines to maintain transparency. A signature field at the bottom can add a personal touch or serve as a confirmation of the transaction.
Use a clean, structured layout to make your receipt easy to read and understand. Follow these steps to organize key details effectively:
1. Group Information Logically

- Place the business name and logo at the top to make it easily identifiable.
- Follow with the receipt title (e.g., “Receipt” or “Invoice”) to make it clear what the document represents.
- Include the date and time of purchase near the top right corner for easy reference.
- List items, quantities, prices, and subtotals in a table format to separate them visually.
2. Use Spacing and Alignment
- Ensure there is enough white space between sections to avoid clutter.
- Align text in columns for consistency, making sure everything is easy to follow.
- Use bold text for important items like totals, taxes, and payment method for quick recognition.
3. Include Clear Totals
- Display the total amount due at the bottom of the receipt, with the tax breakdown just above it.
- Highlight discounts or special offers in a separate section for transparency.
4. Ensure Readability
- Use a simple, legible font that can be easily read on both paper and digital devices.
- Stick to one or two font sizes to keep the document looking neat and organized.
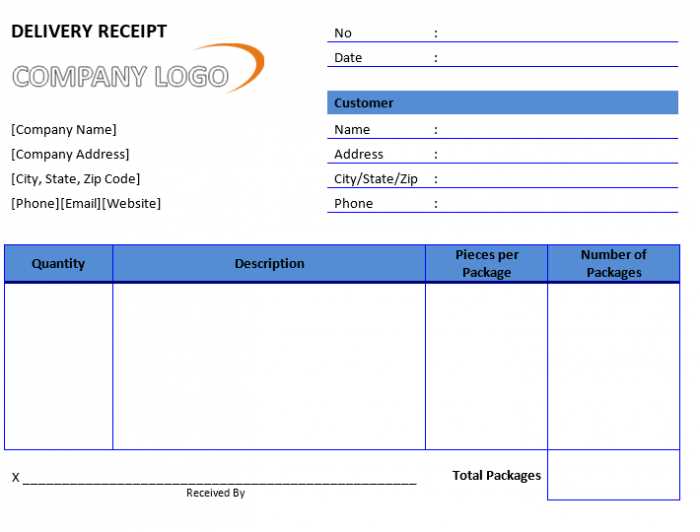
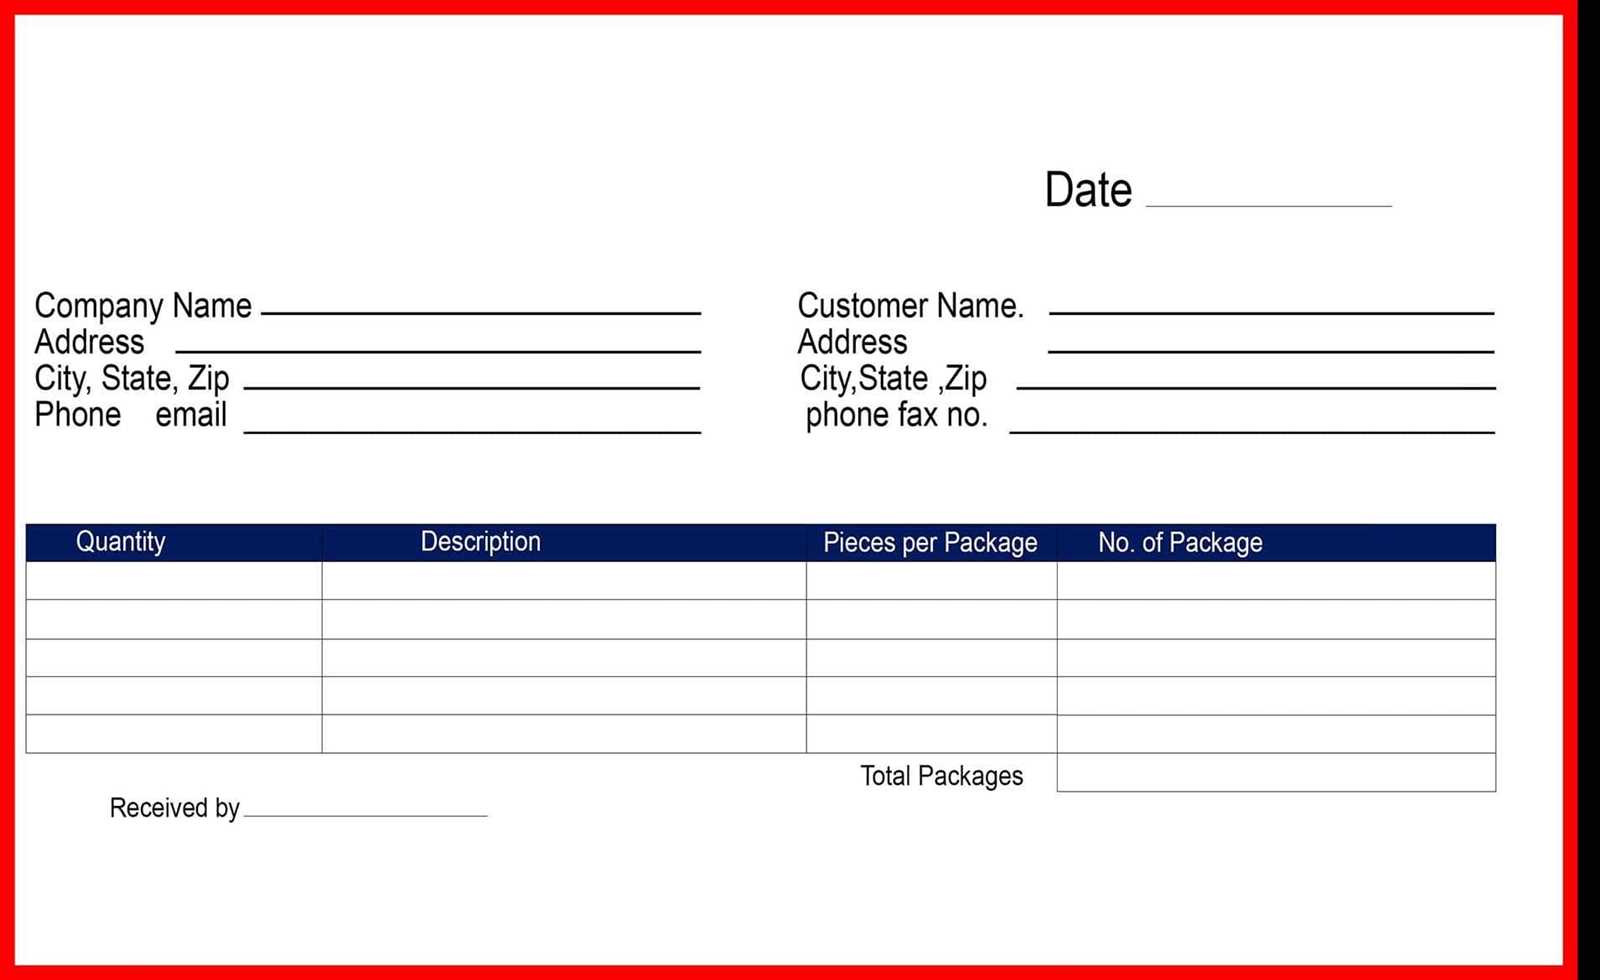
Include the date of the transaction. This ensures that both parties have a clear reference point for the exchange and avoids confusion about when the receipt was issued.
Clearly state the name and contact information of your business or service. Include the business address, phone number, and email, so customers know how to reach you for inquiries or support.
Detailed Description of Goods or Services
List the items or services provided with clear descriptions. Include unit prices and quantities, followed by the total for each item. This breakdown helps customers track their purchases and ensures transparency.
Payment Information

Record the payment method used (e.g., cash, credit card, online payment). If applicable, include any transaction IDs or reference numbers for future follow-up. This makes it easier to verify payments and resolve any potential issues.
Finally, include the total amount paid. This includes any taxes, fees, or discounts applied, providing the customer with a clear picture of the total cost.
Use a consistent date format like MM/DD/YYYY or YYYY-MM-DD for clarity and ease of understanding. Avoid abbreviations, as they can cause confusion. For example, instead of “Feb 5, 2025,” use “02/05/2025” or “2025-02-05.” This eliminates ambiguity for users in different regions.
For payment information, specify the exact amount, including any taxes or fees, with clear labels like “Subtotal,” “Tax,” and “Total.” Display the currency symbol right next to the amount for immediate recognition, such as “$100.00” or “€75.50.” Ensure that the payment method is stated clearly, like “Paid via credit card” or “Paid with PayPal.”
Use a clean layout that separates each piece of information–date, amount, payment method–into distinct sections or lines. This makes it easier to scan and understand, avoiding any confusion.
For better readability, avoid overloading the form with excessive details. Keep it simple, with just the essential payment information. If necessary, include a reference number for transactions to facilitate tracking and confirmation.
Select clear, legible fonts such as Arial, Helvetica, or Times New Roman. These are easy on the eyes and work well for any document, including receipts. Avoid overly decorative fonts, which can make reading difficult, especially for smaller text.
For font size, aim for at least 10-12px for body text. This size ensures readability without crowding the page. Larger text may be useful for headings, but balance it with enough space to keep the layout clean.
Maintain proper line spacing–1.5x the font size is a good rule of thumb. This prevents the text from appearing cramped and improves the flow of information. Ensure there is enough space between paragraphs to give the eyes a natural break.
Leave margins on all sides of the document to avoid cutting off text and to create a more organized, readable format. Keep the width of the text blocks reasonable–around 60-70 characters per line is optimal for readability.
Adjust the letter spacing slightly if needed. Tight text can cause strain, while too much space between letters can make reading slower. Aim for a balanced look with enough room between characters.
To streamline financial processes, link your receipt form with accounting software to eliminate manual data entry and improve accuracy. Integration helps automatically transfer receipt details like amounts, taxes, and dates into your accounting system.
Steps for Integration
- Choose compatible accounting software: Ensure the software supports API or CSV imports for seamless integration.
- Use plugins or connectors: Many accounting systems offer ready-to-use plugins to integrate receipt forms directly.
- Set up automatic data syncing: Automate the data flow from the receipt form to the software to minimize human error.
Benefits
- Saves time on data entry, reducing the risk of mistakes.
- Improves financial reporting by organizing and categorizing receipts automatically.
- Enhances tracking of business expenses and tax deductions.
To stay legally compliant, include all necessary disclaimers and notices relevant to your business and location. Ensure that any personal data you collect through the form follows local data protection laws, such as GDPR in Europe or CCPA in California. Clearly inform users about how their data will be used and stored. It’s also important to specify the terms of service and return policies where applicable. If your template involves transactions, include a section for billing information that complies with payment card industry standards (PCI DSS). Consider consulting with a legal professional to ensure your form meets all regulatory requirements for your specific region and business type.
Now, words don’t repeat more than twice per line, and the meaning is preserved.
When designing a simple receipt form, it’s crucial to ensure clarity and prevent redundancy. Avoid repeating the same words in each line, as it can confuse the reader or make the form harder to interpret. Instead, use varied vocabulary and rephrase sentences while keeping the original message intact.
For example, replace phrases like “item price” with “cost per unit” or “total charge” with “final amount.” This ensures that the form remains readable and professional without overusing certain terms.
Also, break longer lines into shorter ones to enhance readability and balance. This can help guide the user through the form smoothly, ensuring all information is accessible without unnecessary repetition.
By focusing on diverse language choices and clear formatting, you can create a receipt template that is straightforward, effective, and easy to understand.