Start with clear headers. Label the receipt with a title, such as “Receipt of Purchase” or “Sales Receipt,” at the top. This will immediately inform the customer about the document’s purpose.
Include business details. Clearly display the name, address, phone number, and email of the business issuing the receipt. This information makes it easy for customers to reach out if needed.
Provide transaction specifics. List the date and time of the transaction, as well as the payment method used (credit card, cash, etc.). This helps confirm the transaction’s authenticity.
Detail purchased items. Each product or service purchased should be listed with a description, quantity, unit price, and total cost. Use clear and concise language to avoid confusion.
Calculate totals. Show the subtotal, any applicable taxes, and the final total amount paid. Breaking down the pricing helps customers easily verify the charges.
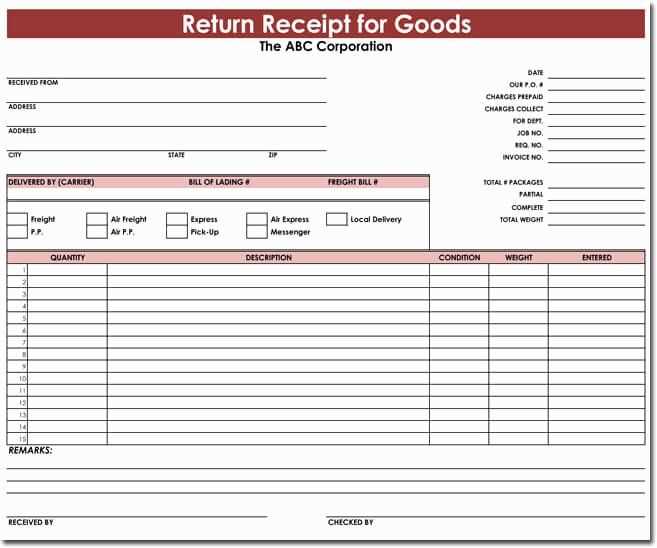
Include return policy. If applicable, mention any return or exchange policies at the bottom. This reassures customers about the process if they need to return an item.
Detailed Guide on Receipt of Purchase Template
A receipt of purchase template must include several key details to ensure clarity and legal compliance. First, the template should feature the business name, address, and contact details. This establishes the identity of the seller.
Next, include the transaction details such as the date of purchase, the total amount paid, and any applicable taxes. This helps both parties track the financial aspects of the sale.
- Transaction Date: Clearly state the date and time of the purchase.
- Itemized List: List all items purchased along with their individual prices and quantities.
- Total Amount: Include the final total, breaking down the subtotal, taxes, and any discounts if applicable.
It’s also beneficial to include payment method details, such as whether the purchase was made with cash, credit, or debit card. This adds transparency and prevents confusion in case of any discrepancies.
Finally, ensure there is space for both the buyer’s and seller’s signatures. This serves as a formal acknowledgment of the transaction.
How to Design a Purchase Receipt Template

Focus on clarity and simplicity when creating your purchase receipt template. Ensure that key information is easy to locate and read. The most critical elements are the date, item descriptions, quantities, prices, total amount, and payment method. Organize them neatly in a logical order.
Include Business and Customer Details
Place your business name, logo, and contact information at the top. Right below that, include the customer’s details, such as their name and address. This helps maintain a professional appearance and adds transparency to the transaction.
Define Transaction Information Clearly

List the purchased items along with their quantities and individual prices. Ensure each entry is easy to understand and formatted consistently. Conclude with the total amount and specify any taxes or discounts applied.
Conclude the receipt with payment details. Indicate whether the transaction was made by card, cash, or other methods. This can help both the business and customer track their purchases effectively.
Key Elements to Include in Your Receipt
Include the business name and contact details at the top for clarity. This should cover the company’s full name, address, phone number, and email. This makes it easy for the customer to reach out if needed.
Ensure the date of the transaction is clearly displayed. This helps both you and the customer keep track of purchase history.
Clearly show the itemized list of purchased products or services. Each entry should include a description, quantity, price per unit, and total price. This allows customers to verify their purchases with ease.
Provide a breakdown of taxes applied to the purchase. Show both the subtotal and the total amount including taxes so customers can understand what they’re paying for.
Include a unique receipt or transaction number. This number should be easy to reference for future inquiries or returns.
Show the method of payment used (credit card, cash, etc.). This can serve as a record of payment for both parties involved.
If applicable, include return or refund policies. This sets clear expectations in case a customer wishes to return or exchange an item later.
Customizing Templates for Different Businesses
Tailoring receipt templates to fit the needs of various industries boosts professionalism and enhances customer satisfaction. Start by incorporating specific details relevant to the business, such as unique product names, service types, and pricing structures. For a restaurant, add sections for tips, taxes, and meal categories. A retail store may benefit from a template that includes a detailed list of items, quantities, and discounts applied.
Include your business’s logo and color scheme to ensure brand consistency. A template for an online service provider might include contact information, subscription details, and renewal dates. For a construction company, it’s helpful to include project descriptions, materials used, and labor charges.
Make sure the font style is clear and legible. Each industry will have its preferences for the layout, but keep it simple and user-friendly. Digital businesses can utilize email receipts with clickable links to invoices or customer support, while physical stores might prefer a layout that prints neatly on smaller paper sizes.
As your business grows, adapt your template to reflect any new services, discounts, or taxes. This ensures your receipt always represents the most accurate information, making transactions smooth and transparent for both you and your customers.
Choosing the Right Software for Template Creation
Focus on tools that offer flexibility and customization for your specific needs. Look for software with drag-and-drop functionality, intuitive interfaces, and a wide range of pre-designed templates. This saves time and allows quick adjustments without requiring coding skills.
Compatibility with Your Workflow
Ensure the software integrates with your existing systems. If you regularly use certain platforms for accounting or customer management, check if the template tool can export files in formats compatible with them. Avoid tools that force you to reformat or manually adjust each time.
User-Friendly Interface
Pick a software with an easy-to-understand interface. Complex designs can slow down the creation process and lead to frustration. A streamlined, accessible layout helps you stay productive and focused on customizing templates, not fighting with the software itself.
Legal Requirements for Purchase Receipts
Ensure that all purchase receipts include key details, such as the date of transaction, seller’s name and contact information, and a description of the items or services purchased. This is required by law in many jurisdictions to provide clear documentation for both the buyer and seller.
Required Information on Receipts
In most regions, a purchase receipt must contain specific information. This includes the name or identification of the business, the date and time of the transaction, the transaction amount, and taxes applied. For electronic receipts, similar requirements are often enforced.
| Required Information | Details |
|---|---|
| Seller’s Details | Name, address, and contact information |
| Transaction Date and Time | Exact date and time of purchase |
| Item/Service Description | Clear description of what was purchased |
| Price Breakdown | Item price, taxes, and total cost |
Tax Information

Receipts must clearly show applicable tax rates and amounts. Sales tax or value-added tax (VAT) should be included in the breakdown to ensure proper financial documentation. This is necessary for both record-keeping and possible audits.
How to Maintain Consistency in Your Templates
Use a standardized layout for all your templates. Stick to a uniform font, color scheme, and structure for every document. This creates a cohesive look that helps users easily navigate and understand the content.
Define Key Elements
Clearly outline the elements that should be present in every template, such as the company logo, footer information, or specific headers. This ensures that important details are always included, regardless of the template’s purpose.
Utilize a Template Style Guide
Create a style guide for your templates. Define rules for fonts, sizes, spacing, and margins. A style guide reduces the risk of inconsistency when different team members are working on various templates.
Consistency is achieved when every template follows the same pattern, even when the content differs. By sticking to these practices, you’ll ensure your templates maintain a professional and cohesive appearance every time.