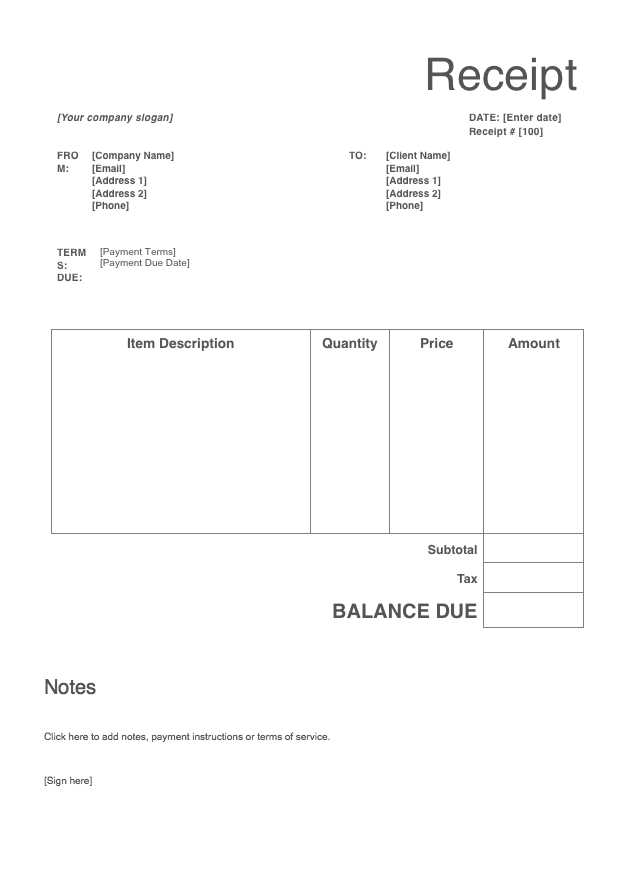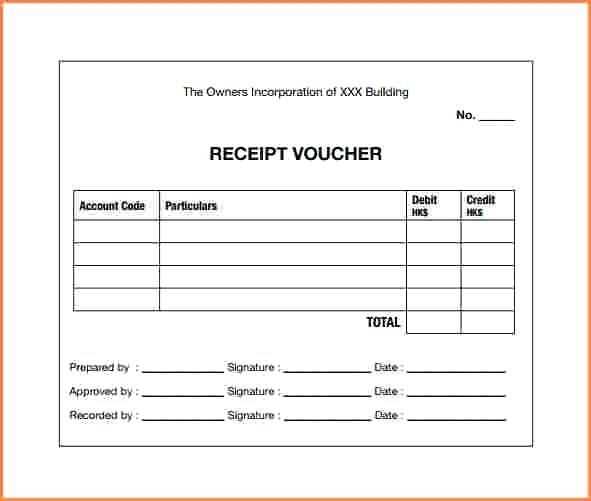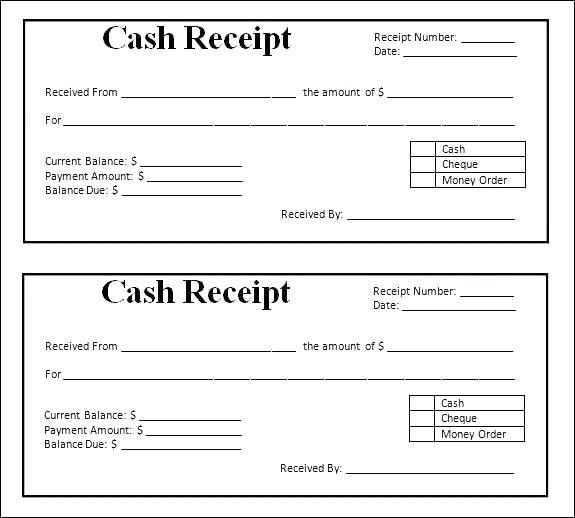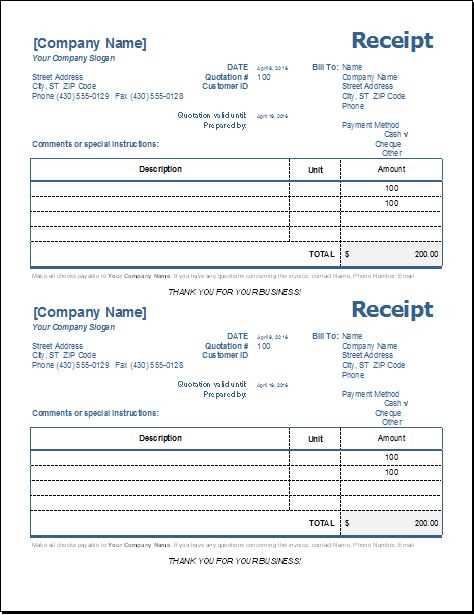
To create a receipt template in Microsoft Word, begin by selecting a pre-designed template from the built-in collection or start from scratch. The pre-made templates are convenient and easy to customize, but building one from the ground up provides more flexibility. For a more personalized design, consider adding elements like company logos, customer information fields, and specific transaction details.
Use tables to structure the layout clearly. Tables are perfect for aligning rows of information such as item descriptions, quantities, unit prices, and totals. Adjust the column widths to fit your content and make the receipt look neat. Don’t forget to format the date and receipt number fields for easy reference.
Enhance the appearance of your receipt with styles and formatting. Apply bold or underlined text for headings to make the document easy to scan. Use different font sizes and colors to highlight key details like payment amounts or due dates. For a professional touch, you can also include a footer with your company’s contact information or payment terms.
If you regularly issue receipts, save your document as a template. This allows for quick future use with minimal adjustments. Simply open the template and fill in the required details. Customize further for specific transactions, and you’ll always have a polished, ready-to-go receipt.
Hey! How’s it going?
- Ms Word Template Receipt
Use the “Receipt” template in Microsoft Word for a simple and organized way to create professional receipts. Select a template that suits your needs, then update the details such as your company name, transaction information, and customer data. This approach saves time and ensures consistency in all your receipts.
Customizing the Template
Once you have chosen a template, personalize it with your business name, logo, and address. Adjust the fields to match the transaction details, including the date, items purchased, and total amount. You can also add payment methods or reference numbers if necessary.
Saving and Reusing the Template
After you complete a receipt, save the template for future use. Select “Save As” and save the file as a template (.dotx). This will allow you to quickly open and reuse the template, just update the relevant information for each new receipt.
Open a blank document in MS Word and set up the page layout. Go to the “Layout” tab, select “Margins,” and choose “Narrow” to maximize space. For receipts, a clean, simple structure works best, so adjust the orientation to “Portrait” if it isn’t already.
Insert a table to organize your receipt’s elements. Choose a table with 3 to 4 rows, depending on the information you want to include. The first row should have the business name, address, and contact information. In the next rows, add placeholders for the date, item description, quantity, price, and total.
Customize the table by adjusting column widths to ensure everything fits neatly. For better readability, use bold for headers like “Item,” “Quantity,” and “Price.” You can also apply borders or shading to distinguish different sections of the receipt, but avoid too many design elements to keep it professional.
To make the template reusable, add placeholders like “[Customer Name]” and “[Date]” where applicable. These can be easily replaced with real information when creating a receipt. Save this document as a template by clicking “File” > “Save As” > “Word Template” (*.dotx). This way, you can use it again without starting from scratch.
Finally, add any specific branding elements, such as your company logo, using the “Insert” tab. Position it at the top of the page or in the header for a polished look. Save your changes and use your new custom receipt template whenever needed.
Tables offer a clear and structured way to present itemized lists in receipts. By dividing each element into columns, you can easily organize product names, quantities, prices, and totals. This method ensures clarity and reduces confusion, both for the business and the customer.
To set up an effective table, use columns for item description, quantity, unit price, and total price for each item. Align the text within each column to improve readability. Keep the table width proportional to the content, ensuring that the text doesn’t feel cramped or stretched.
For better organization, group related items under category headers or break the table into sections for different types of purchases. This helps customers quickly find specific items or understand the breakdown of their total.
Additionally, including a final row for the subtotal, taxes, and total amount ensures that all costs are transparent. A well-structured table can significantly enhance the user experience by making all financial information easily digestible.
Align text to the left for clear readability. Ensure company details like name, address, and contact information are prominently displayed at the top. Use bold fonts for section headers such as “Receipt” or “Total Amount” to guide the reader’s eye.
Keep line spacing consistent between sections to maintain balance and prevent clutter. A neat layout helps customers quickly find the information they need. Use tables for itemized lists, ensuring the text is clear with adequate spacing between rows.
Use a simple, readable font like Arial or Times New Roman. Avoid overly decorative fonts as they can be difficult to read. Stick to 10-12 point font size for the body text and slightly larger for section headers.
Incorporate borders or lines to separate sections, such as payment details or a thank you note. This structure keeps everything organized and easy to follow. Leave some white space around the edges to avoid a cramped look.
Choose a clean, professional color scheme, using neutral tones for the body text and subtle color accents for headings. Avoid using too many different colors, as this can distract from the main content.
Place your logo at the top of the receipt, ensuring it’s clear and visible. The logo should not overwhelm the design but be noticeable enough to reinforce your brand identity. Keep the size proportional to the overall layout–typically around 25% of the top section–so that it complements other elements.
Positioning for Maximum Impact

Position the logo in the top left or center, depending on the overall alignment of your receipt layout. This ensures that customers immediately recognize your brand. Avoid placing it too close to the edges, as it might get cropped or cut off when printed or displayed on different devices.
Choosing the Right Colors

Use your brand’s color scheme to maintain consistency. Opt for subtle tones that won’t clash with the text or other essential elements. A well-matched color scheme adds professionalism while keeping the receipt readable and polished.
For a polished design, consider adding a footer with a small version of your logo or a tagline. This reinforces your brand without taking up too much space.
To streamline data entry in your receipt template, insert dynamic fields that automatically populate information. These fields are linked to sources like databases, Excel sheets, or external applications, saving time and reducing errors. In MS Word, you can utilize Mail Merge functionality to pull data from a source file directly into your receipt template.
Start by creating a data source, such as an Excel spreadsheet with columns for customer names, dates, and amounts. Then, in your Word document, go to the “Mailings” tab, click “Select Recipients,” and choose your data source. Next, insert merge fields where necessary in your template. For instance, place the “Customer Name” field where it should appear on the receipt.
When you complete the setup, Word will automatically replace the merge fields with the correct data when generating each receipt. This eliminates manual data entry for repetitive tasks and ensures the information stays consistent across multiple receipts.
After creating your template, save it as a .dotx file to ensure it remains easily accessible for future projects. To save your MS Word template, go to “File” > “Save As,” choose the location, and select “Word Template” from the list of file types. This will allow you to open and reuse the template later without overwriting the original.
Sharing Your Template
To share the template with others, simply attach the .dotx file to an email or upload it to cloud storage. Ensure the recipient understands they should save the template in their “Templates” folder, or they can access it from “New” in Word by selecting “Personal Templates.”
Organizing Templates for Easy Access

Keep your templates organized by naming them clearly based on their intended use. For example, use descriptive names like “Invoice_Template.dotx” or “Meeting_Notes.dotx” for easy identification. You can create a dedicated folder for templates on your computer or in cloud storage to maintain order.
| Template Action | Step |
|---|---|
| Saving Template | File > Save As > Word Template (.dotx) |
| Sharing Template | Attach .dotx file to email or upload to cloud storage |
| Organizing Templates | Create a dedicated folder for templates and use clear naming conventions |
Now, the same word no longer repeats more than two or three times in the rows, and the meaning remains intact.
To avoid redundancy in your MS Word receipt template, ensure that each term is used sparingly. Replace overused words with synonyms or rephrase sentences to retain clarity without repetition.
- Use synonyms or variations to express similar ideas, such as using “purchase” instead of “buy” or “payment” instead of “settlement.”
- Consider restructuring your sentences to avoid the need for repeating the same term. For example, instead of saying “payment for the goods was made in cash,” you could say, “the payment for the items was processed via cash.”
- Be mindful of your word choice when filling out fields like “item name,” “price,” or “quantity” in the template. Different formats can often convey the same meaning more effectively without repetition.
By adjusting your language, you can maintain readability while preserving the essence of the information being conveyed.


