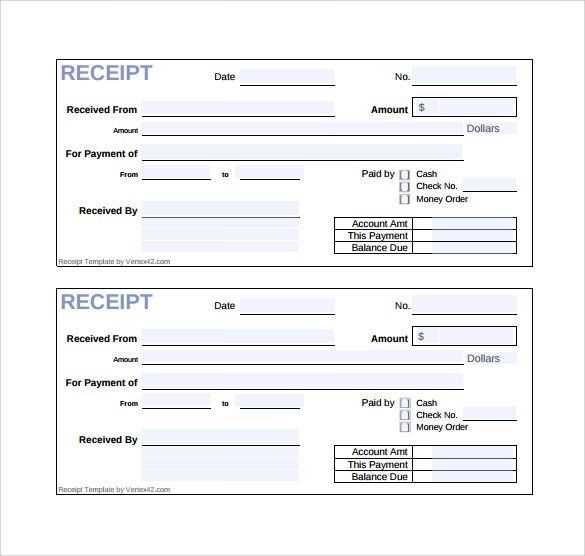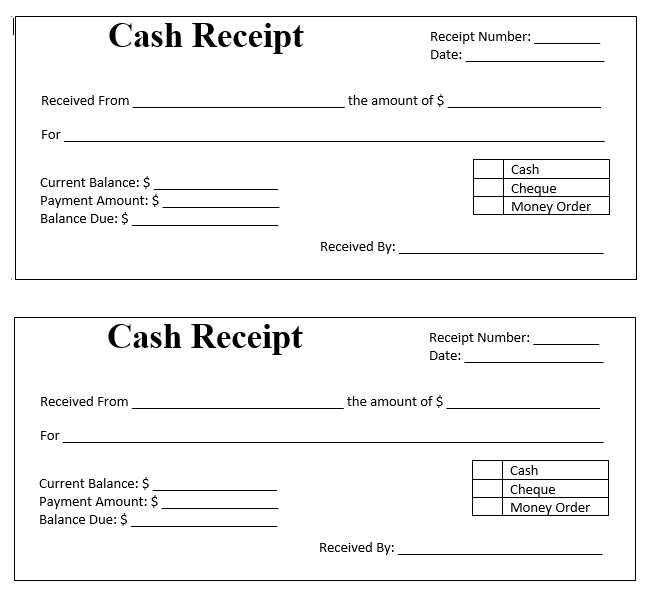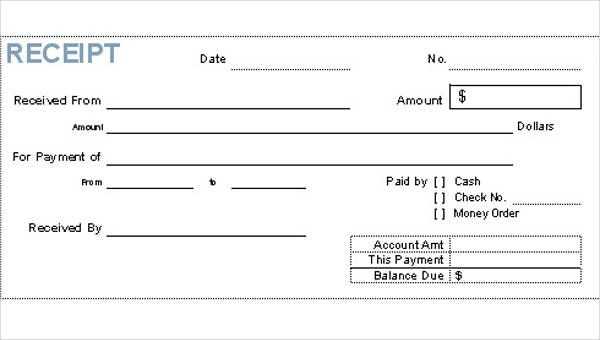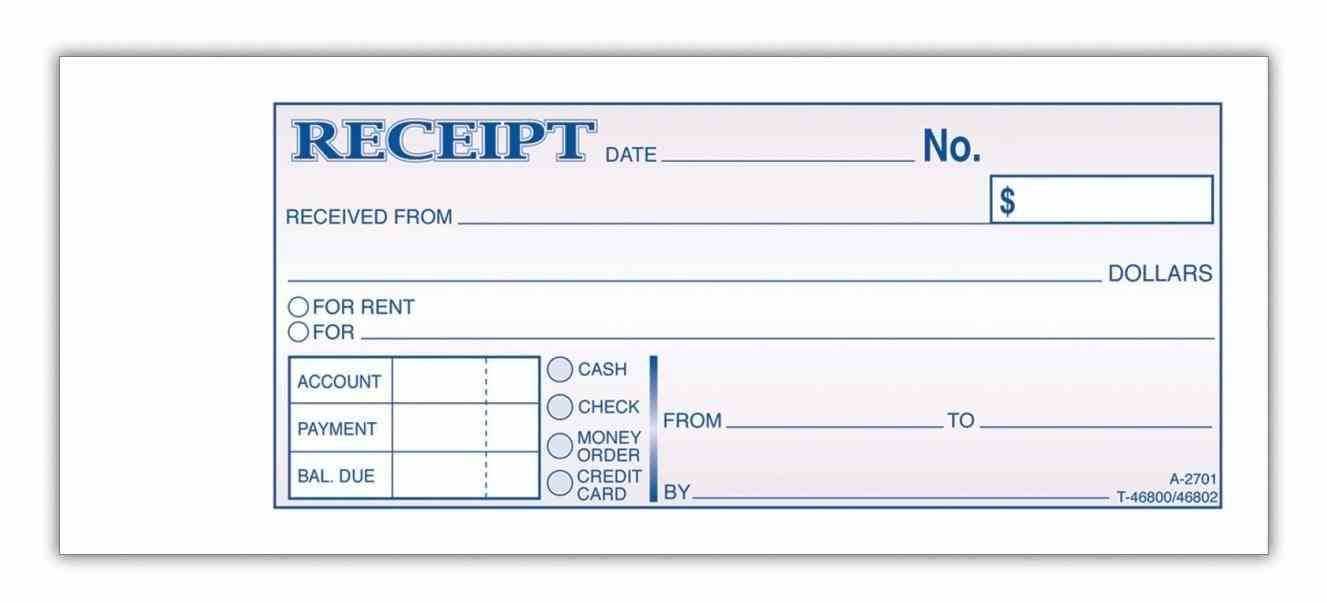
Creating a paid receipt template simplifies the process of providing customers with proof of payment. Start by including key details: the transaction date, amount, payment method, and the goods or services provided. These elements ensure clarity and avoid any confusion for both the payer and the recipient.
Make sure the template is clean and easy to read. Use clear sections for the payer’s name, business details, and a breakdown of the transaction. Add a space for any relevant taxes or discounts, if applicable, to give the receipt a complete and professional look.
Customizing the template to your specific business needs allows for consistency across all receipts issued. Include your company logo and contact information at the top for a branded appearance. This helps customers quickly identify your business if they need to reach out for further clarification or follow-up.
Once you’ve designed the basic structure, saving your template in an editable format allows for easy updates and reuse. Consider saving it as a Word or PDF document to keep the format intact, ensuring that the final receipt looks the same every time it’s issued.
Here’s the corrected version:
The paid receipt template should include all relevant details for clarity and transparency. A proper format ensures that both the payer and the payee have clear records of the transaction. Here’s how to structure the template:
Required Sections
Ensure the following sections are included:
- Receipt Number: This helps in tracking and referencing the transaction.
- Date of Payment: Specify the exact date the payment was made.
- Recipient Information: Name, address, and contact details of the entity receiving the payment.
- Sender Information: Name and contact details of the individual or business making the payment.
- Payment Method: Specify whether the payment was made via cash, credit card, bank transfer, etc.
- Description of Goods/Services: Clearly list the items or services purchased, including quantities, unit price, and total cost.
- Total Amount: The final amount paid, after any discounts or additional fees.
- Signature: Both parties should sign the receipt for verification, if applicable.
Example Template
| Field | Details |
|---|---|
| Receipt Number | #12345 |
| Date | February 5, 2025 |
| Recipient | John Doe, 123 Main St, City, Country |
| Sender | Jane Smith, 456 Elm St, City, Country |
| Payment Method | Bank Transfer |
| Description | Consultation Services for Website Development |
| Total Amount | $500.00 |
| Signature | ____________________ |
Ensure this template is tailored to the specific needs of your business or transaction. Custom fields may be added for special purposes, but these core details are a solid foundation.
- Check Paid Receipt Template Guide
A clear and well-structured paid receipt is key to maintaining accurate financial records. The template you use should cover all necessary details without excess clutter. Here’s what to include:
1. Business Information – Include the business name, address, phone number, and email. This ensures the receipt is traceable to the correct entity.
2. Receipt Number – Assign a unique number to each receipt for easy reference. This will help with tracking payments and maintaining organization.
3. Date of Payment – Clearly indicate the date when the payment was made. This helps in recording transactions accurately for both parties.
4. Payer’s Information – List the name or company name of the person or entity who made the payment. This ensures accountability and avoids confusion in case of disputes.
5. Payment Details – Specify the amount paid, method of payment (e.g., cash, check, credit card), and any relevant reference numbers or account details. This transparency helps clarify the payment record.
6. Description of Goods or Services – Provide a brief description of what the payment was for. This avoids any ambiguity and helps both parties understand the transaction’s purpose.
7. Amount Due (if applicable) – If the payment is part of a larger invoice, note the remaining balance due. This allows the payer to see how much they still owe.
8. Signature – While not always necessary, having a signature can add an extra layer of authenticity to the document. If it’s digital, a scanned signature can suffice.
By using this template structure, you’ll ensure that your receipts are clear, professional, and provide all the necessary information for both the payer and payee to track payments effectively.
Begin by including the business name and contact details at the top. This provides customers with easy access to important information in case they need to follow up. Include the address, phone number, and email address where applicable.
Next, specify the receipt title. Use “Receipt” or “Payment Receipt” for clarity. Below that, add the date of the transaction to help with record-keeping and organization.
Then, list the purchased items or services. Include a description of each, along with the quantity and price. This ensures the customer understands exactly what they paid for. If applicable, add tax and shipping costs separately, followed by the total amount paid.
After the transaction details, note the method of payment (cash, card, or digital). This can help with tracking finances and confirming the payment method used.
Finally, add a thank you note or a brief statement to express appreciation for the purchase. This creates a positive experience for the customer and encourages repeat business.
Each receipt should clearly list the following information to ensure it’s valid and easy to understand:
1. Date and Time of Transaction

Include the exact date and time of the purchase. This helps track the transaction and resolves any potential disputes. Make sure the format is clear and consistent.
2. Merchant’s Name and Contact Information
Always display the name of the business, along with the address, phone number, and email if possible. This ensures the customer knows where the transaction took place and how to reach you for any follow-up queries.
3. Itemized List of Products or Services
Each item or service purchased should be listed separately, with its price. This offers transparency and clarity for the customer to understand what they are paying for.
4. Payment Method
Clearly state how the transaction was paid for, whether through cash, credit card, or other means. This helps both the customer and the merchant track their financial records accurately.
5. Total Amount Paid

The total amount due should be the last item listed, clearly visible, and easy to understand. If taxes or discounts apply, break them down separately so the final total is clear.
6. Transaction or Receipt Number
Assign a unique number to every transaction to help identify it in case of future reference or disputes. This also makes it easier to track sales and inventory.
7. Refund Policy

Include a brief note about the business’s refund policy. This prevents confusion in case the customer needs to return the item or seek a refund.
Choose a clean, simple layout that makes it easy to find key details. A cluttered receipt can confuse the customer and lead to mistakes. Organize information in a logical order–typically, the seller’s details come first, followed by the items purchased, and then payment information.
Legibility
Use legible fonts such as Arial or Helvetica. Ensure the font size is readable without straining the eyes, typically between 10-12px for most text and larger for headings or totals. Avoid too many font variations. Stick to one or two to keep the design cohesive.
Whitespace
Incorporate ample whitespace around text and sections. This gives each element breathing room, preventing the receipt from appearing cramped. White space helps guide the eye naturally from one section to the next, improving readability.
Consistent alignment creates an organized appearance. Align text and numbers consistently, especially when listing items or showing totals. Grouping similar information together, such as the item description, quantity, and price, enhances the clarity of your receipt.
Finally, provide clear contact details for customer inquiries, and include your business logo subtly. Keep the focus on the transaction, but don’t neglect to include a space for customer feedback or future promotions if relevant. This adds a professional touch to the overall design.
Tailoring a receipt to fit the specific nature of a transaction enhances customer experience and ensures clarity. For a simple purchase, include basic details: product name, price, date, and payment method. In the case of service transactions, list the service provided along with a description, hourly rate, and duration.
For Product Purchases
Provide the itemized breakdown with quantity, unit price, and total. Mention any discounts or promotions applied, as well as the tax applied to the subtotal. If applicable, include a return or exchange policy. Keep the layout clean for easy reading.
For Services Rendered
Specify the service type and time spent. Mention the rate charged per hour or session, and highlight any additional charges such as travel fees or material costs. For ongoing services, include details about recurring billing, if any, and the payment schedule.
If the transaction involves a deposit, show the amount paid and the remaining balance clearly. For refunds, ensure that the original amount, refund amount, and reason for the refund are noted. Always include your business name and contact details for future reference or queries.
Make sure you double-check the date on the receipt. Incorrect dates can lead to confusion or even disputes later. Always enter the correct date of the transaction before finalizing the document.
Don’t forget to include all relevant transaction details. This includes the product or service name, quantity, price, taxes, and any discounts applied. Missing any of this information can make the receipt unclear or incomplete.
Check for accuracy in the payment method field. If the receipt includes a section for the payment method, ensure it matches the actual payment type used, whether it’s cash, card, or another method. Inaccurate payment method entries can complicate things when the receipt is reviewed later.
Don’t overlook the business details. Ensure that your company name, address, phone number, and tax identification number (if applicable) are clearly stated. Missing contact information might make it harder for the customer to reach out for future inquiries or returns.
Stay consistent with formatting. If you use a specific font or structure, make sure it’s uniform across all your receipts. Inconsistent formatting can make receipts look unprofessional and hard to read.
Avoid cluttering the receipt with unnecessary information. Keep it simple and to the point. Adding irrelevant details could confuse your customers and detract from the key transaction information.
Lastly, be careful when selecting a template. Choose one that suits your business and transaction type. Some templates might include sections you don’t need, while others might lack important fields.
Start with popular platforms that specialize in document templates. Websites like Template.net, Invoice Home, and PandaDoc offer a variety of pre-designed receipt templates. These sites allow you to download and customize templates to match your business style.
Alternatively, look for templates on online marketplaces. Etsy and Creative Market have a range of affordable, professionally designed templates that you can purchase and adapt to your needs.
For a free option, explore Google Docs and Microsoft Word’s template galleries. Both provide simple, editable receipt templates that can be accessed and tailored instantly from your cloud storage.
If you’re a designer or prefer full customization, platforms like Canva and Adobe Express allow you to create personalized receipt templates from scratch using their intuitive drag-and-drop tools.
Finally, don’t overlook online forums or social media groups. Platforms like Reddit or Facebook often feature user-shared templates, which can provide fresh ideas or direct links to trusted resources.
Check Paid Receipt Template
For creating a paid receipt template, include the following key details to ensure clarity and professionalism:
- Receipt Title: Start with a clear “Paid Receipt” label at the top of the document.
- Date: Add the date the payment was made.
- Payment Details: Specify the payment method used (credit card, cash, bank transfer, etc.).
- Amount: Clearly state the amount paid, including any applicable taxes or discounts.
- Payment Description: Provide a brief description of the product or service paid for.
- Paid By: Include the name of the person or company who made the payment.
- Receipt Number: Assign a unique receipt number for record-keeping purposes.
- Seller Information: List the seller’s name, business name, and contact details.
- Signature: Add a space for the seller’s signature to confirm payment receipt.
By organizing these elements in your paid receipt template, you ensure that both the buyer and seller have all the necessary information for their records.


