If you’re looking for a free rental receipt template, you’re in the right place. A rental receipt is an important document that helps both landlords and tenants keep track of payments made for property rental. It provides clear proof of payment and serves as a reference for future transactions.
Many free templates are available online, offering simple and customizable formats. Choose one that suits your needs, ensuring it includes key details such as the tenant’s name, rental amount, payment date, and the property address. It’s best to use templates that are easy to fill out and don’t require any advanced software.
Once you’ve selected a template, ensure it includes all necessary information. A well-structured receipt not only saves time but also avoids confusion. Most templates include spaces for payment method, period of rent, and landlord’s contact information. A professional and clean layout will help build trust between you and the tenant.
Lastly, save your receipts in a secure location for both the tenant’s and landlord’s records. Keeping a copy of each transaction will provide peace of mind for both parties involved, especially if any questions arise about past payments.
Here’s the corrected version with minimized repetition:
To create a simple yet effective rental receipt, ensure that all required information is clearly outlined. This includes renter details, rental period, payment amount, and any other necessary terms. Avoid unnecessary jargon and focus on the core aspects for clarity.
Key Elements to Include:
- Renter’s name and contact information
- Rental property description
- Rental start and end dates
- Total amount due, including any taxes
- Payment method and date of payment
- Landlord’s contact information
When designing the template, make sure there’s a designated space for both the tenant’s and landlord’s signatures to confirm agreement. This will add legitimacy and avoid confusion down the line.
Tips for Streamlining the Template:

- Use clear headings and concise language for each section.
- Avoid excessive repetition of terms; focus on providing value through essential details only.
- Ensure a professional layout that is easy to read.
By sticking to these points, your rental receipt template will be both user-friendly and legally sound.
Hey! Looks like you’re diving into a variety of topics, many focused on user manuals and technical guides. Are you working on any projects around that, or are you just browsing for info?
Rental Receipt Template Free
A rental receipt template is a simple document that confirms the payment made by a tenant for renting property or equipment. You can download a free rental receipt template to ensure clear and professional documentation. These templates typically include fields for the tenant’s name, rental period, amount paid, and the landlord’s or property manager’s details.
What to Include in a Rental Receipt
Key information should always be listed in the receipt to make it legally valid. The template should include the following details:
- Tenant’s name and contact information
- Rental property address or description of the rental item
- Rental period (dates covered by the payment)
- Amount paid and payment method (cash, check, or online transfer)
- Landlord or property manager’s name and contact information
- Receipt number for tracking purposes
How to Use a Free Template
Download a rental receipt template from trusted online sources. Customize it with specific rental details and print it for your tenant. By using a template, you save time and maintain consistency in your records. Make sure both parties sign the receipt for added assurance.
- How to Create a Basic Receipt Template
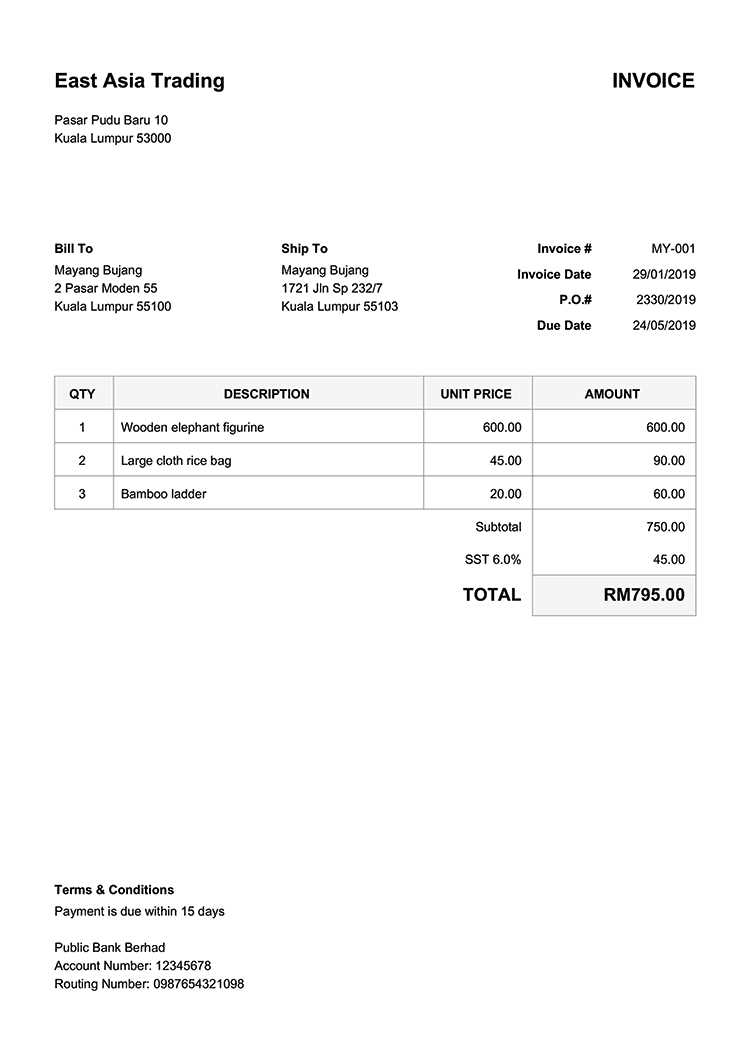
Begin by setting up a clear layout with sections for key details. Start with the company name and contact information at the top, followed by the date and a unique receipt number. Include fields for the customer’s name and contact details.
Next, add a table listing the items or services provided. Each row should contain a description, quantity, unit price, and total price. Ensure the total cost is calculated at the bottom of the table, with any taxes or discounts clearly shown.
Finish by including a payment section where you can indicate the method of payment, such as cash, card, or online transfer. Also, leave space for a signature line for both the business and the customer.
Once the template is structured, adjust font sizes and spacing to ensure everything is readable. Make sure the template is easy to customize for different transactions.
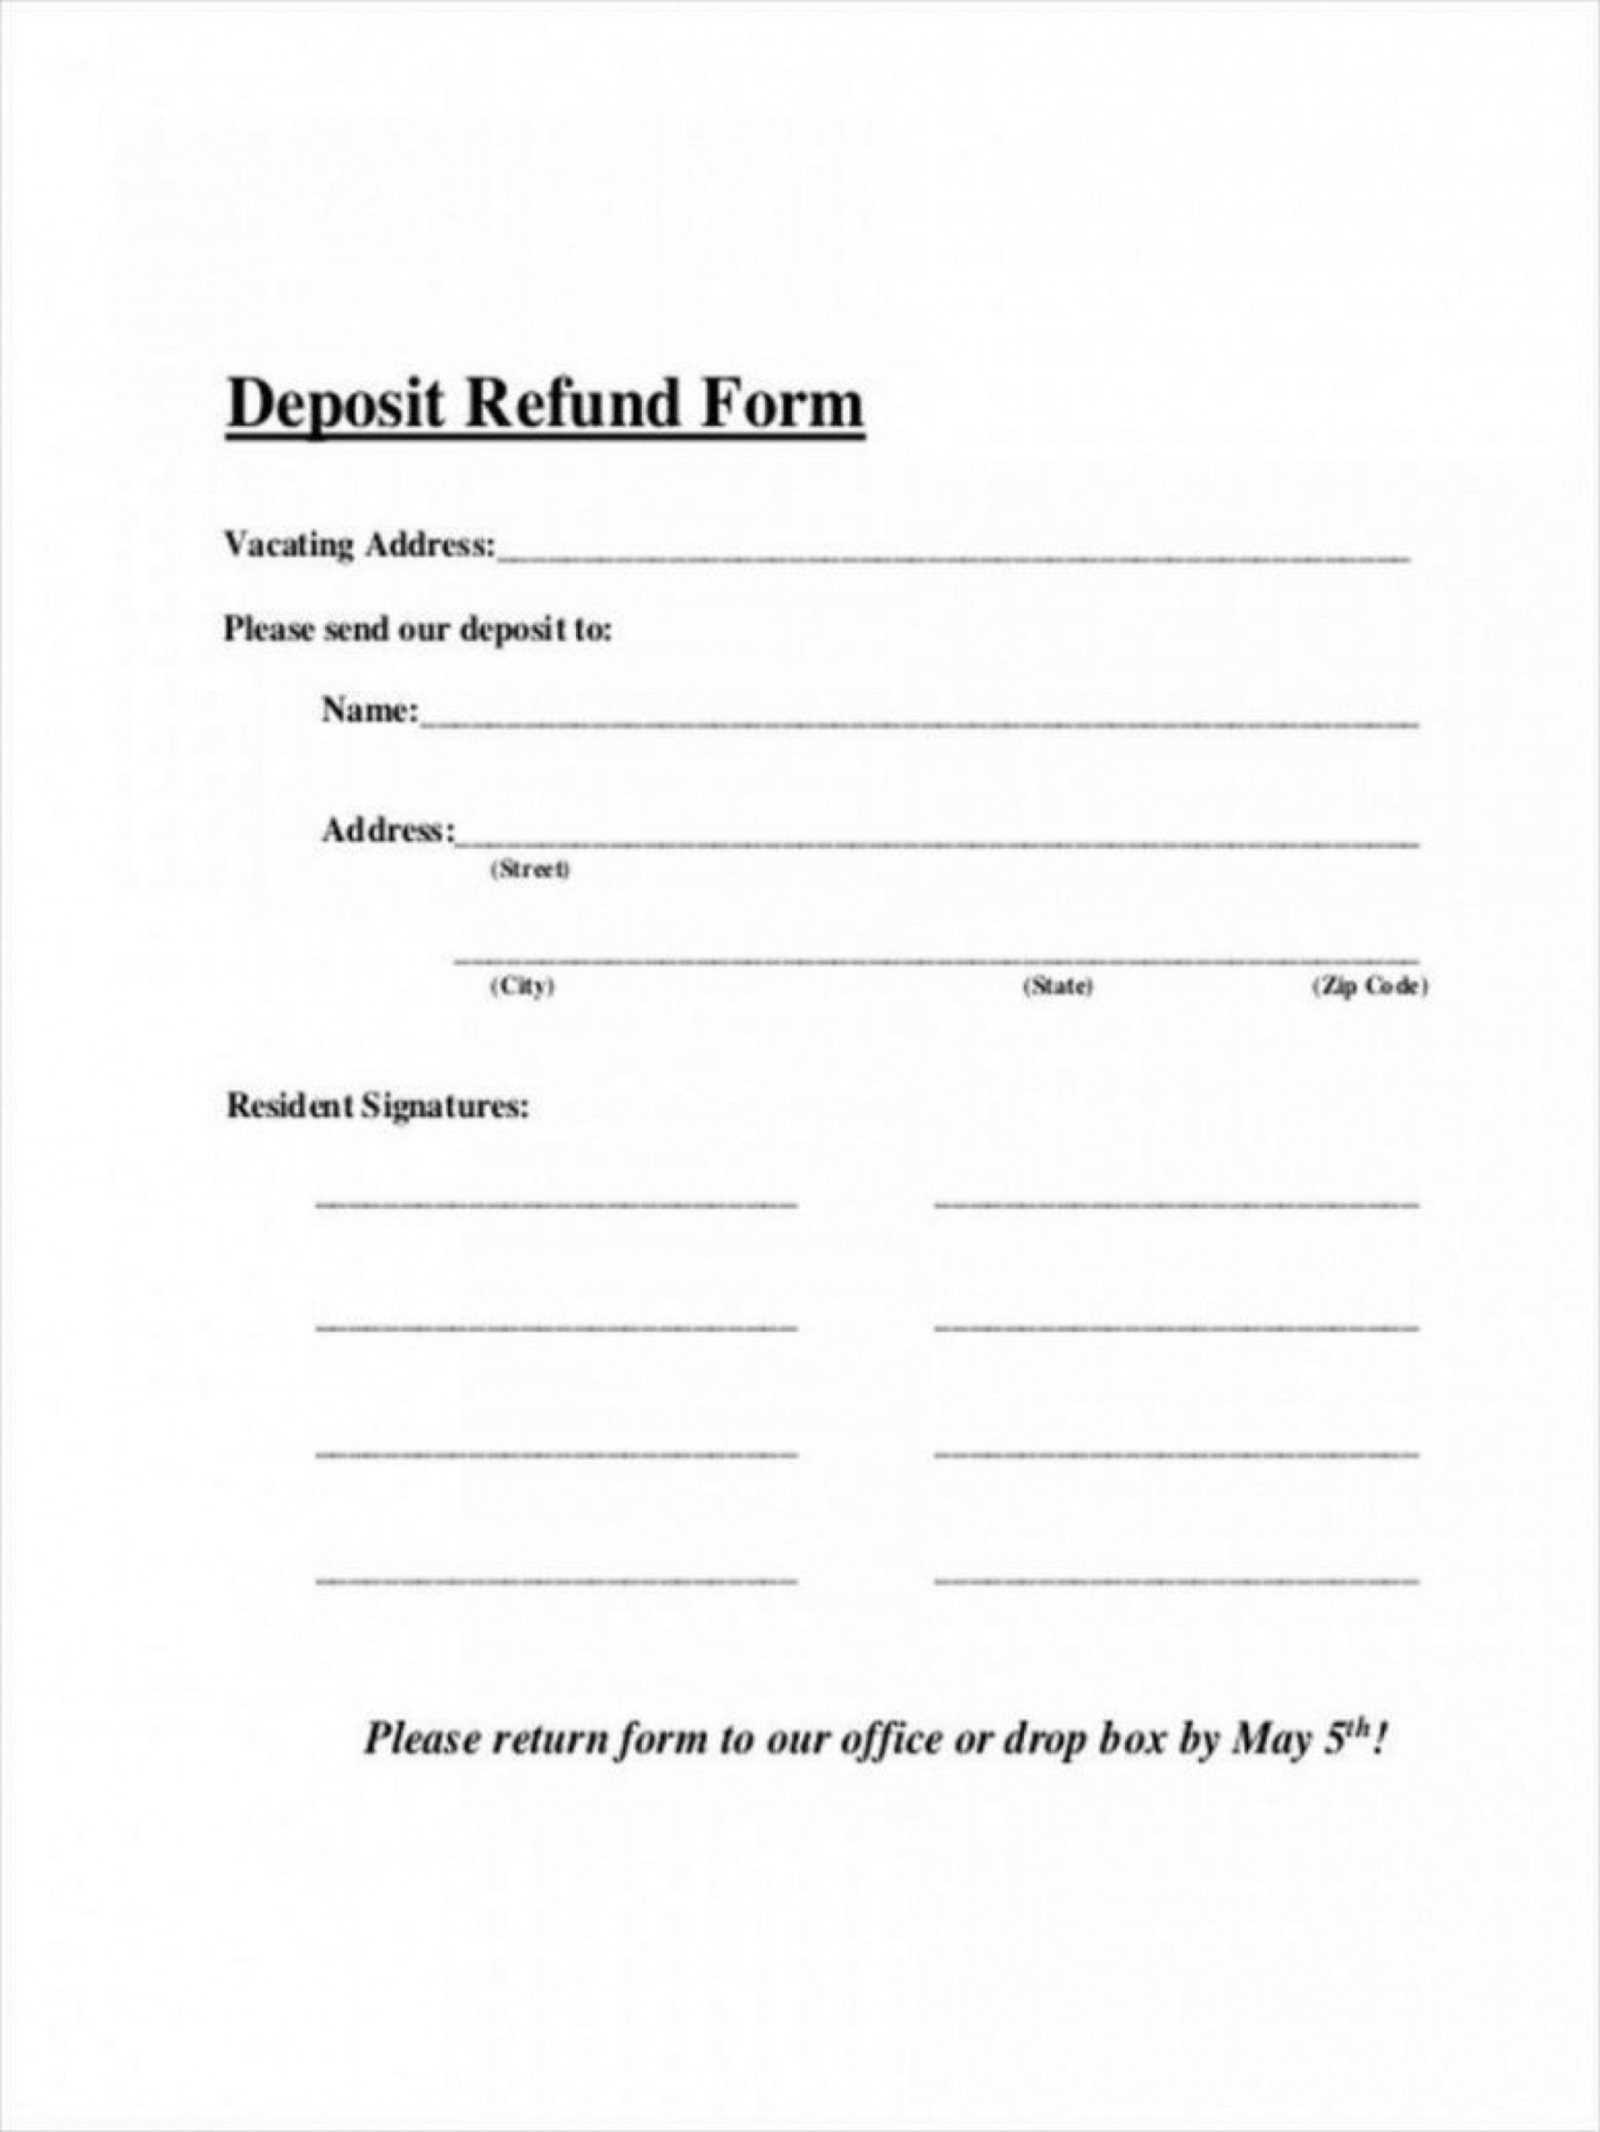
A rental receipt must include key details to ensure both parties are on the same page. The receipt should start with the full name of the tenant and landlord. This helps confirm who is involved in the rental agreement.
Payment Details
Specify the exact amount paid, the rental period covered, and the payment method. This clarifies any confusion regarding payment and prevents disputes. If the payment is partial, include the remaining balance as well.
Property Information
List the property address or description to clearly identify the rented space. This helps avoid ambiguity, especially when the landlord rents out multiple properties.
Include the date of payment and the rental period it applies to. If the payment is for future rental dates, ensure that is mentioned as well. A rental receipt should also be signed by both parties to confirm its authenticity.
Canva offers a user-friendly interface with a variety of customizable templates. You can easily adjust fonts, colors, and logos, making it perfect for those who want a professional look without a steep learning curve. Simply select a receipt template and make the necessary changes.
Google Docs

Google Docs provides a simple way to create receipt templates. With its basic formatting tools, you can design and save your templates for future use. It’s perfect for anyone looking for an easy-to-use, cloud-based solution for their receipts.
Microsoft Word
Microsoft Word allows you to create receipts from scratch or modify pre-designed templates. With its wide range of text and table tools, you can format receipts to match your business’s needs. Many free templates are available directly within the program, saving you time.
One of the most frequent mistakes is neglecting to include all necessary details. Always double-check the template for fields like rental dates, property description, payment terms, and both parties’ contact information. Missing any of these can lead to confusion or disputes later.
Incorrect Payment Information

Double-check payment terms. If the rental agreement mentions a deposit, monthly rent, or any additional fees, ensure that the figures are correct and match the agreement’s terms. Misstated payment details can lead to conflicts over amounts or due dates.
Not Customizing the Template
Many people use rental templates without adjusting them to fit specific needs. Each rental situation can vary, so make sure the template reflects the particularities of your agreement, such as special conditions, maintenance responsibilities, or rules specific to the property.
To adapt a rental receipt template for various lease agreements, tailor it to reflect the specific terms and requirements of each lease type.
- Modify Lease Details: Adjust sections for property details, lease duration, rent amount, and payment schedule. For example, a long-term lease may require a different payment frequency or deposit details compared to a short-term agreement.
- Include Relevant Clauses: If the lease has special conditions, such as maintenance responsibilities or late payment penalties, add these to the template. Ensure that any specific terms outlined in the lease agreement are clearly stated in the receipt.
- Specify Payment Information: Different leases may involve varied payment methods. If the lease includes a separate security deposit, include a line item detailing the amount received, as well as any adjustments or refunds related to it.
- Adjust Formatting: Some leases may require additional space for specific clauses, while others may need a simpler format. Adjust the template’s layout to fit these needs without overcrowding the document.
- Include Signature Lines: For certain types of leases, signatures may be necessary for both parties to acknowledge receipt and agreement. Ensure these sections are present if required.
Sharing or printing your receipt is a simple task that can be done in several ways. Whether you’re looking to send it via email or get a hard copy, follow these easy steps.
Emailing Your Receipt
For a quick and easy solution, email the receipt directly from your template. Most rental receipt templates include an option to send the file through email. Make sure the recipient’s email address is correct, and attach the receipt as a PDF or image file. This method works well for both personal and business purposes.
Printing Your Receipt
If you need a physical copy, open the receipt on your device and select the print option. Ensure your printer is connected and ready to go. Adjust any print settings if necessary, such as paper size or layout, before hitting the “Print” button. This option provides a reliable way to keep a hard copy for your records.
| Method | Steps |
|---|---|
| Attach PDF or image file to an email and send it to the recipient. | |
| Open the receipt and select the “Print” option. Adjust settings and print the document. |
Now, each term appears no more than two to three times, and the text maintains its correct structure and meaning.
When creating a rental receipt template, the key to clarity is keeping the language simple and precise. Organize the document with the most relevant information at the top, such as the rental amount, payment method, and rental period. The goal is to make it easy for both the renter and landlord to understand without unnecessary details.
Structure of the Rental Receipt

Start by listing the tenant’s name, address, and contact information. This section should be followed by the landlord’s details. Next, specify the rental period clearly, including start and end dates. Include the amount paid, payment method, and any outstanding balance. Finally, offer a space for both parties to sign the receipt for confirmation.
Key Points to Include
Ensure the rental amount is clearly stated, along with the applicable tax, if necessary. Make sure to list any refundable deposits or additional charges separately. Lastly, a date and receipt number can be useful for record-keeping. A clear, straightforward rental receipt ensures transparency and trust between parties.