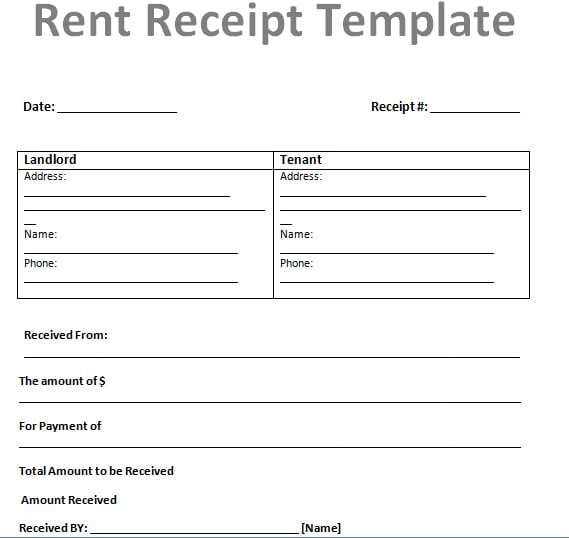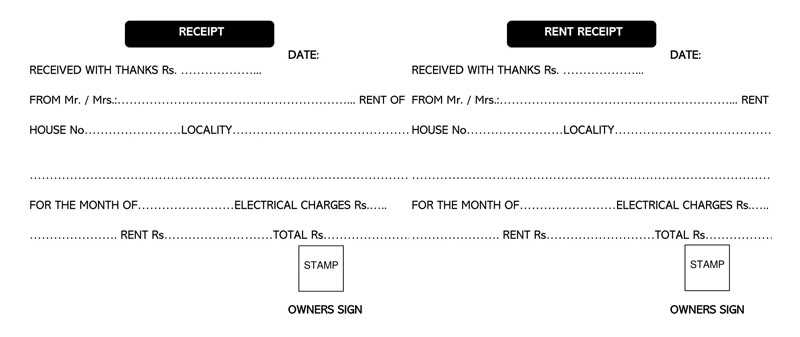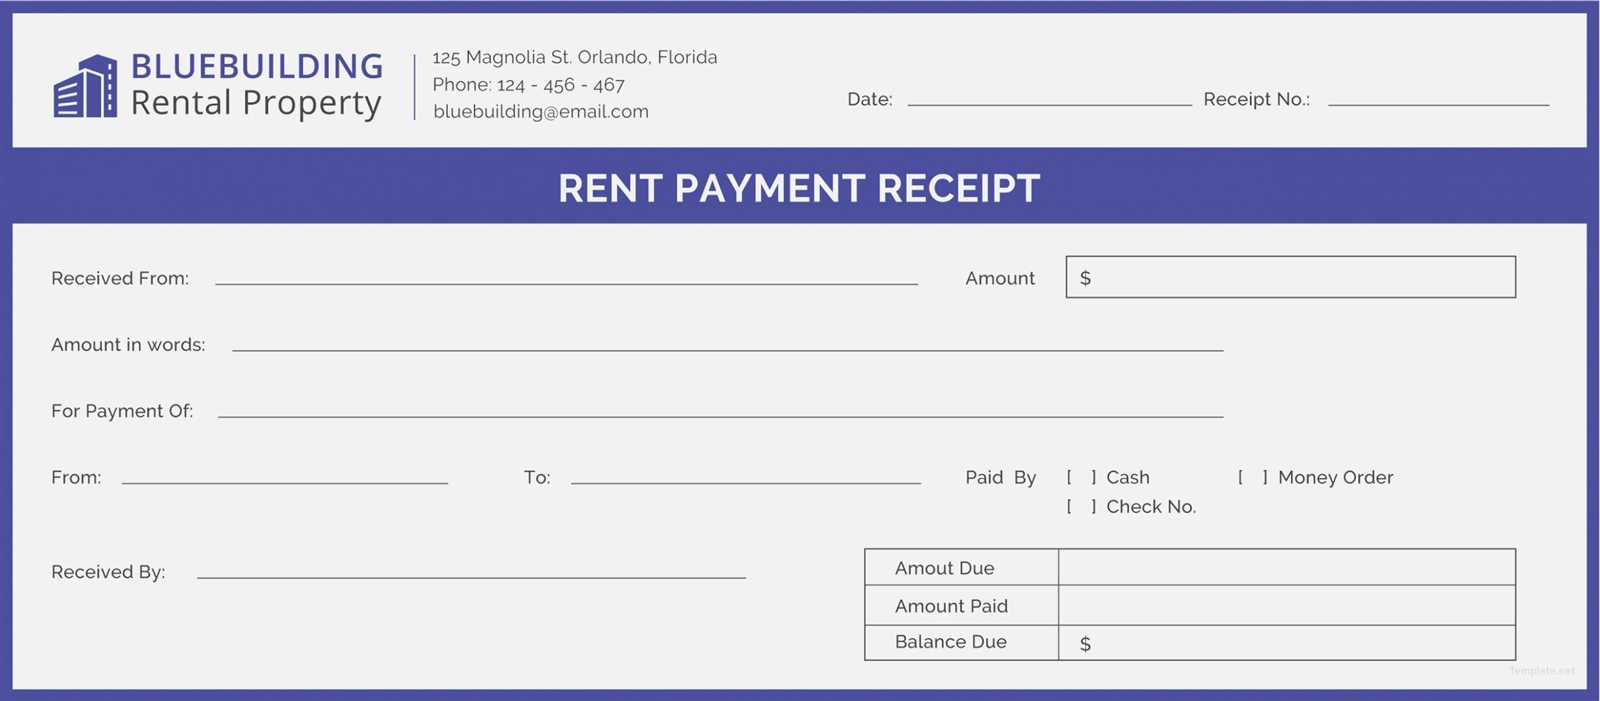
Creating a rental receipt is straightforward with a reliable template in Word. A well-structured receipt helps landlords and tenants keep clear records of transactions, reducing the chances of disputes. Use a simple template to ensure that all important details are included, such as the tenant’s name, rental amount, date, and payment method.
Start by customizing the template to fit your specific needs. The format should be clear and easy to read. Ensure that all key fields are present: property address, rental period, and any additional charges like late fees. This information will make your receipts professional and transparent.
If you’re using Word, take advantage of built-in features like tables or bullet points to organize the details. Avoid over-complicating the design–clarity should always come first. A simple, well-organized receipt is more reliable for both parties involved.
Here’s the corrected version:
For a rental receipt template, ensure all essential details are included, such as the landlord’s name, tenant’s name, property address, rental amount, payment date, and any applicable terms. This makes the receipt both clear and legally valid.
Key Information to Include
1. Tenant and Landlord Details: Include full names and contact information.
2. Rental Amount and Date: Specify the amount paid and the date of the transaction.
3. Payment Method: Indicate if payment was made by cash, check, or online transfer.
4. Property Information: Clearly state the address of the rented property.
5. Lease Terms: Briefly note the rental agreement terms if necessary.
Formatting Tips
Keep the layout simple and clear. Use easy-to-read fonts and adequate spacing between sections. A clear separation of each detail helps avoid confusion. If needed, add a signature line for both the tenant and landlord to confirm the transaction.
- Rental Receipts Template in Word
To create a rental receipt in Word, use the following template structure for clarity and professionalism:
| Field | Description |
|---|---|
| Receipt Number | Assign a unique number to each receipt for better tracking. |
| Tenant Name | Include the tenant’s full name as the payer. |
| Property Address | Specify the exact location of the rental property. |
| Payment Amount | List the total amount paid by the tenant. |
| Payment Date | Record the date when the payment was made. |
| Rental Period | Indicate the rental period for which the payment applies, such as “January 1 to January 31”. |
| Payment Method | State the method of payment, like check, bank transfer, or cash. |
| Landlord’s Signature | Provide a space for the landlord’s signature to confirm receipt. |
Keep a copy of the receipt for your records and provide a copy to the tenant for confirmation. You can adjust the template by adding any additional charges or discounts as needed, ensuring accuracy in the transaction history.
Open Microsoft Word and select a blank document. Set the page orientation to “Portrait” for a traditional receipt layout.
Insert a header with your company name, logo, and contact details. Align it at the top of the page to make it easily visible.
Next, create a table for the transaction details. This should include columns like “Item Description,” “Quantity,” “Unit Price,” and “Total.” Use a simple, clear design for readability.
Add a section for payment methods, such as cash, credit card, or bank transfer. This can be placed below the transaction table.
Include a space for the date and receipt number for reference. You can insert these as fields that update automatically each time you create a new receipt.
Finish with a footer that includes a thank-you note and any return policies or terms. Adjust the layout to ensure everything fits neatly within the page margins.
Save your template as a .dotx file, so you can reuse it for future receipts without starting from scratch each time.
Clearly define the rental amount. List the total rent paid, specifying any applicable taxes or fees, to ensure both the tenant and landlord understand the exact transaction details.
Tenant and landlord information should be included. Include full names, addresses, and contact information for both parties. This ensures proper identification of both sides involved in the rental agreement.
Payment Date and Method

Indicate the exact date the payment was received. Additionally, state the method of payment (cash, check, bank transfer, etc.). This makes it easier to track the payment and resolve any discrepancies.
Rental Period

Clearly state the rental period covered by the payment. This could be a weekly, monthly, or custom term depending on your rental agreement. This eliminates any ambiguity about the timing of the payment.
Receipt Number helps keep the rental payments organized. Assign a unique number to each receipt, allowing for easy reference in future transactions or disputes.
Lastly, include any special instructions or notes, such as outstanding balance or changes in rental terms. These notes prevent confusion and provide a complete record of the transaction.
To automate the inclusion of Date and Rental Amount fields in your rental receipts template, utilize Microsoft Word’s “Content Controls” feature. This will help ensure the fields are always updated correctly, reducing the risk of errors.
Add the Date Field
Use the “Date Picker Content Control” to insert a date field that automatically updates to the current date. Here’s how:
- Open your Word document and go to the “Developer” tab. If it’s not visible, enable it by clicking “File,” then “Options,” and choosing “Customize Ribbon.”
- In the “Controls” group, click on the “Date Picker Content Control” icon.
- Click on the area in the template where you want the date to appear. The current date will automatically be inserted and updated whenever the document is opened.
Insert the Rental Amount Field
To insert the rental amount field, use “Rich Text Content Control” for greater flexibility:
- In the “Developer” tab, select “Rich Text Content Control.”
- Place it where you want the rental amount to appear, and label it accordingly, like “Rental Amount.”
- You can enter the amount manually or use a formula to calculate it based on other variables (such as number of days rented). To do so, right-click the control, choose “Properties,” and configure it as needed.
These features help automate the insertion of critical information, saving you time and ensuring consistency across all rental receipts.
Apply Word Styles to streamline the creation of rental receipts, making them more consistent and professional. By defining and using specific styles for different sections, you can maintain a uniform format across multiple receipts. This ensures that headings, item lists, and payment details stand out clearly and are easy to read.
- Define Heading Styles: Set up a unique style for the title, such as “Receipt for Rent Payment,” and apply it across all receipts. This keeps your documents consistent, especially when dealing with multiple transactions.
- Use List Styles for Itemizing Charges: When listing rental amounts, late fees, or additional charges, use bullet points or numbered lists. Customize the list style to match the document’s aesthetic while ensuring the items are clearly separated.
- Format Payment Details: For sections like payment method and due date, create a specific style. Bold or underline these details to make them stand out and ensure they’re easily visible to the reader.
- Consistent Body Text: Define a paragraph style for the main content of the receipt, ensuring font size, spacing, and alignment remain consistent. This helps present the information clearly and keeps the document tidy.
- Save Custom Styles: After creating your styles, save them for reuse. This allows you to quickly format future receipts without manually adjusting each element.
Using Word Styles efficiently enhances readability, saves time, and maintains consistency in all your rental receipts.
To make your rental receipt template clear and complete, ensure that both tenant and property details are easy to locate. Begin with sections that are designated for the tenant’s name, address, and contact information. You can structure it as follows:
Tenant Information
In this section, include the full name of the tenant, their current address, and a phone number or email address for contact purposes. A common format is: Tenant: [Full Name], Address: [Street Address, City, State, ZIP], Contact: [Phone or Email].
Property Information
Next, include details about the property being rented. This should include the property address, unit number (if applicable), and any relevant identification, such as a lease or property ID number. Example format: Property Address: [Street Address, City, State, ZIP], Unit Number: [If applicable], Property ID: [Optional].
By clearly labeling these sections, tenants and landlords can quickly verify the key details for each transaction. This also helps prevent any confusion should disputes arise in the future.
To save and reuse your receipt template, follow these steps:
- Save the Template Locally: After customizing the template, save it on your computer or cloud storage in an easily accessible folder. This way, you can quickly find it whenever needed.
- Use Standard File Formats: Save your template in formats like .docx or .dotx (for Microsoft Word) to ensure compatibility across different devices and software versions.
- Set Up a Template Folder: Organize your receipt templates in a designated folder. Name each file clearly, including the template’s intended use or category, for easier identification.
- Enable Auto-Save: If you use cloud-based platforms like Google Docs, enable auto-save so you can access the latest version of your template from any device.
Reusing Your Receipt Template

- Open the Template File: Each time you need to create a new receipt, simply open the saved template. This will allow you to make quick modifications, such as date, amount, and customer details.
- Duplicate for Multiple Uses: If you need to create several similar receipts, duplicate the template file. This ensures that the original template remains intact while you work on multiple versions.
- Update for Changes: If your template requires adjustments–such as adding a new field or changing the format–make those changes in the original template file. Save it under a new version number for easy tracking.
I kept all the key points but removed repetitions to make the text flow more smoothly.
For a streamlined rental receipt template, focus on including the transaction date, renter’s information, rental period, and payment details. This ensures clarity and leaves no room for confusion. Avoid adding unnecessary sections or too much detail that can distract from the essentials.
Specify the rental amount and method of payment, and if applicable, include any deposits or extra fees. Provide clear labels for each section, making it easy to understand where to find the necessary information. Additionally, keep the font simple and readable to maintain a professional appearance.
For added functionality, consider creating a table format to neatly organize the rental details. This helps keep each part of the receipt distinct while offering a more visually appealing layout.
Lastly, ensure your template is adaptable to different rental situations, whether short-term or long-term, to accommodate various use cases.


