Creating a rent payment receipt template is straightforward, and it simplifies the tracking of payments for both landlords and tenants. Start by ensuring that the receipt includes the date, the amount received, and the rental period it covers. This provides clarity and ensures both parties have a clear record of the transaction.
Make sure to include a section for tenant details, including the tenant’s full name and contact information. This step helps avoid any confusion when referencing a specific payment. Don’t forget to add the property address, as this confirms which rental property the payment applies to.
Lastly, include payment methods and any relevant notes regarding the transaction. This helps in case of disputes or questions about how the payment was made, whether by cash, check, or bank transfer. A simple and well-structured receipt ensures transparency and makes record-keeping easier for both parties.
Here’s a version with reduced repetition:
To streamline your rent payment receipt, focus on key details: tenant name, property address, payment date, amount received, and payment method. Avoid unnecessary words or phrases that don’t directly support these points. Specify if the payment covers a partial or full month and if there’s a balance due. Keep formatting clear and consistent, with no redundant sections.
Rather than repeating the same information, reference previous transactions or agreements briefly. This helps maintain clarity without overloading the receipt with excessive text. If applicable, include a section for both parties to acknowledge the payment with signatures, but only if it adds value to the document.
Make sure each receipt contains unique identifiers, such as receipt number or reference code, to avoid confusion. With these small adjustments, you will have a clear, concise document that serves its purpose without unnecessary repetition.
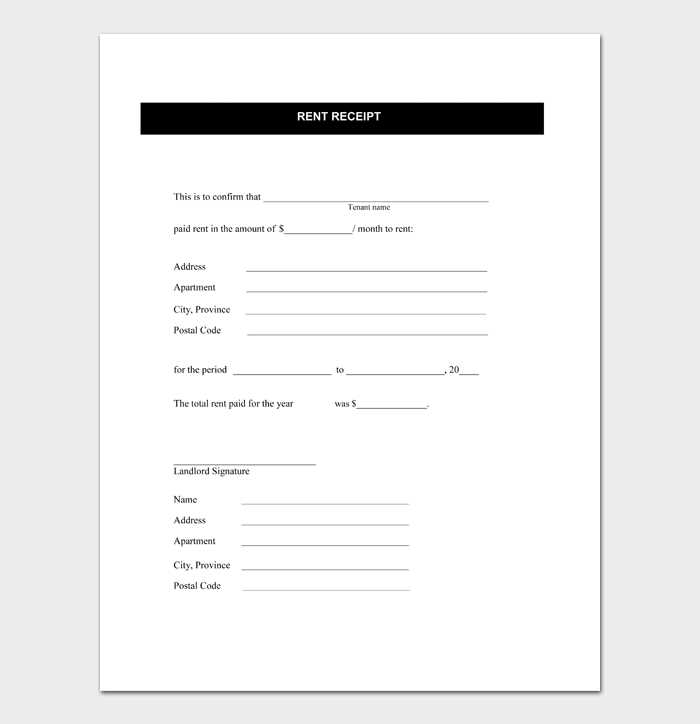
- Receipt of Rent Payment Template
To create a clear and professional rent payment receipt, include the following key details:
- Tenant’s Name – Full name of the tenant making the payment.
- Landlord’s Name – The name of the property owner or manager receiving the payment.
- Payment Date – The exact date when the rent was paid.
- Amount Paid – The total amount paid by the tenant. Ensure it matches the agreed-upon rent for the period.
- Payment Method – Specify the payment method used (e.g., cash, bank transfer, cheque).
- Rental Period – Clearly state the period covered by the payment (e.g., “January 1, 2025 to January 31, 2025”).
- Property Address – Include the full address of the rental property.
- Receipt Number – A unique reference number for tracking purposes.
- Signature – Both tenant and landlord can sign to acknowledge the transaction.
This template ensures clarity and accountability for both the tenant and landlord. Keep a copy for your records to avoid disputes in the future.
Creating a rent receipt template in Word or PDF is simple. Follow these steps to make it accurate and professional:
Step 1: Set Up Your Document

Open Word or PDF editor and create a new blank document. Begin by adding the header with your landlord or property management company name, address, phone number, and email for contact. This makes the receipt official and easily identifiable.
Step 2: Add Rent Payment Details
Include the tenant’s name, address of the rented property, and the payment date. Specify the rental period (e.g., January 1st to January 31st) and the total amount paid. If there are any late fees or other charges, list those as separate line items.
Ensure the payment method is noted (e.g., cash, check, bank transfer) along with any reference number or transaction ID for tracking purposes.
Step 3: Provide a Signature Line
Leave space for your signature and the date to confirm the payment was received. You can also include a field for the tenant’s signature if necessary.
Step 4: Save and Share

Once you’ve finalized the template, save the document. If using Word, save as a .docx file; if using a PDF editor, save it as a .pdf file. You can then easily share it with tenants via email or print a hard copy.
A payment receipt must include several key details to ensure clarity for both the payer and payee. These elements help prevent misunderstandings and provide necessary documentation for future reference.
1. Receipt Number
Each receipt should have a unique number. This ensures that every transaction can be tracked and referenced easily. It also helps with record-keeping and tax filing.
2. Date of Payment
Clearly state the exact date on which the payment was received. This helps both parties keep accurate records for financial or legal purposes.
3. Payer’s Information
- Full name
- Address
- Contact details (optional)
It’s important to identify the person making the payment. This guarantees that the payment is correctly attributed and offers a way to reach out if needed.
4. Payee’s Information
- Full name or business name
- Address
- Contact details
The payee’s details are equally important. This confirms who has received the payment and ensures transparency in the transaction.
5. Payment Amount
Include the total amount paid. Clearly state it in both numeric and written formats to avoid confusion.
6. Method of Payment
- Cash
- Credit card
- Bank transfer
- Online payment platforms
Specify the method used for payment. This provides a clear record for both parties, ensuring there’s no doubt about how the transaction occurred.
7. Description of the Transaction
Provide a brief description of the reason for the payment. Whether it’s rent, service, or product-related, clarity here avoids ambiguity later on.
8. Signature (Optional)
While not always required, including a signature adds an extra layer of authenticity to the receipt. A signed receipt can act as a legal record in case of disputes.
Begin by identifying the key terms specific to each rental agreement. For short-term leases, highlight dates, security deposits, and utilities included. For long-term leases, focus on payment schedules, lease durations, and renewal clauses. Adjust the layout to prioritize information based on the rental type and payment structure.
Modify the payment section to match the frequency of payments. For monthly rentals, list the payment due date and amount. For weekly or daily rentals, ensure the template reflects the shorter intervals. If rent varies based on conditions, such as seasonal rates, include fields for changes in rent amounts.
In case of multiple tenants or co-signers, add spaces to list each party’s information. Specify individual responsibilities, like which tenant covers utilities or maintenance. For commercial leases, adapt the template to include details about business-related expenses and any shared building costs.
| Lease Type | Key Customization | Example Fields to Add |
|---|---|---|
| Short-term rental | Focus on dates, security deposit, and utilities | Check-in/check-out dates, deposit amount |
| Long-term lease | Include payment schedules, lease term, and renewal clauses | Lease start/end dates, monthly rent, renewal options |
| Commercial lease | Cover business-related expenses and shared costs | Utility split, maintenance charges |
For each rental agreement type, ensure that the tenant’s responsibilities are clearly defined. Include provisions for late fees or penalties if applicable, and make sure these terms are easily noticeable within the document. If the agreement includes a pet policy or smoking regulations, add appropriate sections to avoid confusion.
Accurately recording payment dates and amounts is key to maintaining clear financial records. Begin by documenting the payment date immediately after the transaction. This avoids confusion and ensures accuracy. Use a consistent format for dates, such as MM/DD/YYYY, to prevent errors and make sorting easier.
For each payment, note the exact amount received. Always match the payment with the agreed rental rate to ensure consistency. If there are any discrepancies–such as partial payments or late fees–clearly mark these exceptions in your records, including the adjusted amount and the reason for the change.
Use a simple ledger or spreadsheet to track payments. Create columns for payment dates, amounts, and any additional notes such as payment method or references. This helps you keep everything organized and ensures you can quickly access information when needed.
Always verify each payment against the corresponding lease agreement or contract terms. If a tenant pays early or late, document the reason. For recurring payments, set up reminders to prevent missed entries and confirm payments on time.
How to Issue Receipts Electronically Using a Template

Start by choosing a reliable receipt template that suits your needs. Many templates are available in software like Microsoft Word, Google Docs, or specific receipt tools like QuickBooks or Zoho Invoice. These templates help streamline the process and ensure all necessary details are included.
- Enter the payment date, tenant’s name, and rental property address.
- Specify the amount paid and the payment method (bank transfer, check, cash, etc.).
- Include any applicable details about the payment period (e.g., for the month of February 2025).
- Include your contact information and any business details if applicable.
Once you’ve filled in the required information, save the document in a PDF format. This ensures the receipt is easily accessible, secure, and tamper-proof.
Send the receipt through email, either by attaching the PDF file directly or using email services that allow attachment of receipts. For quicker access, some software solutions provide a “Send Receipt” feature, which automates this step.
If you use an online invoicing system, the template can automatically generate receipts based on the payment records. Many of these platforms also allow you to customize templates with your logo and specific payment details to make them look more professional.
Ensure you include the correct rental amount. A common mistake is entering the wrong figure or leaving it blank. Double-check the payment amount and compare it with the agreed-upon rent before finalizing the receipt.
Clearly specify the payment date. Omitting the date or listing an incorrect one can lead to confusion. Make sure the date matches the payment transaction or the agreed-upon due date.
Include accurate tenant details. Mistakes in the tenant’s name or contact information may lead to issues later. Always verify the tenant’s full name and address before printing the receipt.
Don’t forget the rental period. The receipt should reflect the exact start and end dates of the rental period covered by the payment. Missing this information can create ambiguity about which time frame the payment corresponds to.
Ensure the payment method is specified. If the rent was paid via bank transfer, cash, or check, this should be clearly noted in the receipt. Without this, the payment record may lack clarity.
Avoid vague descriptions. Be specific about the rent payment and avoid using general terms like “payment received.” Clearly state that it is for the rent of a specific property and include any additional fees, if applicable.
| Common Mistakes | How to Avoid |
|---|---|
| Incorrect rental amount | Double-check payment details |
| Missing or incorrect payment date | Ensure the date matches the transaction |
| Incorrect tenant information | Verify the tenant’s name and address |
| Lack of rental period | Include the start and end dates of the rental |
| Unspecified payment method | Clearly state how payment was made |
| Vague description | Be specific about the payment purpose |
Receipt of Rent Payment Template
Use a straightforward template to issue rent payment receipts, ensuring clarity and accuracy for both parties. Include essential details such as the tenant’s name, the rental property address, the payment date, the amount paid, and the payment method.
Key Elements to Include
Start with the tenant’s full name and the rental address, clearly identifying the lease agreement in question. Record the exact amount paid and the date of payment. Specify the payment method (cash, check, bank transfer, etc.) and provide a unique receipt number for easy tracking. Sign the receipt and offer a copy to the tenant.
Formatting Tips
Make sure the text is legible and spaced appropriately. Use a clean, professional font. This makes it easy to verify all details and helps avoid confusion later. Always store copies for future reference in case of disputes.