If you’ve misplaced a receipt, it’s not the end of the world. Start by gathering all the relevant details of your purchase, such as the date, amount, and store information. Having this data at hand will simplify the process of completing the lost receipt form.
The template should ask for basic information like the purchase date, the total amount, and the name of the store or service. Make sure you add any extra details that could assist in identifying the transaction, such as the method of payment or the items purchased.
Keep the form clear and concise, as it will speed up the verification process. Double-check for accuracy before submitting it to the appropriate department. In many cases, you might be asked to provide additional proof, such as bank statements or email confirmations. This extra step can help confirm the legitimacy of your claim.
Once submitted, expect to hear back from the service provider within a reasonable timeframe. If no response comes, it’s perfectly fine to follow up and ensure everything is moving forward smoothly.
Here’s the corrected version:
To address the lost receipt issue, use this straightforward template to submit your request. It’s important to include as many details as possible to help the vendor or service provider locate the transaction. Below is an example of a simple and clear form you can use:
| Field | Details |
|---|---|
| Full Name | Enter your first and last name |
| Email Address | Provide the email used for the transaction |
| Phone Number | Include a contact number where you can be reached |
| Transaction Date | Specify the date when the purchase was made |
| Amount | State the amount paid |
| Item Purchased | List the item or service you purchased |
| Payment Method | Include whether it was a card payment, PayPal, etc. |
| Transaction ID | If available, provide the unique transaction number |
| Additional Notes | Any other relevant details that can assist in locating the transaction |
Once you fill out the form, submit it to the relevant company or service provider. They should be able to process your request efficiently using the details provided.
- Lost Receipt Form Template Guide
To create a lost receipt form, begin by including the necessary fields that will capture key details. The form should request the date of purchase, the amount spent, and a description of the item(s) purchased. Include a section for the reason why the receipt is lost, along with any other supporting information the customer might provide to validate the claim.
Ensure the form has a space for the contact details of the individual filling it out, including their name, phone number, and email address. This ensures that follow-up communication can occur without delays. It’s also a good idea to add a section for the method of payment, as this information can help cross-check the claim.
Next, include a disclaimer or statement that assures users the form is for official use only and that fraudulent claims will be investigated. This adds clarity and deters misuse of the form.
Finally, make the submission process clear. Specify if the form should be submitted online, via email, or in person. Provide a clear deadline for submission to streamline the process and avoid confusion.
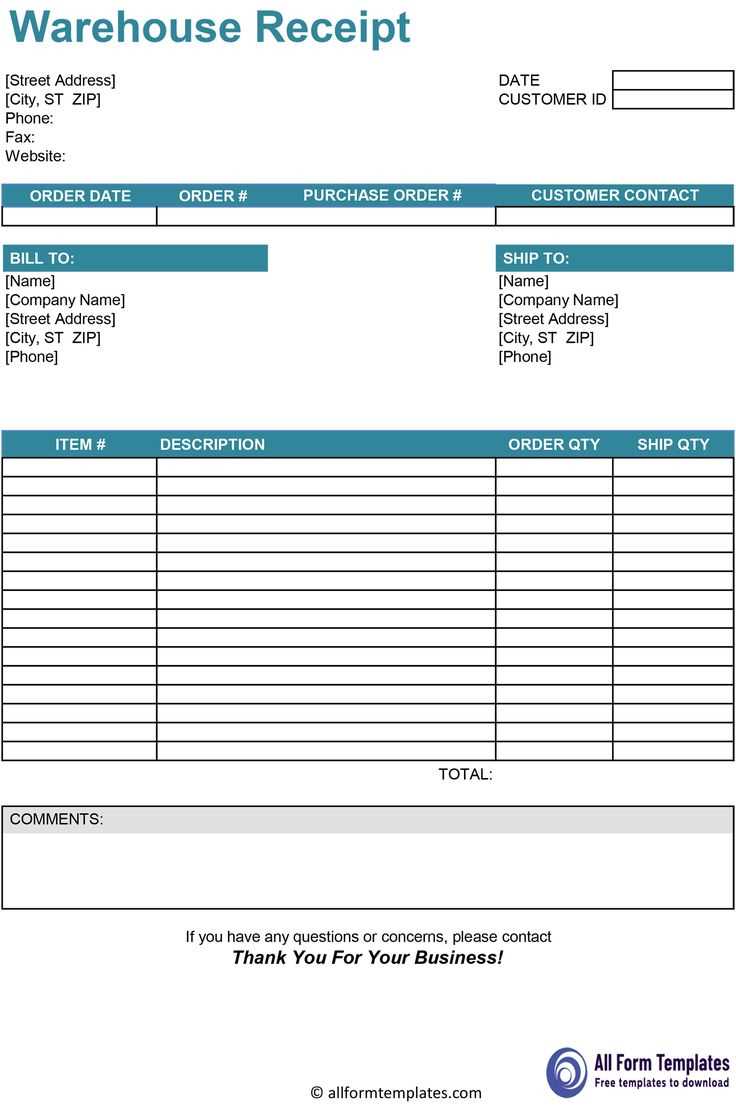
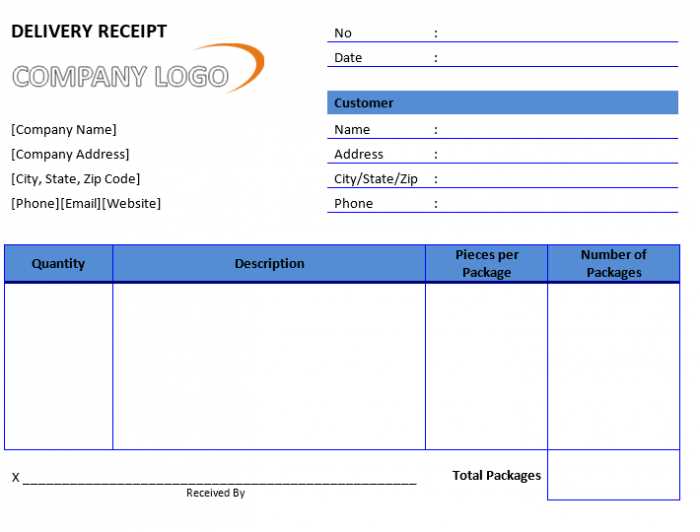
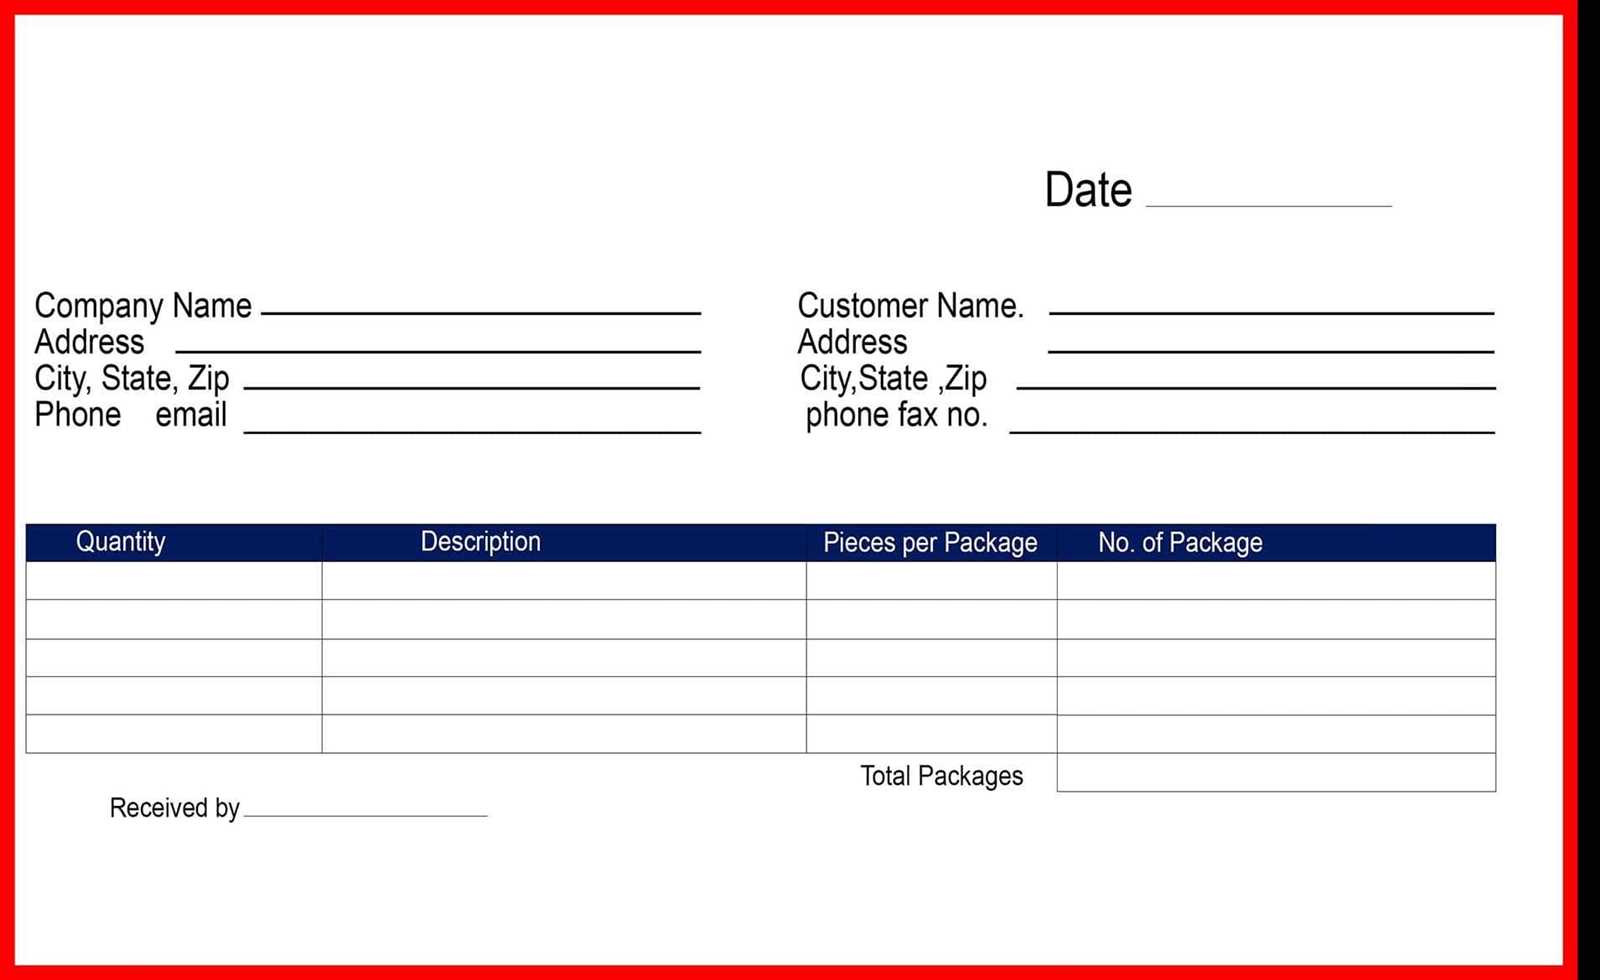
To create a functional lost receipt template, include the following key details: the date of the transaction, the amount spent, the vendor or business name, the purpose of the purchase, and any reference numbers such as order or transaction ID. These elements provide enough information for verifying the purchase while maintaining clarity.
Organize the form into clear sections. Start with basic details like customer name, contact information, and the reason for the missing receipt. This helps to verify the identity of the person requesting reimbursement or proof of purchase. Follow this with transaction details, including the payment method used, and space for any supporting documentation that could confirm the transaction, such as bank statements or screenshots of electronic payments.
Ensure the template has space for both printed and handwritten entries. This allows users to complete the form manually or digitally. Use simple formatting to keep the document accessible and easy to navigate. Clearly label sections, and provide instructions for each part, particularly where users may need clarification.
Lastly, add a section for the signature of the person making the request. This serves as confirmation that the information provided is accurate. Keep the layout neat, avoid excessive text, and ensure there is sufficient space for additional notes or explanations if necessary.
Ensure your receipt form includes these key details for accuracy and clarity:
- Date of Transaction – Always note the exact date to track when the payment occurred.
- Vendor Information – Include the business name, address, and contact details. This helps identify where the transaction took place.
- Customer Details – If applicable, include the name or account number of the customer for easy reference.
- Description of Goods or Services – A clear breakdown of what was purchased, including quantity and item description.
- Amount Paid – The total amount, including taxes or discounts, should be clearly stated, with an indication of currency.
- Payment Method – Specify how the payment was made (e.g., credit card, cash, or check).
- Receipt Number – Assign a unique number to each receipt for tracking purposes and easy retrieval.
Additional Information to Consider
- Return or Refund Policy – If relevant, include a note about the vendor’s return policy for customer convenience.
- Signature – Include a space for signatures when required, especially for significant transactions.
Ensure your receipt form includes the necessary information required by law. This often includes the business name, address, contact details, and tax identification number. Verify the format and content to comply with local tax laws, as they can vary between regions.
Include Transaction Details

Clearly list the transaction date, itemized list of goods or services, their quantities, prices, and total amount paid. Double-check that the correct tax rates are applied and indicated on the receipt, including any applicable discounts or surcharges.
Stay Updated with Tax Regulations

Regularly review tax regulations to ensure your receipt form remains compliant with the latest changes in tax rates, exemptions, or new requirements. This step reduces the risk of non-compliance and potential fines.
Double-check the accuracy of the information you provide. Mistakes in dates, amounts, or vendor names will delay the process and can lead to rejection. Always verify details before submission.
Missing Required Information

Leaving out essential details, such as transaction numbers or payment methods, can cause your claim to be rejected. Make sure to include all the information the form asks for, including any receipts or proof of purchase, if available.
Failure to Follow Format Guidelines
Not adhering to the required format can lead to confusion and delays. Ensure your form is neat, legible, and follows the submission instructions exactly. Check if you need to print or submit the form digitally, and ensure it is appropriately signed or dated, if necessary.
Start by organizing your receipts digitally. Use scanning apps to store copies of receipts as soon as you receive them. This way, even if the original is lost, you can quickly access the digital version for claims or returns. Keep your files organized by categories, such as purchase type or date, making retrieval simple when needed.
Contact the Merchant Directly
If you’ve lost the receipt, the first step is to reach out to the merchant. Many businesses can track purchases by the method of payment or customer account information. Provide as much detail as possible, including the date of purchase, the item(s) bought, and payment method, to help them locate your transaction quickly.
Utilize Credit Card or Bank Statements
If contacting the merchant doesn’t yield results, your credit card or bank statement can serve as proof of purchase. Look up the transaction on your statement and ensure the merchant’s name and date align with your claim. This can often be enough for refunds or warranty claims, especially when paired with digital receipts or tracking information.
Store receipt forms in a secure, organized location to avoid misplacement. Use a dedicated folder or binder for physical copies, ensuring they are easy to access. For digital receipts, create a specific folder on your device with clear labels for different categories, such as purchases or expenses.
Organize by Date or Category

Group receipts based on their dates or types of transactions. This method helps quickly retrieve any necessary documents. For instance, categorize receipts by months or types like travel, office supplies, or utilities.
Back Up Digital Receipts
Back up digital receipts in cloud storage or external drives. This ensures that even if your device is lost or damaged, your records remain safe and accessible.
- Consider using cloud services with strong security features to protect sensitive information.
- Regularly update and check your backups to ensure all files are stored correctly.
Use receipt management software or apps to store and track digital receipts. These tools often provide automatic organization by date, store name, and transaction amount, making it easy to locate any receipt with a quick search.
Review and Purge Regularly
Regularly review stored receipts to remove unnecessary or expired documents. Create a schedule, such as quarterly, to go through your receipts and discard any that no longer serve a purpose.
To create a “Lost Receipt Form,” begin by gathering the necessary details. Include sections for basic information like the customer’s name, address, and contact details. Clearly ask for specifics about the lost receipt, such as the date of purchase, the item(s) bought, and the purchase amount. Add a declaration for the customer to confirm the loss of the receipt and a statement explaining that the information provided is accurate to the best of their knowledge.
Design tip: Make the form easy to read by using simple, clear labels and logical flow. Keep the length minimal, focusing on only the most important details. Ensure that users can easily submit the form online or via physical mail, depending on your business setup.
Verification process: Consider asking for additional proof of purchase, such as bank statements, if available, to help verify the claim. Be transparent about how the information will be used, ensuring privacy and data security for customers.
Remember: Offering a simple and quick process helps maintain customer trust, especially when they are dealing with a lost receipt. This makes it more likely for them to complete the form and resolve the issue smoothly.