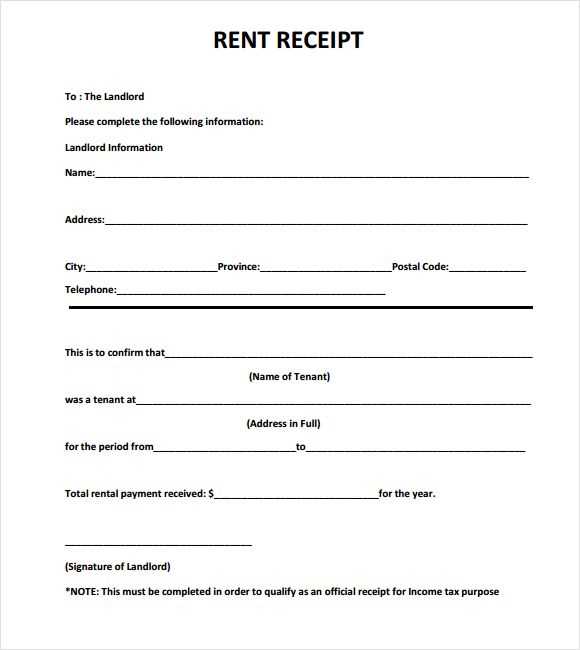
If you’re looking for a simple yet professional way to create rental receipts, a Google Doc template can be your go-to solution. With just a few clicks, you can have a clean and functional receipt ready to use. Using a template not only saves you time but also ensures consistency across all your transactions.
Start by choosing a template that matches the specific needs of your rental business. Some templates allow you to easily customize details like the rental period, amount paid, and tenant information. This customization helps make the receipt look tailored to your business, while still maintaining a standard format.
Once you’ve selected or created the right template, simply input the relevant data for each transaction. This includes renter details, property specifics, rental dates, and any additional charges or discounts. A clear breakdown of costs helps avoid confusion and keeps both parties on the same page.
Incorporating Google Docs also means you can share or store your receipts digitally. Easily email receipts directly to tenants or save them in your preferred cloud storage for easy access later. The convenience of using Google Docs for rental receipts makes it an ideal tool for busy landlords and property managers.
Here’s an improved version with reduced repetition while keeping the meaning intact:
To make your rental receipt template in Google Docs more concise, focus on clarity and accuracy while eliminating unnecessary redundancy. Instead of repeating the same details across different sections, streamline the process by grouping related information together. For example, if you include rental dates and charges in multiple parts of the document, consolidate them into a single section to avoid confusion.
Consolidating Key Details
Keep the rental item description, cost, and dates in one place. This simplifies the structure, making it easier for both the renter and the recipient to quickly verify important information without needing to cross-reference other sections.
Using Simple Formatting
Use bullet points for clearer presentation of multiple items or charges. This keeps the content organized, ensuring no vital information is overlooked. Additionally, reduce the use of full sentences when short phrases will suffice to maintain a neat, professional look.
By focusing on the key elements and minimizing repetition, the rental receipt becomes easier to read and more functional for both parties involved. The simpler layout also improves its legibility on various devices, making it practical for quick reviews and record keeping.
- Customizing the Template for Various Rental Agreements
Begin by adjusting the payment terms section to fit the specifics of the rental agreement. For short-term rentals, clarify the rental duration, including any late fees. For long-term agreements, specify the deposit requirements and rent payment schedules. Ensure both parties understand the due dates and penalties clearly.
Adjusting Terms Based on Property Type

For real estate rental agreements, add clauses for property maintenance, utilities, and tenant responsibilities. Include details like property inspections, which are often necessary in long-term contracts. For equipment rentals, focus on item care and usage limits, highlighting damage policies and repair fees.
Special Clauses and Additions

Include specific clauses such as pet policies, security deposits, or insurance requirements depending on the nature of the rental. Add clear terms for early termination or renewal options if applicable. These additions tailor the template to meet the needs of both the landlord and the tenant or renter.
Automating fields in your rental receipt template can save valuable time. Use Google Docs’ built-in features like Google Forms or data from Google Sheets to automatically populate fields. This minimizes the need for manual input and ensures consistency across multiple receipts.
One way to add automated fields is by creating a linked Google Sheet that stores rental information. Set up the template to reference specific cells, and Google Docs will pull in data such as customer name, rental dates, and payment amounts. This approach allows you to quickly generate a new receipt without re-entering details every time.
To add the automated fields, use the “Insert” tab in Google Docs to include placeholders, like {{customer_name}} or {{rental_period}}. Connect these placeholders to a Google Sheet using Google Apps Script or the mail merge function. Once the data is available in the sheet, the fields will automatically fill in when you generate the receipt, ensuring all necessary details are correctly displayed.
For even more efficiency, set up a script that triggers automatically whenever new rental information is added to the Google Sheet. This process reduces the chance of human error and helps keep everything up to date with minimal effort.
Align the text to the left for a clean, easy-to-read layout. This creates a straightforward flow that users can follow quickly.
Use bold for key details like the transaction date, total amount, and payment method. This makes the most important information stand out at a glance.
Ensure consistent font size and style across all sections. This maintains a uniform look and avoids distraction. Avoid mixing too many font types.
Separate sections with clear line breaks or horizontal lines. This helps customers identify different parts of the receipt, such as itemized costs, taxes, and total.
Include a clear header with your business name and contact information. Place this at the top for easy reference.
List all purchased items with precise descriptions, quantities, and individual prices. A well-organized itemized list helps verify the purchase details and reduces confusion.
Ensure the total is clearly marked at the bottom, with any discounts or taxes shown separately. This way, customers can easily verify the final amount.
Consider adding payment method details at the bottom, especially for card payments, as this adds transparency and clarity to the transaction.
For online rentals, include a return date or rental duration clearly. This avoids disputes and helps both parties stay aligned on expectations.
Share receipts through cloud storage platforms such as Google Drive or Dropbox. These services offer easy access and security for storing and sharing files. Upload your receipts and organize them into folders by category or date for easier retrieval. Use shared links to quickly send receipts to others.
Consider using a receipt scanner app to digitize physical receipts. Many apps allow you to capture an image, convert it into a PDF or other file formats, and store it directly in your cloud storage. This helps reduce clutter and ensures all your receipts are stored digitally.
Organize Receipts by Category
- Group receipts by purpose–e.g., business, personal, or tax-related.
- Create subfolders for each category and subcategorize by month or year for easier search.
- Label each receipt file with a descriptive name, such as the store name and date, to simplify searches.
Use Receipt Management Software
- Explore apps like Expensify or Shoeboxed, which offer receipt scanning and automated categorization features.
- These tools help track expenses and automatically generate reports, saving you time on manual entry.
This version maintains clarity and avoids unnecessary repetition. Let me know if you’d like any more tweaks!
To ensure a clean, user-friendly rental receipt template, focus on streamlining the layout and keeping information clear. Include necessary details like rental item description, rental period, payment amount, and due date. Avoid clutter by removing any non-essential fields.
Use Clear Headings

Each section of the receipt should be clearly labeled. For example, use headings like “Rental Details,” “Payment Information,” and “Terms & Conditions” to guide the reader. This helps users easily find the information they need without confusion.
Minimal Design
Stick to a simple, clean design. Use basic formatting like bold text for important details and bullet points to list key terms. Keep colors and fonts minimal to enhance readability and prevent distractions.
By following these suggestions, the rental receipt template becomes both practical and visually appealing, making it easier for customers to understand the details of their transaction.