Creating a receipt template that suits your needs can streamline transactions and help maintain clear records. A well-structured receipt includes key details, such as the date, business name, item descriptions, quantities, unit prices, and total amounts. Avoid clutter by sticking to the basics and leaving out unnecessary information that might confuse the customer.
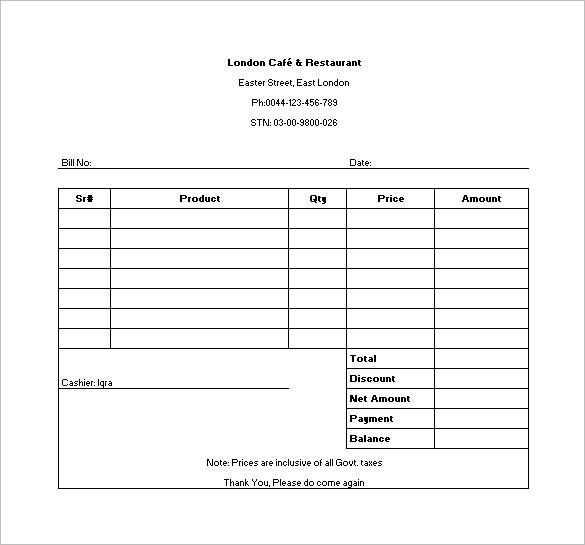
Start with the essentials: Include the business name, address, and contact information at the top. This helps customers easily reach you for any follow-up questions. Add the receipt number to keep track of each transaction. For clarity, itemize each purchased product or service with the respective price and quantity.
Incorporate tax information: If applicable, clearly display taxes separately to avoid any confusion about the total amount due. Ensure that the tax rate is included, especially if it varies by product or service. This ensures transparency in your financial dealings.
Finish with a thank you note: A brief message at the bottom, such as “Thank you for your purchase,” adds a personal touch and reinforces positive customer experiences. Make sure to leave space for additional notes, should customers need to record specific details of their purchase.
Here is the revised version with reduced word repetition:
To create a well-organized receipt template, focus on clarity and simplicity. Begin with clear headings like “Item”, “Quantity”, and “Price”, keeping each category distinct. Avoid using the same term repeatedly by diversifying your vocabulary. For example, instead of using “total” multiple times, use “amount due” or “grand total” as alternatives.
Streamlined Format
Make sure that each section of the receipt is easy to identify and read. Group related details, such as taxes and discounts, under separate headings. Include a clear breakdown of the items purchased, along with the final sum in a bold font for quick visibility.
Additional Tips
Keep the design minimalistic. Use different font weights to distinguish between headings and details. Place the date and time at the top, and end with a thank-you note or return policy. These small additions help improve the overall customer experience.
Receipt Sample Template Guide
How to Create a Basic Receipt Design
Essential Elements to Include in a Receipt
Customizing Templates for Your Business Needs
Selecting the Best Format for Your Receipt
Best Practices for Printing Receipts Effectively
How to Modify and Save Your Template
To create a functional and clear receipt, start with a simple layout that includes a header, body, and footer. The header should feature your business name and contact information, while the body contains transaction details. The footer should provide payment terms and any relevant disclaimers.
Include the following key components: the date of purchase, a unique receipt number, a description of purchased items or services, quantity, price per item, and the total amount due. Clearly display taxes, discounts, and payment methods. These elements ensure your receipt is complete and provides all necessary details to customers.
When customizing a template for your business, consider adding your logo, adjusting fonts to match your branding, and changing the color scheme to align with your company’s identity. You may also want to tailor the language and terminology based on the products or services you provide.
For the format, PDF or CSV files are commonly used due to their compatibility with most devices and software. However, if you’re using a point-of-sale (POS) system, make sure your format is compatible with it for easy integration.
For printing, ensure the receipt fits the standard paper size (e.g., A4 or 80mm width for thermal printers) and uses clear, readable fonts. Print receipts in high quality so that all information, including barcodes or QR codes, is legible.
To modify and save your template, make adjustments based on customer feedback or any changes in your business model. Keep the template editable, so you can easily update pricing, product descriptions, or terms. Save your template in a secure location for easy access and future use.