To create a functional and clear receipt deposit template, focus on including the necessary details for both the depositor and the recipient. Make sure the date and amount deposited are clearly stated, along with any relevant transaction information. Include a space for signatures to confirm the deposit’s validity and to provide a record of agreement.
Start with the header, listing the deposit’s purpose and ensuring that all involved parties’ details are listed. A receipt number or reference code can help track the transaction. Use a clear structure, dividing sections logically–such as depositor information, deposit breakdown, and signatures.
Include deposit details, such as the method of deposit, account number, and any relevant notes. These can clarify the nature of the deposit and make future referencing easier. Always ensure that the amount is written in both numerals and words to prevent confusion.
Conclude with a reminder to keep a copy of the receipt for your records. This simple step will safeguard both parties and help maintain organized financial tracking.
Receipt Deposit Template: Practical Guide
To create a receipt deposit template, begin by organizing key sections for clarity. Start with a clear title at the top, such as “Deposit Receipt.” Below, include the date and time of the transaction, followed by the name of the depositor and the account number. This ensures accurate tracking and easy identification.
Key Elements to Include
Make sure the template captures the transaction amount, both in figures and words. This reduces errors in processing. Include a space for any additional notes or reference numbers that may apply to the deposit. This can be helpful if the transaction involves specific instructions or account codes.
Formatting Tips
Keep the layout simple and clear. Use bold for headings and separate sections with lines to improve readability. Provide enough space for signatures at the bottom, ensuring that both the depositor and the bank representative can sign the receipt. Ensure that there is room for a stamp or official mark if required by your institution.
Always double-check the template for accuracy before use to ensure it meets any regulatory or institutional requirements.
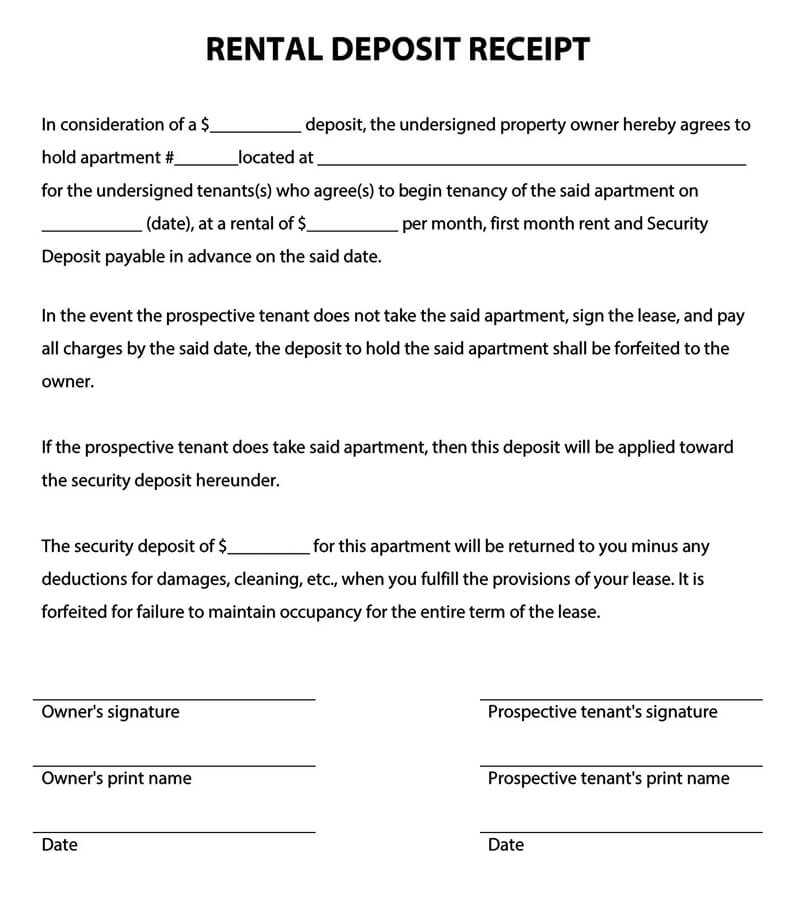
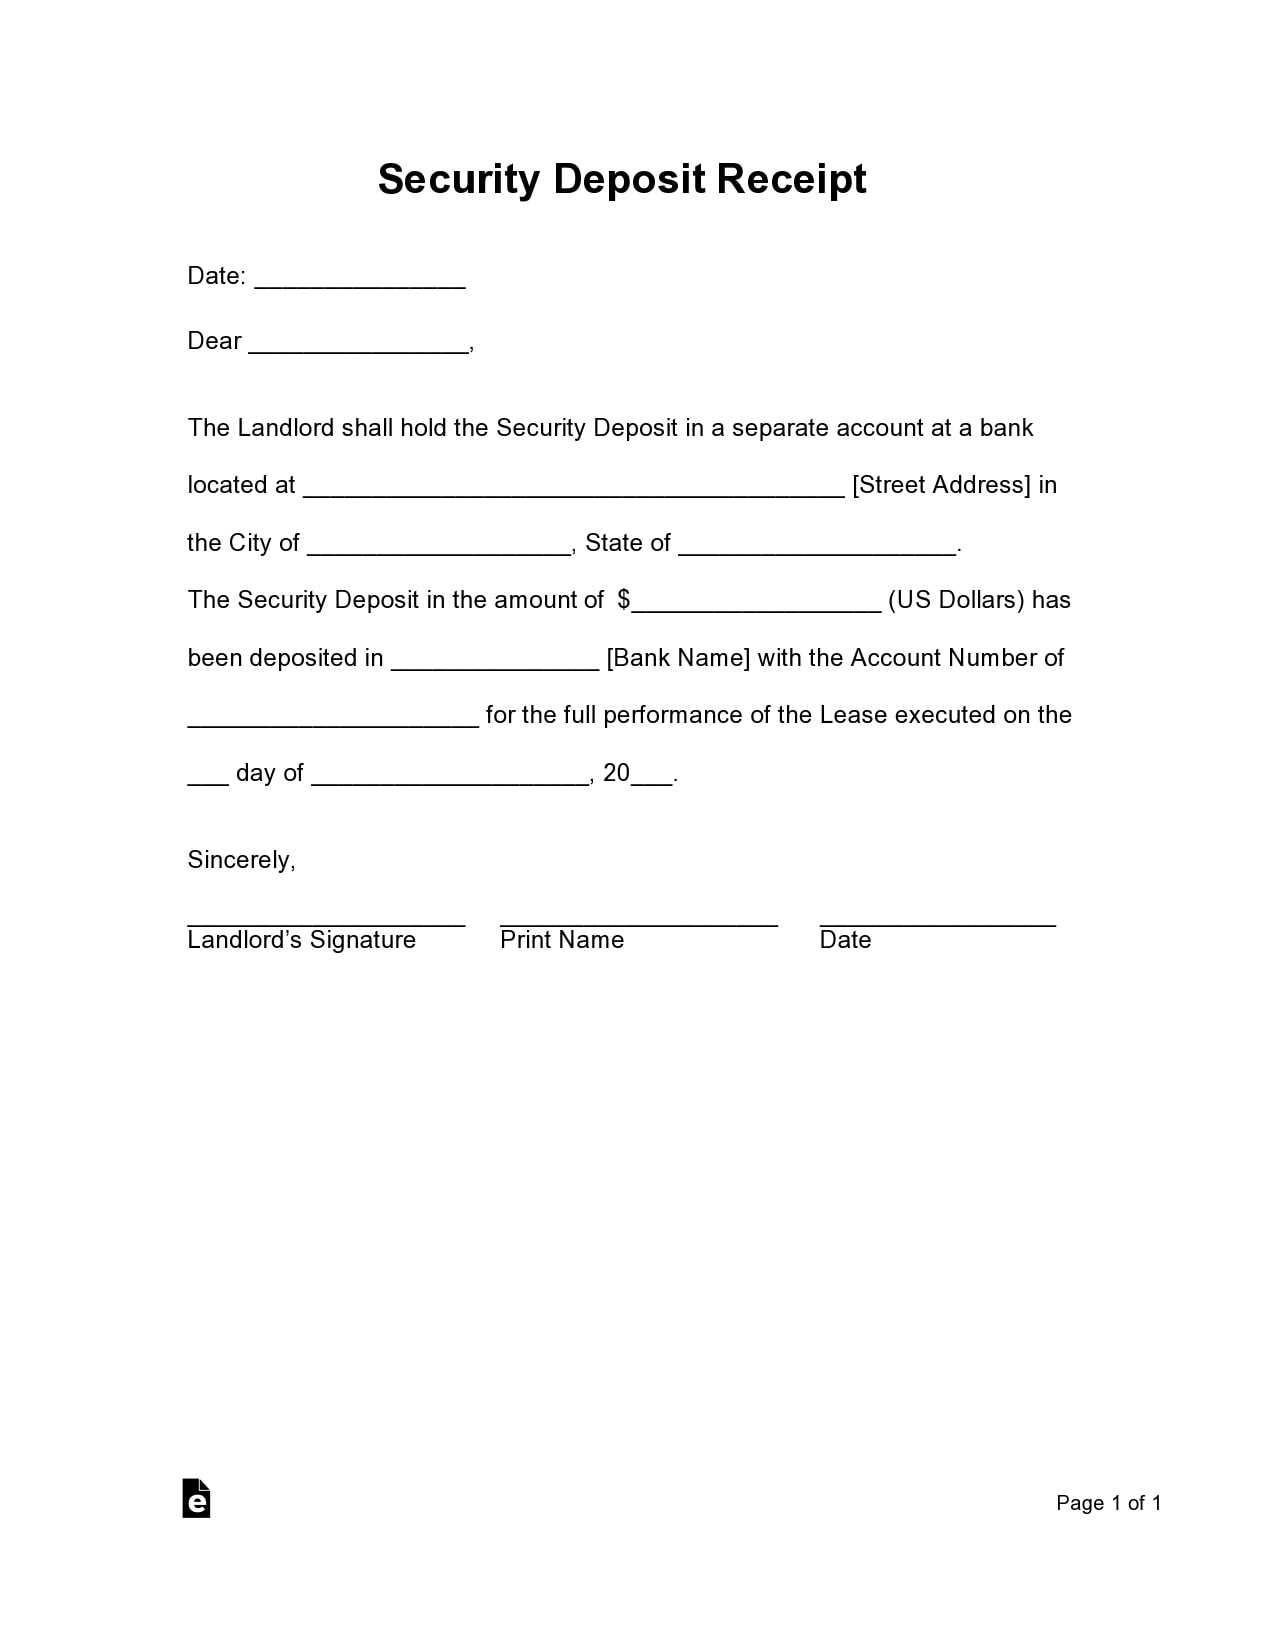
Creating a Clear Header for Your Deposit Receipt
Keep the header concise and easy to spot. Place your company name or logo at the top, ensuring it stands out. If applicable, include the name of the service or type of transaction, like “Deposit Receipt” or “Cash Deposit Confirmation,” directly beneath the company details.
Include a Date and Unique Identifier
Display the date of the transaction clearly. Also, add a unique receipt number or transaction ID to help track the deposit. This makes future reference easier and improves organization.
Ensure Readable Font and Size

Choose a bold, legible font for the header. Opt for a size that’s large enough to grab attention but doesn’t dominate the entire document. A clean, straightforward style maintains readability and professionalism.
Designing the Deposit Amount Section

Ensure the deposit amount section is clearly labeled and easily accessible. Use a large input field where users can quickly enter the amount they wish to deposit. Include currency symbols next to the input box to guide users and avoid confusion.
Position the field prominently on the form, so it’s one of the first things the user notices. Use contrasting colors for the field border and background to make it stand out without overwhelming the design.
Incorporate real-time validation, such as error messages or alerts for invalid input (e.g., non-numeric characters), directly beneath the field. This helps users quickly correct any mistakes as they fill out the form.
Offer a summary of the deposit amount below the input field, displaying the entered amount clearly. This can help users verify their input before submission. Consider using a larger font size or bold styling for this amount.
For added usability, allow users to enter the amount using predefined buttons for common deposit values (e.g., $10, $50, $100). This simplifies the process and reduces the chance of error.
Keep the section uncluttered by limiting additional elements and ensuring there is enough spacing around the input field. A minimalist design ensures that the user’s focus remains on the deposit amount without distractions.
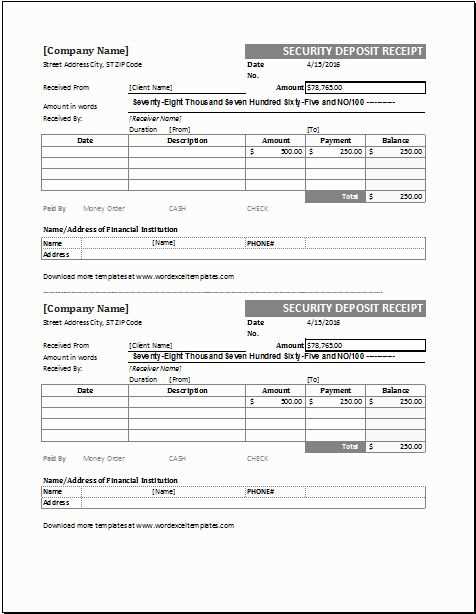
Including Account Details for Clarity

List the account number, account holder name, and any other relevant identifiers directly on the deposit receipt. These details ensure that the transaction is properly attributed to the correct account and can be tracked with ease.
Account Number

Always include the full account number. This helps prevent any confusion about where the funds should be directed, especially if the transaction involves multiple accounts.
Account Holder Name
Clearly state the name of the account holder as it appears on the account. This ensures that the transaction is linked to the correct individual or business entity.
Other Relevant Identifiers

- Branch code or location if applicable
- Routing number (for bank transactions)
- Transaction reference number for cross-checking
Including these details guarantees that both parties have a clear understanding of the transaction, avoiding potential mix-ups and making record-keeping more straightforward.
Adding Date and Time for Accurate Record Keeping
Include the current date and time for each transaction to ensure clear tracking and avoid confusion. This helps maintain an organized system where each deposit or transaction is easily traceable. Make it a habit to update the timestamp each time a deposit is recorded.
Use automatic time-stamping features if available. This will reduce human error and ensure consistency in records. When manually entering date and time, ensure the format remains consistent throughout all records to avoid discrepancies.
The table below shows an example of how date and time can be included in a receipt deposit template:
| Date | Time | Amount Deposited | Account Number |
|---|---|---|---|
| 02/08/2025 | 09:45 AM | $500 | 123456789 |
| 02/08/2025 | 10:30 AM | $200 | 987654321 |
Consider including a timestamp field in your system or template that automatically updates with each new record. This minimizes mistakes and ensures that you always have accurate data at your fingertips.
Ensuring Proper Format for Transaction Reference
Ensure transaction references are clear and consistent by following a set format. Include essential details like the transaction date, amount, and unique reference number. Avoid ambiguous abbreviations and excessive characters that could confuse recipients or processors.
Use a Standardized Structure
Adopt a standard format for all transactions. A consistent structure, such as “Transaction Date – Amount – Reference Number,” reduces errors and simplifies tracking. Stick to the same format across all deposits to ensure clarity and prevent discrepancies in records.
Include Relevant Information
Alongside the basic details, include any additional information necessary for identifying the transaction, such as account numbers or invoice IDs. This helps to quickly link deposits to the right transaction in case of future inquiries or audits.
Finalizing with Signature and Authorized Stamp
Ensure that the receipt is completed with a clear signature and an official stamp to validate the transaction. This serves as confirmation of approval and compliance with the terms outlined in the document.
- Place the authorized signature at the designated space, ensuring clarity and legibility.
- Position the company or institution’s stamp near the signature for immediate recognition of authorization.
- Check that the stamp is properly inked, leaving a distinct impression without smudging.
- Ensure that the stamp contains essential details, such as the company name, registration number, or location, as required by local regulations.
After finalizing these steps, double-check the document for completeness and clarity. The receipt should now be fully authenticated and ready for storage or submission.