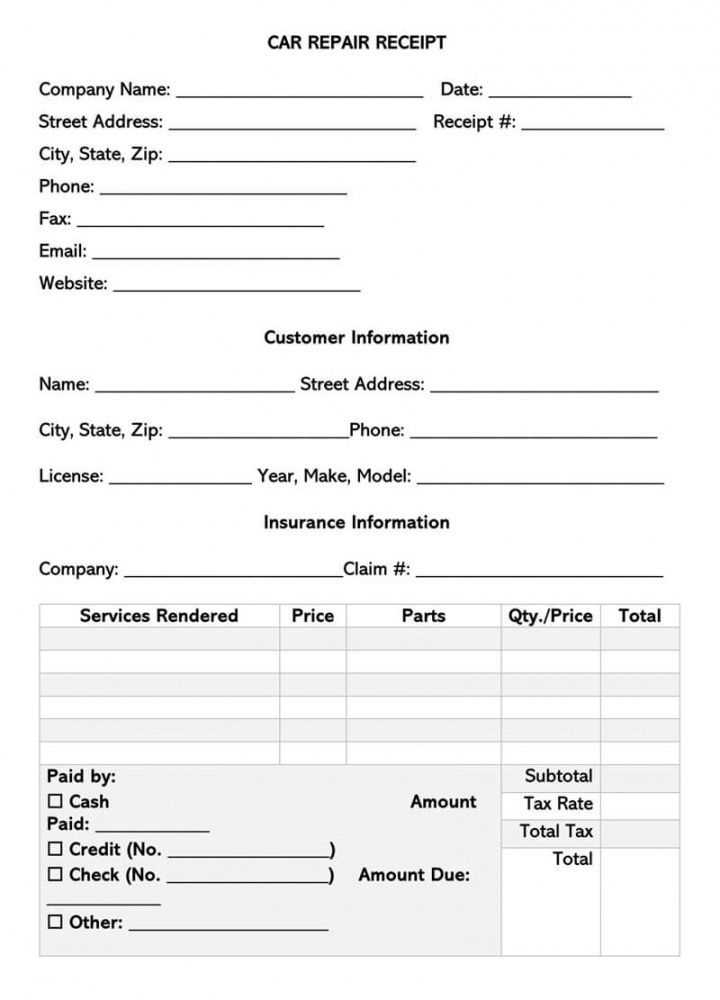
Every auto repair shop needs a well-structured vehicle repair receipt template. It ensures transparency, simplifies accounting, and provides legal protection for both the mechanic and the customer. A properly formatted receipt includes essential details like labor costs, parts replaced, and warranty terms.
For accuracy, include the shop’s name, address, and contact details. The receipt should also list the customer’s name, vehicle make and model, VIN, and odometer reading. These details help track service history and prevent disputes.
Break down charges into separate sections: labor costs, parts used, taxes, and total amount due. If any warranties apply, clearly state the terms. For digital receipts, consider adding a QR code linking to the shop’s website or customer service.
A well-designed template saves time and maintains professionalism. Whether using printed forms or digital invoices, keep the format clear, concise, and easy to understand.
Here’s the corrected version with the removal of redundant repetitions:
Remove repetitive phrases by focusing on clarity and conciseness. The repair receipt template should list the vehicle’s make and model, the repairs performed, and any parts replaced. This allows for a more streamlined and clear record. Using straightforward language avoids confusion and ensures that each section provides unique information.
To make the receipt easier to understand, break down the costs clearly. For instance, categorize labor costs, parts, and additional fees separately. This structure allows both the service provider and the customer to quickly identify each component of the total cost.
Here is an example format for clarity:
| Item | Description | Cost |
|---|---|---|
| Labor | Engine repair labor | $150 |
| Parts | Brake pads | $75 |
| Additional fees | Environmental disposal fee | $10 |
| Total | $235 |
This template format avoids redundancy by keeping the content straightforward and easily interpretable. By organizing the information clearly, both customer and service provider can follow the transaction without confusion.
- Vehicle Repair Receipt Template: A Practical Guide
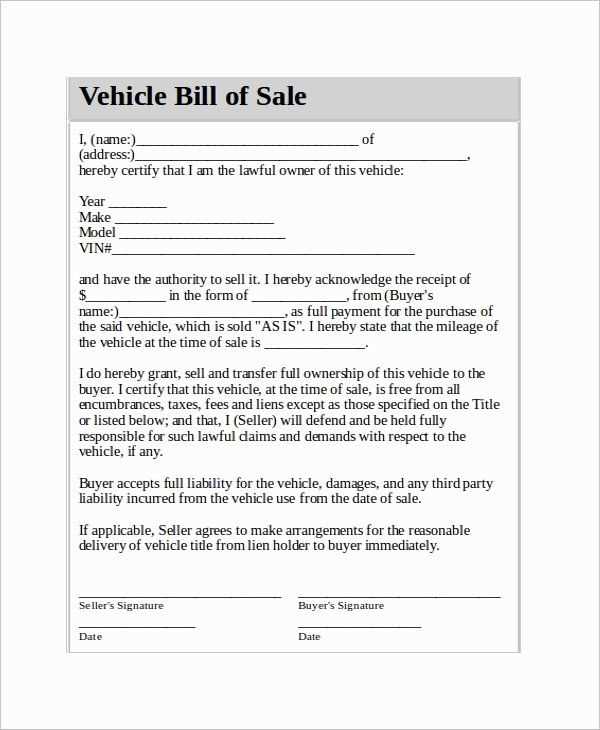
A vehicle repair receipt template simplifies the process of documenting services provided to clients. It ensures all critical details are clearly outlined, preventing confusion and providing transparency between the repair shop and the customer. The template should include fields for the repair shop’s name, address, contact information, and a unique receipt number for easy tracking.
Key Information to Include
The template must list the following key sections:
- Customer Information: Name, address, and contact details of the customer.
- Vehicle Information: Vehicle make, model, year, VIN (Vehicle Identification Number), and license plate number.
- Service Details: A breakdown of the work performed, including parts replaced, labor hours, and any special instructions or observations from the technician.
- Pricing Breakdown: Itemized list of costs, including parts, labor, taxes, and any other charges.
- Total Amount Due: Clearly state the final amount to be paid, including any discounts or special offers applied.
- Payment Method: Indicate whether the payment was made via cash, card, or another method.
- Repair Shop Details: Include warranty information for the repairs, if applicable.
Why It Matters
Using a structured template ensures both the customer and the repair shop have a complete, accurate record of the transaction. It prevents misunderstandings regarding costs and services rendered. Plus, it helps track recurring customers, offering insights into their preferences and repair history.
Make sure to update the template regularly to reflect any changes in your services or pricing. This simple practice boosts professionalism and enhances customer trust in your business.
Include the customer’s name and contact information to ensure proper identification. This helps both the business and customer keep track of the repair history. Add the vehicle’s make, model, year, and VIN (Vehicle Identification Number) for accurate records.
List a detailed description of the services performed, including parts replaced or repaired. This creates transparency and helps avoid future disputes. Specify the labor hours charged along with the hourly rate for clarity.
Clearly state the total cost for the repair, broken down by parts and labor, along with applicable taxes. This provides the customer with a transparent overview of the cost.
Include the repair date and the expected completion date (if applicable), so the customer knows when the work will be finished. Also, if the vehicle requires additional work, mention it with an estimate for those repairs.
Provide information about warranties, if any, on parts or labor, including the duration and terms of the coverage. This assures the customer that they’re protected in case of future issues.
Finally, include the shop’s name, contact details, and any legal disclaimers or terms of service that apply. This creates a clear, professional record of the transaction for both parties.
Each repair receipt must meet specific legal requirements to ensure compliance and protect both the service provider and the customer. These requirements can vary by jurisdiction, but some general standards apply across most regions.
1. Clear Itemization of Services
The receipt should clearly list each service provided, including the labor involved and any parts used. This transparency is necessary for warranty claims and for resolving disputes. The customer must understand what they are paying for.
2. Accurate Pricing

All charges should be itemized with accurate prices. Include the total cost of parts, labor, taxes, and any other fees. It is important to include any discounts or special offers applied, ensuring the customer sees the final amount owed.
3. Contact Information
The repair business must include its legal name, address, phone number, and email on the receipt. This provides a clear point of contact for future communications or warranty claims.
4. Date and Time
The receipt should reflect the date and time when the service was completed. This timestamp is critical for warranty periods and proof of service.
5. Warranty and Return Policies

- Any warranties or guarantees associated with the repair should be explicitly mentioned on the receipt.
- Clearly state the duration of the warranty and the terms under which it is valid.
6. Tax Information
Tax details, including applicable rates, should be included. This ensures that the transaction is properly documented for both the business and tax authorities.
7. Signatures
Both the customer and the service provider should sign the receipt. This serves as proof that the terms have been agreed upon and acknowledged by both parties.
8. Regulatory Compliance
Different jurisdictions may have specific legal mandates for what must be included on a receipt. Ensure that the receipt complies with local consumer protection and trade practices laws.
Begin by including your business’s name, address, phone number, and email at the top of the invoice. This makes it easy for the recipient to contact you if needed. Directly below, add the client’s details, such as their name, company, address, and phone number. Be sure to place both sets of contact information in separate sections to avoid confusion.
Include a unique invoice number for tracking and reference purposes. Follow this with the invoice date and the due date for payment. This clarifies the timeline for the recipient and ensures payment terms are clear.
Next, outline the services provided or repairs performed. Use a clean table format with columns for a brief description of each item, the quantity, the price per unit, and the total cost for each. If there are any taxes or additional fees, list them separately in a distinct line for transparency.
Summarize the total amount due at the bottom, ensuring that it is clearly marked. Specify the payment methods accepted, whether it’s bank transfer, check, or online payment. You might also want to include any late fees or payment instructions, but avoid overwhelming the client with too much detail.
Finally, include any necessary legal disclaimers or terms of service at the bottom, such as refund policies or warranty information. Ensure the font is legible, and the layout is straightforward for easy reading and quick reference.
Ensure the receipt includes accurate customer information. Mistakes like misspelled names or incorrect contact details can lead to confusion, especially if follow-up is needed.
- Incorrect Item Descriptions: Always double-check the names, quantities, and prices of the services or parts. Inaccurate descriptions can lead to disputes or dissatisfaction.
- Missing or Incorrect Dates: A receipt without a correct date can cause confusion during warranty claims or legal matters. Ensure it reflects the actual service date.
- Unclear Pricing: Avoid vague terms. Specify each charge with clarity. If applicable, break down labor costs, parts costs, and taxes for transparency.
- Failure to Include Business Details: A valid receipt must include the full business name, address, and tax identification number. Without these, it may not be accepted for reimbursement or tax purposes.
- Overlooking Payment Method: Always list the payment method used–whether cash, card, or check. This ensures both the customer and business have a clear record of the transaction.
- Incorrect Totals: Always double-check the math. An incorrect total can lead to customer complaints and mistrust.
Choosing between printable and digital vehicle repair receipt options depends on your preferences and how you plan to store and access the receipts.
Printable receipts offer a tangible record of the transaction, which can be stored in physical folders or filing cabinets for easy reference. These are ideal if you need to keep hard copies for tax purposes, warranty claims, or simply prefer a physical format. With a printable template, you can customize the receipt layout and ensure all the necessary details are included, such as service description, costs, and technician information. Simply print the completed receipt and file it as needed.
Digital receipts, on the other hand, provide flexibility and convenience. You can easily store them on your computer or cloud service, reducing clutter and allowing quick retrieval. Digital files can be sent via email, offering an eco-friendly option and making it simple to share receipts with clients or team members. You can also save these files in a folder system to maintain organized records, or back them up for extra security.
| Feature | Printable | Digital |
|---|---|---|
| Storage | Physical storage (filing cabinets) | Cloud storage or computer |
| Accessibility | Requires physical access | Access from any device with internet |
| Sharing | Needs to be scanned or mailed | Easily emailed or shared via links |
| Eco-friendliness | Less eco-friendly due to paper use | More eco-friendly (no paper required) |
| Security | Physical loss or damage risk | Data backup reduces loss risks |
Whether you choose printable or digital, both options offer advantages depending on your workflow. The choice will depend on your need for accessibility, storage space, and convenience. Make sure to select the option that best fits your business needs and organizational preferences.
Adjust the layout to fit your business’s specific needs. A simple, clean design is often the best way to present repair details clearly. Include sections like customer information, services provided, parts used, and total charges. Make sure there is space for both written and itemized data, allowing for easy understanding at a glance.
Branding Your Template
Incorporate your shop’s logo, colors, and fonts to create a consistent experience for your customers. This helps with brand recognition and adds a professional touch to your receipts. Consider placing your logo in the header, and make sure the contact details (address, phone number, website) are clearly visible.
Tailoring Service Details
Customize the list of services to match your offerings. You may want to include a checkbox or a dropdown menu for common tasks like oil changes, brake repairs, or tire replacements. Adjust the pricing fields according to your service rates, and leave room for additional charges, such as labor fees or taxes. This ensures the invoice is always accurate and up-to-date.
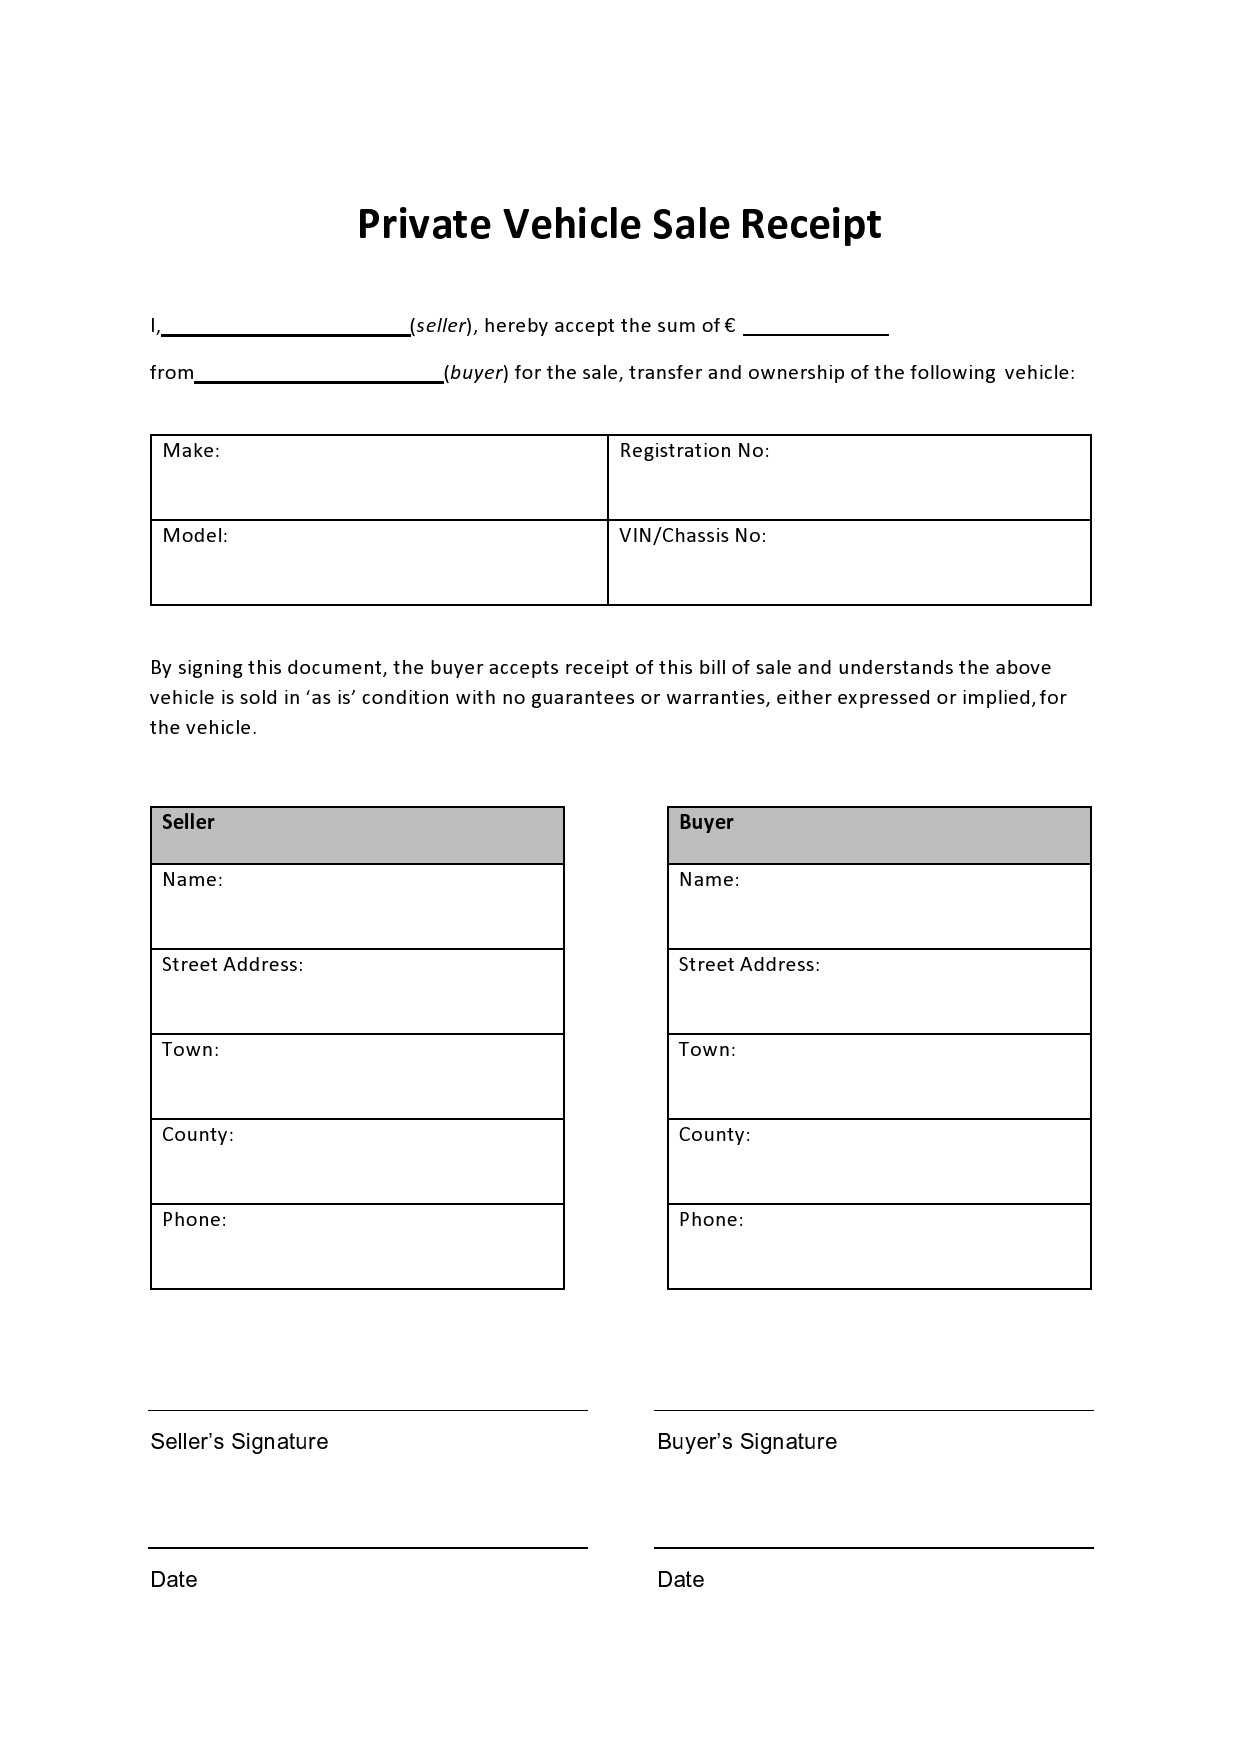
Receipt Details for Vehicle Repair
Include clear and detailed information in your vehicle repair receipt to avoid any confusion. Here’s what to add:
- Customer Information: Name, address, and contact details.
- Repair Shop Information: Shop name, address, and contact details.
- Invoice Number: Unique number for easy reference.
- Repair Description: List each repair task performed, including parts replaced and labor involved.
- Parts Used: Specify part names, model numbers, and prices for transparency.
- Labor Charges: Itemize the time spent and rate per hour.
- Total Cost: Show the total amount due, including parts and labor.
- Payment Information: Include the payment method (credit card, cash, check) and amount paid.
- Warranty Information: Indicate any warranties on repairs or parts.
- Signature Line: Provide a space for both the customer and repair shop to sign, confirming the transaction.
Formatting Tips

- Use a clean and professional layout, with easily readable fonts.
- Ensure all sections are clearly marked with bold headers.
- Keep the language simple and direct.
- Provide a breakdown of costs for transparency.