Using a receipt template with four entries per page offers a practical solution for streamlining your printing process. This layout allows you to maximize the use of paper, reducing waste and cutting down on costs. Each receipt is neatly organized, ensuring that all necessary information is included in a compact, easy-to-read format.
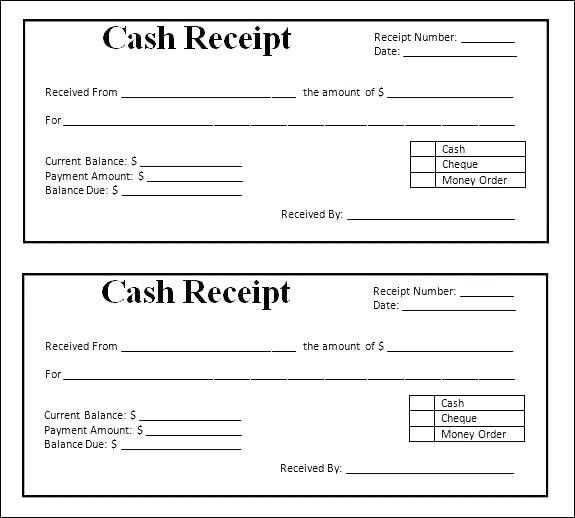
To create or download a template that fits four receipts on a single page, make sure the design is clear and simple. Focus on aligning the text fields properly to avoid clutter and ensure readability. Including sections for the business name, date, amount, and a brief description is standard practice for these templates.
If you want to customize the template, look for options that let you adjust font size and layout. This flexibility ensures that the template fits your needs, whether you are printing a few or many receipts at once. Keep the margins consistent to prevent information from being cut off when printed.
Receipt Template 4 Per Page: Practical Guide
Use a “Receipt Template 4 Per Page” layout to maximize space and print efficiency, especially when dealing with multiple transactions in a short period. This format helps organize receipts neatly on a single sheet of paper, reducing waste and saving time. Choose a template that aligns with the specific needs of your business or event, such as branding, tax information, and transaction details.
Adjusting Template for Specific Needs

Modify the margins and spacing to ensure that each receipt fits comfortably on the page without compromising readability. Keep the font size between 10 to 12 points for clear legibility, and use a simple sans-serif font for professional results. Make sure to include essential details like the transaction date, amount, itemized list, and payment method within each section.
Using Software for Customization
Leverage software tools like Microsoft Word, Excel, or Google Docs to customize the template further. These programs offer grid and table structures that allow you to adjust the layout, ensuring all four receipts align perfectly. Additionally, you can add your logo or business name for branding, and include tax breakdowns or discounts if necessary. Save the template in a reusable format for quick access in future printing sessions.
Customizing Layouts for Different Printer Types
For optimal results, adjust the layout settings based on the printer’s capabilities. Laser printers typically handle smaller, more detailed fonts and graphics better than inkjet models. When printing multiple receipts per page, start by ensuring your page size matches the printer’s specifications. Some printers may not support standard letter-size paper, requiring adjustments to the paper type or format.
Laser Printers: These printers offer better precision with smaller text and fine lines. For 4 receipts per page, utilize precise margin settings to avoid clipping edges. Test print a sample to check for any distortion or misalignment.
Inkjet Printers: Inkjet printers may produce less crisp lines at smaller scales. To maintain print quality, slightly increase the spacing between receipts to prevent ink smudging. Choose the highest print quality setting for clear, legible receipts.
Thermal Printers: These printers often have specific paper sizes they support. Configure the layout to fit the standard thermal paper roll width, ensuring the receipt’s size is proportionate to avoid paper jams or unreadable prints.
Always perform test prints to adjust the layout before finalizing the template. This ensures that the printed output matches your desired format without compromising the printer’s performance.
Optimizing Template for Cost-Effective Paper Usage

Adjust your receipt template layout to maximize paper usage without wasting space. Use grid-based designs to fit four receipts per page with minimal white space between them. Align all text consistently, making use of both vertical and horizontal space efficiently.
Use of Margins and Spacing

Reduce unnecessary margins and line spacing to fit more content onto the page. Opt for a smaller font size without compromising readability. Ensure there’s enough space for necessary details, but keep it compact to prevent excessive gaps.
Printer Settings and Paper Type

Set your printer to use the paper size that aligns with the receipt template dimensions. Choosing the right paper weight can also help minimize the number of pages needed. Standard paper types and lightweight options keep the cost down without sacrificing print quality.
- Adjust margins to around 0.25 inches on all sides.
- Set line spacing to 1 or 1.15 for compact text formatting.
- Use a monospaced font to avoid uneven spacing and maximize space efficiency.
Formatting and Adjusting Template for Various Business Needs

To adapt a receipt template for different business types, focus on the key information that needs to be included, such as company name, transaction details, and payment methods. Use clear, easy-to-read fonts and maintain consistent alignment throughout the document. Adjust the template layout to fit your specific business, whether it’s retail, service, or another sector, by placing essential elements in prominent positions for clarity.
For a retail business, consider placing itemized lists near the center of the receipt, allowing enough space for product names, quantities, and prices. Ensure tax and total amounts are clearly visible. Service-based businesses may need more room for detailed descriptions of services rendered. Incorporate fields for employee names or invoice numbers, which can be useful for tracking purposes.
Always test print your template on various page sizes to ensure content fits well. Avoid clutter by limiting unnecessary graphics or information. Use the available space wisely and keep margins even for a professional look. For businesses that require frequent updates to receipts, consider templates with editable fields that can be customized for different transactions or promotions.