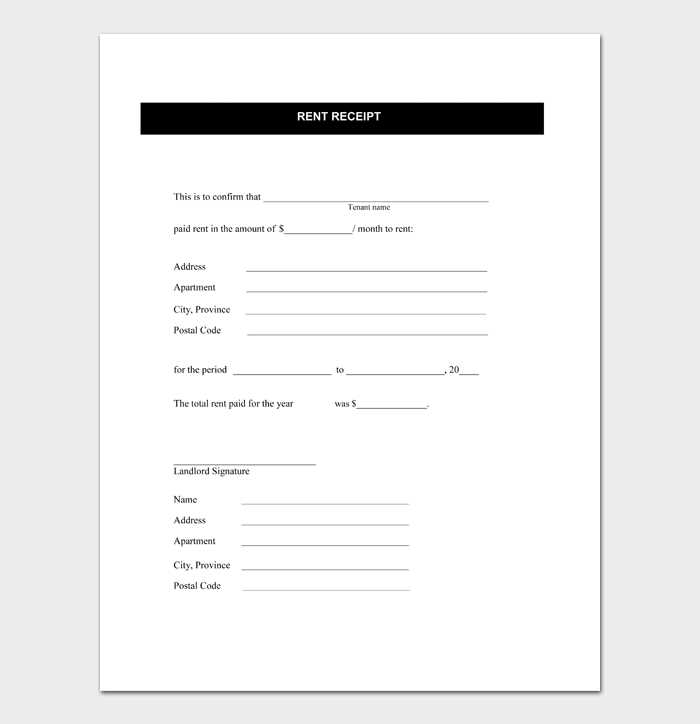
To streamline your office rental process, use a clear and concise office rent receipt template. This document helps both landlords and tenants keep track of payments, ensuring transparency in rental transactions. It should include the tenant’s name, address of the rented property, rental amount, payment date, and the rental period it covers.
Make sure the template also features space for both the landlord’s and tenant’s signatures, indicating mutual agreement and confirmation of payment. An itemized breakdown of any additional charges, such as utilities or maintenance fees, is also highly recommended for clarity.
By using a standardized office rent receipt, you prevent any confusion or disputes regarding payments, maintaining a professional approach to leasing arrangements. Customize your template with any specific details relevant to your office space rental agreement, such as security deposits or late fees, to match the unique terms of your lease.
Here are the corrected lines:
Ensure that the receipt clearly lists the details of the office rental agreement. Include the following information:
- Tenant’s full name
- Property address
- Lease term dates
- Rental amount and payment frequency
- Payment method
- Any additional fees or charges (e.g., utilities, maintenance)
The receipt should also be signed by both parties, with dates confirming the transaction. Ensure accuracy in the formatting and legibility of the document. For tax and legal purposes, include any applicable VAT or other taxes in the total rental amount.
Key Tips:
- Double-check the rental amount, as any mistakes here could lead to disputes.
- Clearly mention whether payments are for a fixed period or ongoing.
Keep a copy for your records and provide a signed copy to the tenant for their reference. This helps maintain transparency and avoid misunderstandings later on.
- Office Rent Receipt Template Guide
Start by structuring your office rent receipt template clearly. Include the essential details that both landlord and tenant need: tenant’s name, landlord’s name, rental period, payment amount, and payment date. This ensures all parties have a clear understanding of the terms agreed upon.
Key Elements of the Template
- Tenant and Landlord Information: List the full names and contact details of both parties. This ensures clear identification if issues arise.
- Receipt Number: Assign a unique number to each receipt for easy reference and record-keeping.
- Payment Breakdown: If applicable, specify the breakdown of the rent, including any additional fees like maintenance or utilities.
- Amount Paid: Clearly state the exact amount paid, along with the payment method (e.g., bank transfer, check, cash).
- Date of Payment: Include the date the payment was made to avoid any confusion regarding overdue payments.
- Signature: While optional, including a space for both parties’ signatures can add formality to the document.
Tips for Customization
- Include Rent Due Date: Adding the rent due date helps tenants understand when the next payment will be due, which can prevent late payments.
- Adjust for Specific Terms: Modify the template to account for any special agreements, such as rent discounts or payment deferrals.
- Payment Method Details: If the rent is paid through multiple methods, include a section for breaking down the payment method.
Once you’ve included these basic elements, make sure your template is user-friendly. It should be simple enough to fill out quickly, yet thorough enough to serve as a legal document. Keep your layout organized, and avoid cluttering the template with unnecessary information.
Creating a clear and professional rent receipt template helps ensure smooth transactions between landlords and tenants. Here’s how to design one that meets your needs.
Step 1: Include Basic Details

The template should capture the most important information. Start with the date of payment, the landlord’s and tenant’s names, office address, and the amount paid. These details ensure the receipt is complete and transparent.
Step 2: Payment Breakdown
For clarity, itemize the payment. Include the rent amount, and if applicable, utilities, maintenance, or other charges. This keeps both parties on the same page about what the payment covers.
Example:
Rent: $1500
Utilities: $100
Total: $1600
Step 3: Payment Method

Note the payment method–whether it was cash, check, or bank transfer. This can help resolve any future discrepancies and verify the payment process.
Step 4: Signature or Acknowledgment
End with a space for the landlord’s signature or a statement confirming receipt of payment. This adds a layer of authenticity and formal acknowledgment.
By following these simple steps, you can easily create a rent receipt template that is clear, organized, and professional.
Tailor your rent receipt for each payment method to ensure clarity and accuracy. When tenants pay by check, note the check number, date, and the bank from which it was issued. For cash payments, clearly state the amount paid in full along with a receipt number to keep track of the transaction. If payment is made via bank transfer, include the transaction ID and the date of the transfer. When using credit cards, record the card type (Visa, MasterCard, etc.) and the last four digits of the card number for verification.
For online payments, add a reference number from the payment portal and confirm the amount received. If payments are made in installments, break down each payment date and amount on the receipt to avoid confusion. Always include a clear indication of any late fees if applicable, and for recurring payments, consider adding a note about the next due date to keep everything organized.
Finally, adjust the receipt format according to the payment method to ensure all relevant details are captured while maintaining consistency across all receipts. This approach helps both you and your tenant stay organized and makes record-keeping seamless.
Rent receipts for office spaces must include specific details to ensure both landlord and tenant are legally protected. The receipt should clearly state the date of payment and the amount received, ensuring there’s no ambiguity about the transaction. The address of the office being rented is a must, as this verifies the location of the leased property. The name of the tenant and landlord, along with their contact information, should be present to avoid any confusion should a dispute arise.
It’s crucial that the payment period is specified, whether it’s monthly, quarterly, or annually, to clarify the scope of the payment made. Be sure to note the method of payment (e.g., bank transfer, cheque, cash), as this helps establish a clear record for both parties. If any late fees or adjustments are included, these should also be documented in the receipt, as these details can affect future transactions or legal matters.
A rent receipt template should also include a signature from the landlord or an authorized representative. This confirms the payment and ensures that both parties agree to the terms outlined in the document. It may also be useful to have a clause addressing whether the receipt serves as a full or partial payment, which could protect both sides in case of any disputes later.
Finally, some regions may have specific legal requirements regarding what needs to be included in a rent receipt. Check local laws to ensure compliance, especially if there are unique tax reporting obligations or regulations related to commercial leases. Always keep a copy of the receipt for your records, as this can be an important document for tax purposes or resolving future issues.
How to Create an Effective Office Rent Receipt Template

To ensure clarity and professionalism, keep the wording concise while ensuring all key details are included. Avoid redundancy by limiting the use of the words “office” or “rent” to no more than two or three times per sentence.
Start with the tenant’s name and address clearly labeled at the top, followed by the property description, such as the office’s location and size. Include the payment date, rental amount, and the duration covered by the receipt. Avoid repeating the term “office” in each line; instead, specify the office’s characteristics or details in a more varied manner.
Use the following template as a guide for your office rent receipt:
| Tenant Name | [Insert Tenant Name] |
|---|---|
| Office Location | [Insert Address] |
| Payment Date | [Insert Date] |
| Amount Paid | [Insert Amount] |
| Payment Period | [Insert Duration] |
| Landlord Name | [Insert Landlord Name] |
| Landlord Signature | [Insert Signature] |
This simple template covers all the necessary points, helping both landlord and tenant maintain clear records. By minimizing the repetition of terms, the document feels professional and streamlined.