For a small business, having a clear and professional receipt template is key. A well-structured receipt helps with record-keeping, customer trust, and financial tracking. Make sure your template includes the following core components: your business name, contact details, transaction date, itemized list of products or services, and the total amount due, including any applicable taxes. Customize it to reflect your branding by adding a logo and adjusting the color scheme to match your business identity.
In addition to these basics, it’s also helpful to include a unique receipt number for tracking purposes. This can be especially useful during tax season or for resolving any disputes. A line for payment methods (cash, card, etc.) further ensures transparency. Consider incorporating space for any additional notes or refund policies to keep customers informed.
A receipt template should be simple yet thorough. This ensures that both you and your customers have a clear understanding of the transaction. Tools like Microsoft Word or Google Docs offer easy-to-use templates, but many small businesses opt for specialized software that integrates directly with their point-of-sale systems for a more streamlined approach.
Here are the corrected lines:
Ensure that your receipt includes a clear date and time of the transaction. This helps avoid confusion for both you and your customers, especially for returns or audits.
Itemized List of Products
Each item sold should be listed with its description, quantity, and price. This makes it easier for your customer to verify their purchase and for you to track sales efficiently.
Accurate Tax Breakdown
Show the sales tax as a separate line item, detailing the percentage or flat rate applied. This transparency ensures your customers know exactly how much tax they paid.
Don’t forget to include your business name, address, and contact details. It adds a professional touch and makes it easy for customers to reach out if needed.
Finally, for digital receipts, include a unique reference number or order ID. This helps with tracking and resolving any potential issues in the future.
- Receipt for Small Business Template
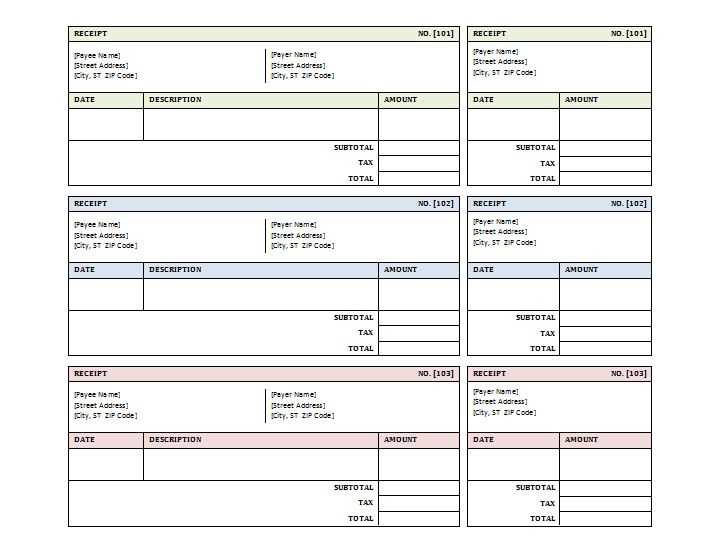
To create a clear and professional receipt for your small business, include the following elements in your template:
- Business Information: Include the name, address, phone number, and email of your business. This ensures customers know where the receipt came from and how to contact you if needed.
- Receipt Number: Assign a unique receipt number to each transaction for easier tracking and record-keeping.
- Date of Transaction: Always specify the date of the transaction to keep accurate financial records.
- Customer Details: Include the name of the customer for personalized records. This can also be useful for return or warranty purposes.
- List of Items Purchased: Clearly list all items or services purchased, including quantity, description, and price per unit. This helps the customer review their purchase details.
- Total Amount: Include the total cost of the purchase, specifying any taxes or discounts applied. This gives a clear breakdown of the final charge.
- Payment Method: Indicate how the transaction was paid (e.g., cash, credit card, or other forms of payment) for accounting purposes.
- Return Policy (Optional): If applicable, include a brief note about your return or exchange policy to set expectations for the customer.
Tips for Customizing Your Template
- Keep your design simple and easy to read, using a consistent font and layout.
- Include your logo or business branding to make the receipt look professional and recognizable.
- Consider integrating your receipt template with your point-of-sale (POS) system to automate receipt generation.
Using a Template for Consistency

Using a standard receipt template helps maintain consistency across all transactions. It not only makes your business appear organized but also ensures that you meet legal and tax requirements by keeping detailed records of every sale.
Design a receipt template that reflects your brand identity and ensures clarity for your customers. Keep the layout clean, highlighting the key elements of the transaction such as the date, items purchased, price, and payment method. Use a simple and easy-to-read font to avoid confusion.
1. Include Your Business Details
Start by including your business name, address, and contact information at the top. This makes it easier for customers to reach you if needed. Make sure the font size is large enough to be legible but not overwhelming.
2. Transaction Information

List the products or services purchased along with their individual prices and quantities. Include any applicable taxes or discounts. Make sure the total is clearly highlighted at the bottom of the receipt.
3. Customizing the Receipt

Your receipt template should be flexible, allowing for easy adjustments. For instance, you can add a field for discount codes, membership numbers, or custom notes to make each receipt unique to the transaction.
| Item | Price | Quantity | Total |
|---|---|---|---|
| Item 1 | $10.00 | 2 | $20.00 |
| Item 2 | $5.00 | 1 | $5.00 |
| Subtotal | $25.00 | ||
| Tax | $2.50 | ||
| Total | $27.50 | ||
Use colors or fonts that align with your branding. For example, if your business logo uses a specific color scheme, incorporate those colors into the receipt’s design to maintain consistency. Avoid cluttering the receipt with unnecessary information or designs, which could distract from the core details.
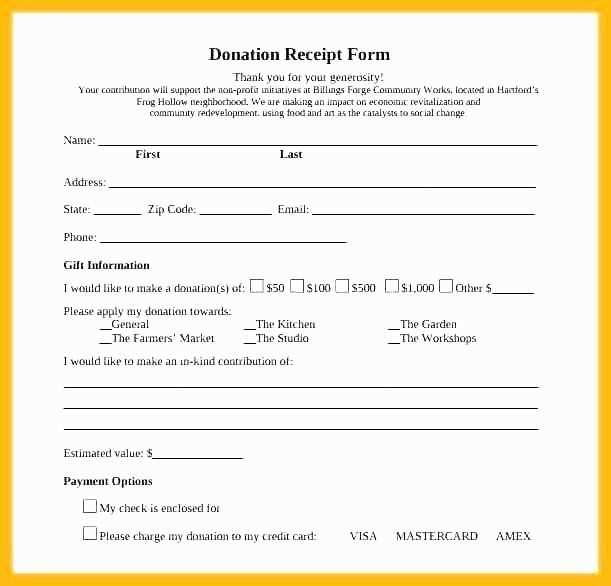
4. Choose a Format
Decide on the format that best suits your business needs. For most small businesses, a simple paper receipt might be sufficient, but you can also opt for digital receipts to reduce paper waste. Customize these formats to match the look and feel of your brand.
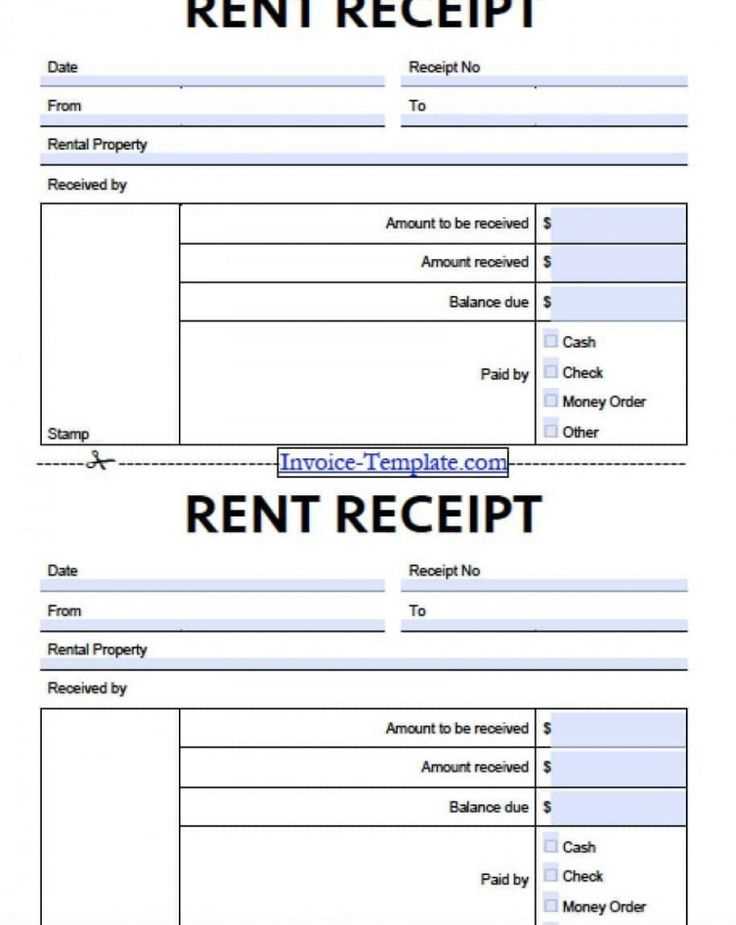
Include the business name, address, and contact information at the top of the receipt. This makes it easy for customers to identify your business if they need to get in touch.
Clearly state the receipt date and a unique receipt number for easy reference. This will help you and your customers track purchases accurately.
List the items or services provided along with a brief description, quantity, and price. This should be detailed enough for the customer to understand what they are paying for.
Specify the total amount paid, including any taxes or discounts applied. Include a breakdown to make the calculations transparent.
If relevant, include payment method details–such as whether the transaction was made by credit card, cash, or another method.
For returns or exchanges, note the policy clearly on the receipt. This adds transparency and ensures both parties understand the terms.
Always provide a space for customer signatures if needed, especially for larger transactions or when required by law.
Use tools like Canva or Microsoft Word for quick and customizable template creation. Canva offers a user-friendly interface with various receipt templates that can be tailored for small businesses, providing easy drag-and-drop functionality. It also allows exporting in multiple formats such as PDF and PNG.
Google Docs is another reliable option for creating templates collaboratively. It supports real-time editing and offers pre-built receipt templates for quick setup. You can also save and share templates with others via Google Drive, making it a convenient choice for teams working together remotely.
If you’re looking for more advanced features, Adobe InDesign offers greater control over design, especially for businesses with specific branding requirements. It allows the creation of highly professional templates and is suited for complex layouts. Templates can be reused with ease and shared with others via Creative Cloud.
FreshBooks and QuickBooks provide templates built directly into their invoicing software, tailored to meet business needs. These platforms streamline the entire process, from creating templates to sending invoices and tracking payments. They also offer automation options, saving time on repetitive tasks.
For those who prefer a more hands-on approach, Excel or Google Sheets can be customized with simple formulas to create a functional receipt template. This option gives flexibility in design and ensures you can tailor receipts to specific business requirements.
Receipt for Small Business Template

Ensure your receipt includes key details such as the business name, contact information, and a clear description of the goods or services provided. Itemize each product or service with corresponding prices and quantities. Always include the total amount paid and specify the payment method–whether it’s cash, card, or another option.
For better organization, include a unique receipt number. This helps track transactions and maintain accurate records. Add the date and time of the transaction to avoid confusion and assist with future referencing.
Provide space for customer information if necessary. It can be useful for businesses offering warranties or services that require follow-up. Make sure the design is simple yet readable, using clear fonts and sections for easy reference.