When creating a business receipt, the key is to ensure clarity and transparency. A well-organized receipt helps both the customer and business owner track financial transactions efficiently. Make sure to include all the necessary details like the transaction date, business name, payment method, and a breakdown of purchased items or services.
Be clear about the total amount paid. This eliminates any confusion and ensures that both parties agree on the terms of the transaction. It’s also important to include a receipt number for easy reference and potential future queries.
Design your receipt to include a professional layout, which helps maintain consistency in your business’s financial records. Ensure the font is legible and the overall structure allows quick identification of important details like the amount and date. Keep the format simple and avoid unnecessary elements that may distract from the core information.
Here’s the revised version with minimal repetition:
To create a clear and concise business receipt, focus on the key components. Include the company name, contact details, transaction date, itemized list of purchased goods or services, quantities, unit prices, total amount, and payment method. Structure the information logically for easy reference.
Ensure all numbers are formatted correctly and aligned, using a simple, readable font. Keep the language direct, listing items and prices without unnecessary elaboration. Each entry should be clear and easy to identify.
- Company name and contact information: Place this at the top for quick access.
- Date and transaction number: This helps with tracking and referencing the receipt.
- Item list: Be specific, and break down the products or services purchased.
- Price breakdown: Show the individual price for each item and any applicable taxes.
- Total amount: Clearly highlight the total sum due or paid.
- Payment method: Indicate whether payment was made via cash, card, or another method.
Avoid clutter. Streamline the design for quick reading. If applicable, consider including a return or refund policy at the bottom for clarity. This approach ensures that your receipt is both professional and user-friendly.
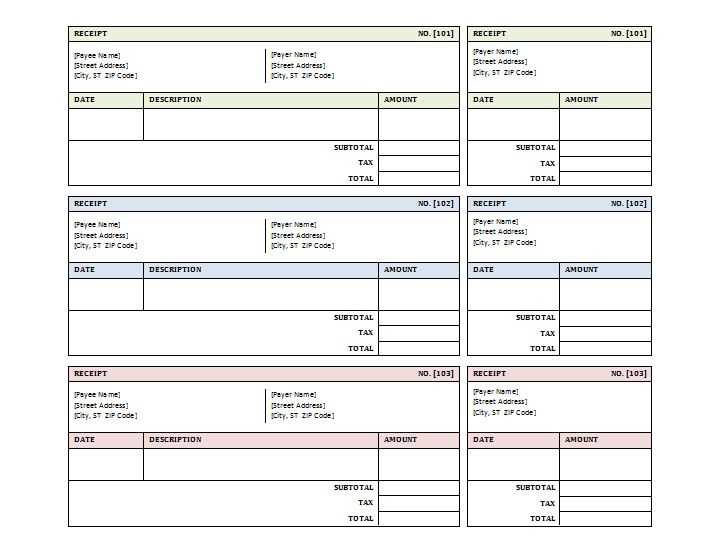
- Sample Business Receipt Template
A well-structured receipt template should clearly display essential transaction details for both the business and the customer. Start with your company’s name and contact information, including the address and phone number. Below, include the receipt number and the date of the transaction for record-keeping purposes.
Receipt Breakdown
The template should have sections for the items or services purchased, with each entry showing a brief description, quantity, price per unit, and total cost. Ensure to highlight taxes and discounts separately if applicable.
Payment Details
Provide clear payment details, including the payment method (e.g., cash, card, or online transfer). Include any reference number for electronic payments or checks. A line for the total amount paid and remaining balance (if any) should be present.
Finish with a thank you message, reinforcing the customer’s purchase, and leave space for any additional notes, such as return policies or terms of service.
A receipt should contain specific details to be clear and reliable. First, ensure that the date of the transaction is included, as this helps both the buyer and seller track the purchase. This detail is important for returns or warranty claims.
Next, provide a description of the item or service purchased. It is helpful to include the quantity, unit price, and total price for clarity. This allows the customer to verify the transaction and understand the breakdown of costs.
Include the payment method used, whether it is by cash, credit card, or any other method. This transparency helps avoid any disputes regarding how the payment was made.
Always list the seller’s contact information, including name, address, and phone number. This makes it easier for customers to reach out for inquiries or issues related to the receipt.
Finally, include any taxes applied, such as sales tax, and clearly state the total amount paid. This ensures that both parties are on the same page regarding the final payment.
Select a receipt format based on your business needs. For smaller transactions, a simple text-based format will suffice. For larger transactions, consider including more details such as itemized lists and tax breakdowns. A clear structure prevents confusion and ensures transparency.
Factors to Consider

- Transaction Size: Smaller purchases benefit from simpler receipts, while larger ones require itemized entries for clarity.
- Industry Requirements: Some industries, like retail and hospitality, may have specific format regulations. Ensure compliance with local laws.
- Digital vs. Paper: Digital receipts are eco-friendly and easier to store, but paper receipts may still be necessary for certain customer preferences or legal obligations.
Popular Formats
- Basic Text Receipts: Ideal for quick, low-value sales. Simple and cost-effective.
- Itemized Receipts: List every product or service purchased, including quantity, price, and taxes. Suitable for higher-value transactions.
- QR Code Receipts: Allow customers to access more detailed information via a scan, enhancing convenience for digital-savvy buyers.
Adjusting your receipt template to align with different business operations is key to maintaining professionalism. Tailor the layout to reflect the nature of your business while making the information easy for both you and your customers to understand.
Incorporating Custom Fields
Incorporate fields that are specific to your industry, such as product codes, service descriptions, or delivery details. If you run a retail business, add a section for SKU numbers, whereas a consultancy may need a field for the consultation type or duration.
Branding and Visual Elements
Customizing colors, fonts, and adding your business logo to the receipt helps reinforce your brand identity. Ensure the design remains clear and professional, avoiding unnecessary decoration that can distract from the critical transaction details.
Payment Details and Tax Breakdown
Provide clear payment information, including tax rates, total charges, and discounts. This is especially helpful for businesses that deal with multiple tax rates or provide variable pricing. Break down each charge clearly to avoid confusion.
Creating Multiple Versions

If your business operates in different regions or offers various services, create versions of your template that reflect these distinctions. For example, offer different receipt templates for in-store purchases versus online orders or for local and international clients.
| Field | Customizable Option |
|---|---|
| Product or Service Description | Add specific details such as codes or durations |
| Payment Method | Include fields for credit card, cash, or digital payments |
| Tax Breakdown | Allow for multiple tax rates based on location or service |
| Logo and Branding | Insert your company’s logo and consistent color scheme |
Customizing these details ensures that your receipt template suits the unique needs of your business while maintaining professionalism and clarity for your customers.
Always specify the tax rate and amount clearly on receipts. This helps customers understand the breakdown of their payment. Ensure the receipt lists the total price before tax, the applicable tax rate, and the total tax amount. Additionally, mention the method of payment, whether it’s cash, credit card, or another option. If the payment is split, include the amounts paid with each method for clarity.
Be sure to display any relevant tax identification numbers or business registration details as required by local laws. If a discount is applied, show the discount amount separately and explain how it affects the final price.
Ensure receipts comply with local tax regulations. Businesses must include specific information like the business name, address, transaction date, and a clear breakdown of goods or services provided.
- Include a unique receipt number for tracking purposes.
- Display the correct tax rates applied, including sales tax or VAT.
- Provide clear descriptions of items or services purchased, including quantities and prices.
Record retention is another key factor. Depending on jurisdiction, receipts must be stored for a set number of years for tax audits or other legal requirements. Failure to comply with these regulations can result in fines or penalties.
- Check with local tax authorities to determine the required retention period.
- Ensure digital records are securely stored and easily accessible.
For businesses operating internationally, include relevant currency information and clarify the applicable exchange rates. This ensures transparency for international customers and helps prevent disputes over pricing.
Integrating receipt generation automation into your business can save time and reduce human error. The key is using a tool or platform that automatically creates and sends receipts as soon as a transaction is completed.
Choosing the Right Automation Tool
Start by selecting a receipt automation software that fits your business model. Many accounting and invoicing platforms, such as QuickBooks or Xero, offer integrated receipt generation. These tools pull transaction data directly from your payment processor or point of sale (POS) system, creating receipts without manual input.
Setting Up the Automation Process

Once you’ve chosen your tool, connect it to your payment gateway or POS system. Set up the parameters, such as when the receipt is sent (e.g., after payment confirmation). Ensure the tool includes customer details like name, date, amount, and payment method in the receipt.
| Automation Tool | Supported Payment Methods | Customization Options |
|---|---|---|
| QuickBooks | Credit Cards, PayPal, Bank Transfers | Custom templates, tax settings |
| Xero | Credit Cards, Bank Payments | Custom logos, payment terms |
| Stripe | All major credit cards | Customizable receipt emails |
By linking your payment systems to an automated tool, you ensure that every transaction generates a consistent, professional receipt without the need for manual data entry. This boosts accuracy and customer satisfaction.
When designing a business receipt template, it’s key to focus on clarity and functionality. Begin with clear headings such as “Receipt” and “Transaction Date.” The template should include all essential transaction details, like the buyer’s name, purchased items or services, itemized costs, total amount, and payment method.
Itemize each product or service with a short description, quantity, unit price, and total for that item. This makes the receipt easy to understand at a glance. It is important to use bold for key figures like totals to make them stand out clearly.
Including a unique invoice number can help track transactions efficiently, especially for returns or future reference. Ensure that each receipt has a timestamp showing the exact time of the transaction.
To make your receipt more professional, include your business name, logo, and contact details at the top or bottom of the template. This way, your customer knows where to reach you for inquiries.
Lastly, leave space for any additional notes like terms of return, shipping info, or special discounts applied. This adds flexibility to your receipts without overcrowding them with unnecessary information.