When creating a receipt for a deposit, clarity and accuracy are key. A well-structured template ensures all important details are included, leaving no room for confusion. Start by including the date of the transaction, the amount of the deposit, and the name of the person or business making the deposit.
It’s important to also specify the method of payment, such as cash, credit, or bank transfer. Including a unique transaction reference number is highly recommended for tracking purposes. Don’t forget to add a description of the goods or services being secured by the deposit.
Finally, provide space for any terms and conditions related to the deposit, such as refund policies or deadlines. Using a clean, professional layout for your template will make it easy to read and ensure all necessary information is clearly communicated.
Here’s the revised version without repeating words more than 2-3 times, while keeping the meaning intact:
Begin by clearly specifying the deposit amount and currency in the receipt. Make sure to mention the payment method used by the client, whether it’s a bank transfer, check, or cash. This ensures that all parties are clear about the terms of the deposit.
Deposit Confirmation
Include a section confirming the deposit was received. Specify the date of receipt, and if applicable, the transaction number or any reference code linked to the payment. This adds a layer of transparency and accountability to the transaction.
Terms and Conditions
List any terms attached to the deposit. This could include deadlines for refunds, deposit usage, or conditions under which the deposit is non-refundable. Clearly outline these points to avoid misunderstandings.
Finally, ensure that both parties sign and date the receipt. This confirms the agreement and provides a record for future reference.
- Deposit Receipt Template Overview
A deposit receipt template serves as a formal acknowledgment of a transaction. This document is crucial for both the payer and recipient, offering clarity about the amount deposited, the terms of the deposit, and relevant details. Using a standard template ensures that all necessary information is included and helps avoid confusion during future transactions or audits.
Key Information to Include

- Amount Deposited: Clearly state the exact sum of money deposited.
- Deposit Date: Specify the exact date of the transaction.
- Depositor Information: Include the name and contact details of the individual or business making the deposit.
- Recipient Information: Provide the name and contact details of the entity receiving the deposit.
- Purpose of Deposit: Briefly describe the reason for the deposit, whether it is for rent, a service, or other purposes.
Additional Tips
- Use clear and legible fonts to ensure easy reading.
- Include a unique reference number for tracking purposes.
- Provide both digital and physical copies for convenience and record-keeping.
To create a basic receipt, include the following details for clarity and transparency:
1. Receipt Title
Begin with a clear title such as “Receipt” or “Payment Receipt” at the top. This helps the recipient immediately understand the document’s purpose.
2. Date and Time of Transaction

Include the date and time of the transaction. This provides a precise record of when the payment occurred.
3. Payer Information
Include the name or company of the person making the payment. If applicable, include contact details like an email address or phone number.
4. Payee Information
State the name or business receiving the payment. Providing a contact number or email is also helpful.
5. Payment Details
- List the items or services purchased, with a brief description of each.
- Indicate the quantity and unit price for each item, as well as the total cost.
- If applicable, show taxes, discounts, or any other adjustments.
6. Total Amount Paid
Clearly highlight the total amount paid. This can include the currency for clarity.
7. Payment Method
Specify how the payment was made, such as via credit card, cash, check, or another method.
8. Receipt Number
Assign a unique receipt number for easy tracking and reference in future communications.
9. Signature (Optional)
If necessary, a signature line for the payee or an authorized representative can be added.
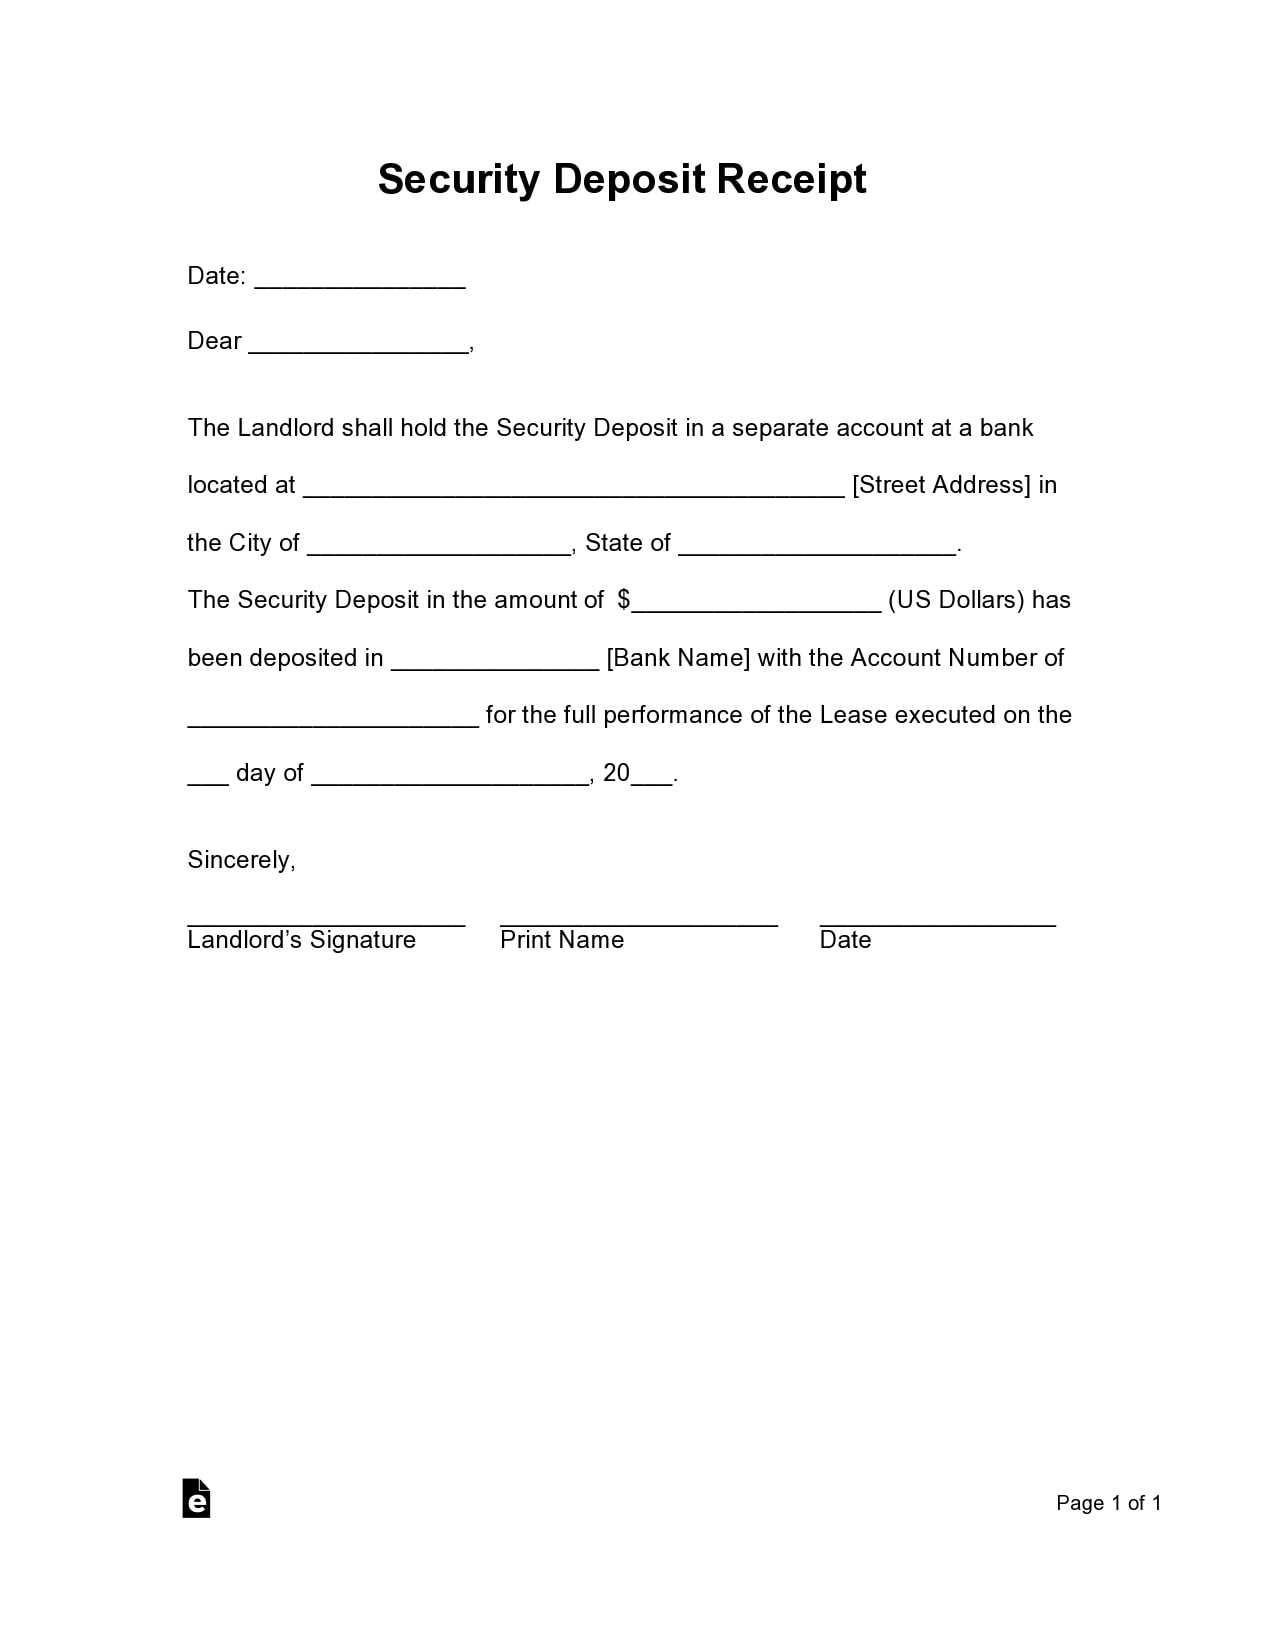
Start with clear identification of the parties involved: include the name and address of both the payer and the recipient. This helps prevent misunderstandings about the transaction.
Specify the amount being deposited. Whether it’s a fixed sum or based on an agreed formula, this detail ensures transparency in the transaction.
Details of the Deposit

Include the purpose of the deposit. Clearly state whether it’s for a service, security, or any other reason. This clarifies the intent behind the transaction and sets expectations.
Dates and Deadlines
Include the date the deposit is being received, as well as any important deadlines. If there’s a timeline for refund or usage, specify those dates too.
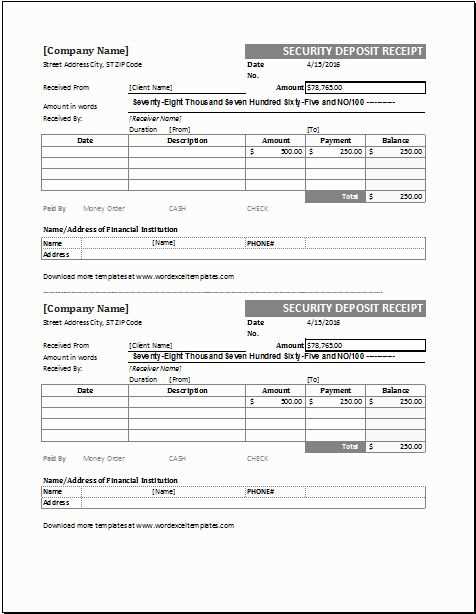
| Information Type | Required Details |
|---|---|
| Parties Involved | Name, address of payer and recipient |
| Amount | Amount deposited or formula for calculation |
| Purpose | Reason for the deposit |
| Date | Date of deposit and any deadlines |
Finally, include any terms or conditions related to the deposit, such as refund policies or usage restrictions. Be specific about any contingencies or actions required from both parties.
Use a clear, legible font like Arial or Times New Roman for better readability. Stick to a consistent size for the text, ensuring it’s large enough to be easily read. Avoid overly fancy fonts that could hinder clarity.
Include all key information: the business name, address, phone number, email, transaction date, receipt number, and a detailed list of items or services purchased, along with their prices. This transparency helps the recipient understand the transaction without confusion.
Ensure that your layout is well-structured. Organize the details in a logical flow: start with your business information, followed by the transaction details, and end with the total amount paid. Group related information together and use bold for headings or totals to draw attention.
Use clear labels and headers, like “Item Description,” “Unit Price,” and “Quantity,” to separate different types of information. This will help users easily identify what they’re looking for when reviewing the receipt.
Make use of white space to prevent the receipt from looking cluttered. Leave enough space between sections so that the information doesn’t appear overcrowded. This makes the receipt easier to navigate and reduces the risk of missing details.
If applicable, include payment method details, such as the last four digits of the credit card used or confirmation numbers for electronic transactions. This adds an extra layer of transparency and security for the recipient.
Clarify the deposit amount and terms clearly. Avoid vague language that could cause confusion later. Specify the exact amount and the payment method to prevent any misunderstandings.
1. Incomplete Payment Details
Always include the exact amount of the deposit and the payment deadline. A vague statement like “a reasonable deposit” may leave room for disagreement and disputes later. Be specific with amounts, dates, and payment methods.
2. Missing or Unclear Cancellation Terms
Ensure cancellation terms are explicit. State the consequences of cancellation, including any deposit refunds or forfeiture. Ambiguity in this area often leads to conflict and dissatisfaction.
3. Failure to Define Responsibilities
Clearly outline each party’s responsibilities regarding the deposit. Who will handle the payment, and what is expected from both sides? Make sure both parties agree on the obligations to avoid confusion.
4. Absence of Signatures
Always include space for signatures from both parties. Without signatures, the document may not hold legal weight in the event of a dispute. Both parties must agree to the terms in writing for it to be enforceable.
5. No Timeline for Deposit Return
Include a specific timeline for when the deposit will be returned if applicable. Vague terms like “within a reasonable time” can be interpreted differently, leading to delays and frustration.
Leverage online platforms like Canva or Google Docs to create customized receipt templates quickly. These tools offer ready-to-use templates that can be modified to match your specific needs, making the process faster and more consistent.
For a more professional approach, consider using dedicated receipt generators such as Receipt Generator or Zoho Invoice. These tools provide detailed, accurate formats with automatic calculations, which saves time and reduces errors.
If you require a more tailored solution, explore Excel or Google Sheets. You can create your own receipt template using formulas to calculate totals, taxes, and discounts. This method is particularly useful for businesses that need to handle a variety of transaction types.
Don’t forget about integrating payment processors like PayPal or Stripe. Many of these services automatically generate receipts with transaction details, which can be easily customized and saved for future use.
Adjust receipts to reflect transaction details accurately. Include transaction type, such as deposit or payment, and specify amounts clearly. If the deposit is linked to a specific service or product, note it on the receipt for reference. Differentiate between refundable and non-refundable deposits to avoid confusion.
For deposits with conditions, add relevant clauses about refunds or adjustments. This ensures both parties are clear on expectations. For larger deposits, break down the amount into components if applicable, providing transparency in the transaction. Always include the date, time, and method of payment to keep records precise.
If the transaction involves multiple parties, list them on the receipt to clarify who made the payment and who will benefit from it. Customizing these details fosters trust and clarity in any agreement, reducing future misunderstandings.
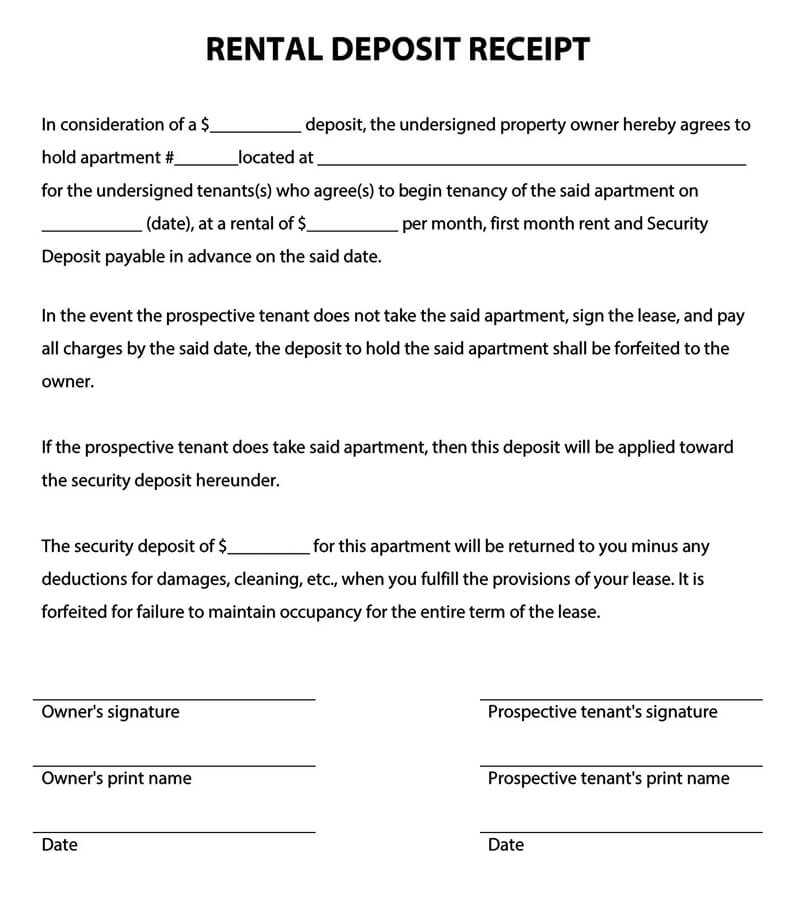
Receipt of Deposit Template

To ensure clear and formal acknowledgment of a deposit, a receipt template should include specific details such as the amount, date, and purpose of the deposit. The template should have space for both the depositor’s and receiver’s information, ensuring transparency in the transaction. Ensure the document includes a unique reference number for future tracking and verification.
Key Information to Include
- Depositor’s Name: Clearly state the full name of the person making the deposit.
- Amount Deposited: Specify the exact amount received, including the currency.
- Date of Deposit: Record the exact date the deposit was made.
- Purpose or Reason: State the reason for the deposit, whether for rent, security, or another purpose.
- Payment Method: Mention the method of payment, such as cash, check, or bank transfer.
- Reference Number: Assign a unique reference number for easy tracking.