When creating a donation receipt, use a clear and easy-to-customize template to streamline the process. A well-structured receipt can help both the donor and organization maintain accurate records. It simplifies the task of acknowledging contributions while ensuring compliance with tax regulations.
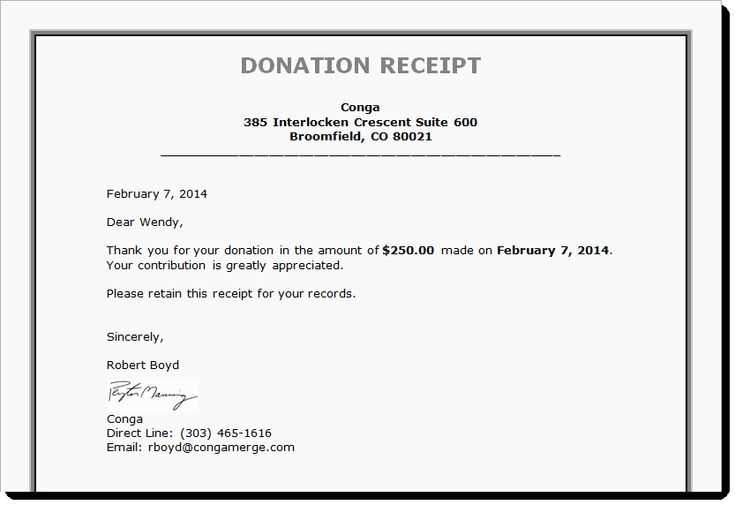
Start by including the donor’s name, donation amount, and date. Add a description of the donated item or service if applicable. It is also important to clearly state that no goods or services were exchanged for the donation to ensure it meets IRS guidelines for tax-deductible contributions.
Additionally, choose a template that can be edited quickly for each new donation. Many editable templates are available online, allowing you to fill in the necessary details and print them instantly. This not only saves time but ensures that each receipt is accurate and up to date.
Lastly, ensure the template includes the organization’s contact information and a thank-you message. This adds a personal touch to the receipt and reinforces the donor’s connection with your cause. By using an editable template, you can create professional, personalized receipts in no time.
Printable Editable Donation Receipt Template

Using a printable editable donation receipt template is an excellent way to simplify record-keeping for donations. These templates are customizable, ensuring all necessary details are included, while being easy to fill out and print.
Key Information to Include
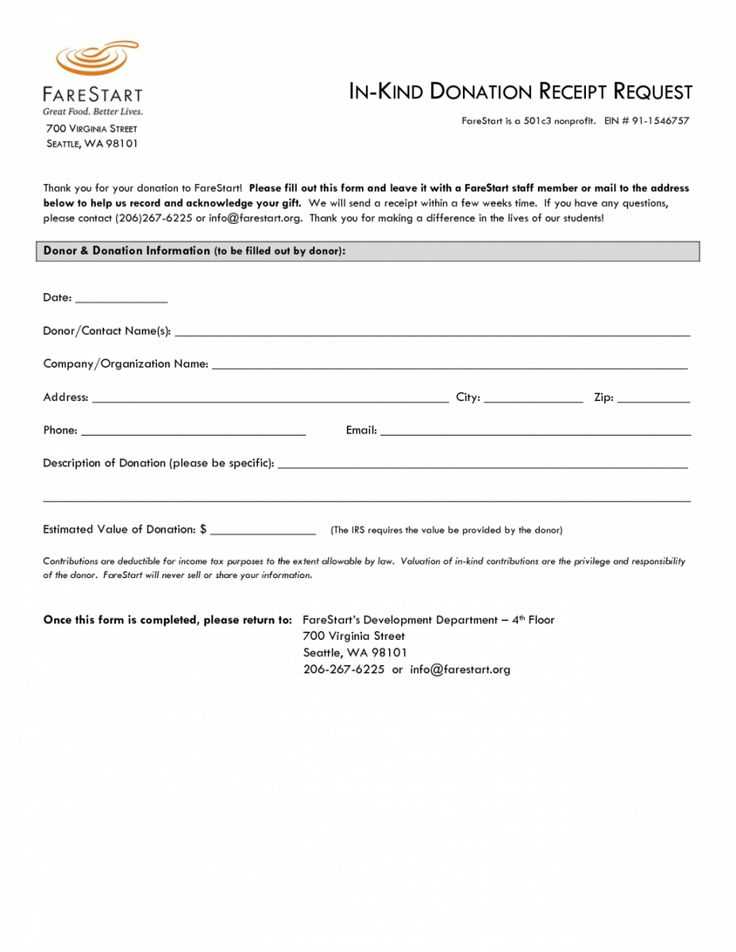
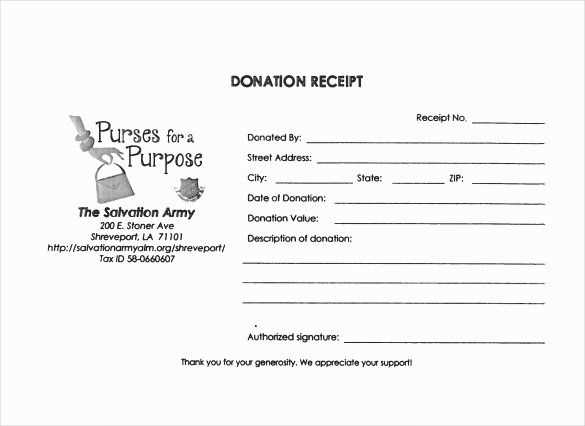
- Donor’s Name: Clearly state the donor’s full name.
- Donation Date: Include the exact date the donation was received.
- Donation Amount: Specify the amount of the donation, whether it’s in cash, check, or in-kind goods.
- Purpose of Donation: If applicable, note the purpose or campaign the donation supports.
- Organization’s Name and Address: Make sure the name and contact details of the receiving organization are listed.
- Tax-Exempt Status: If relevant, include the organization’s tax-exempt status for tax deduction purposes.
- Receipt Number: Assign a unique number to each receipt for tracking purposes.
Benefits of Using Editable Templates
- Customization: You can adjust the template to meet specific needs, whether for a one-time donation or recurring support.
- Accuracy: Ensure all details are correct with a clear format and prevent errors in handwritten receipts.
- Convenience: Easily create and print receipts from your computer, saving time and effort.
- Cost-Effective: Printable templates are free or inexpensive, reducing administrative costs.
How to Customize a Donation Receipt Template
Begin by inserting your organization’s name and contact details at the top of the receipt. Make sure the address, email, and phone number are clearly visible. This ensures the donor has all the necessary information for future reference.
Include a unique receipt number for tracking purposes. This can be auto-generated or manually assigned to each donation. It helps with keeping accurate records and simplifies any future inquiries.
Add a section for the donor’s name and address. Ensure it’s accurate and formatted correctly, matching the information provided on the donation form. This guarantees the receipt reaches the right individual and is personalized.
Specify the donation amount in both numerical and written forms. Include the currency used to avoid any confusion. If the donor made multiple payments or contributions, list each separately with corresponding amounts.
Clearly state the donation date. It’s crucial for both the donor and the organization to have an accurate record of when the donation occurred. You may also include a note if the donation is part of a recurring contribution.
Include a brief description of the donation purpose, if applicable. For example, if the funds are designated for a specific project, mention it on the receipt. This adds clarity and assures the donor their contribution is being used as intended.
If the donation is tax-deductible, make sure to mention this. Include any relevant tax information, such as your organization’s tax identification number. This helps the donor during tax filing and confirms their receipt as an official document.
Finally, add a thank-you note or a message of appreciation at the bottom. A small gesture of gratitude strengthens the donor’s relationship with the organization and encourages future support.
Choosing the Right Format for Your Receipt

Select a format that suits both your needs and the preferences of your donors. A PDF format offers a professional touch, is easy to print, and is compatible with most devices. It’s ideal for formal documentation and ensures that the formatting stays intact across various platforms.
Printable Templates
If your primary goal is to provide a physical receipt, use a printable format like PDF. These files are easy to download, print, and store. They maintain the layout and design without altering the text, making them perfect for donors who prefer hard copies.
Editable Options
For flexibility, consider using an editable format such as Word or Google Docs. This allows you to customize the receipt for each donation, adjusting the details as needed while keeping a consistent structure. It is particularly useful for organizations that need to update donation records frequently.
Choosing the right format depends on how you intend to use the receipts and how your donors will interact with them. Stick to formats that are both convenient and accessible to ensure smooth operations.
Key Information to Include in the Template
Provide the donor’s full name and address to clearly identify them. Specify the date of the donation and the amount given. Ensure the template has a section for the organization’s name and contact information, including address, phone number, and email. This makes the receipt traceable and reliable.
Include a unique transaction ID or receipt number for reference. This helps in tracking donations and addressing any issues that might arise. Mention whether the donation was monetary or in-kind, along with a brief description of non-cash donations.
Clearly state the tax-exempt status of the organization. Include a statement such as, “This is a tax-deductible donation” to provide clarity for tax purposes. Avoid making any promises of goods or services in exchange for the donation unless explicitly required by law.
Finally, add a section for a thank-you note or personalized message, showing appreciation for the donor’s support. Keep this section brief but sincere.
Steps to Print and Distribute the Receipts

First, ensure that the donation receipt template is filled out correctly with all necessary details. Double-check the donor’s name, donation amount, date, and any applicable tax information. This will avoid any mistakes during distribution.
Printing the Receipts
After reviewing the information, open the template in a word processor or PDF editor. Make sure the layout is aligned properly and that the receipt’s font is legible. Print on high-quality paper to maintain a professional appearance. If printing multiple receipts, use a printer that supports batch printing to save time.
Distributing the Receipts
Once printed, organize the receipts by donor or event, especially if you’re handling a large number of donations. For physical distribution, mail the receipts in secure envelopes. If providing digital copies, save the receipts as PDFs and send them through email. Make sure to include a brief message confirming the donation and thanking the donor for their contribution.
Ensure to track which receipts have been sent and follow up with any donors who have not received their receipts within the expected timeframe.
Design Tips for a Professional Look
Use a clean, simple layout. Stick to one or two fonts for readability and professionalism. A serif font for headings and a sans-serif font for body text creates a balanced design. Avoid using too many colors; a monochromatic or limited color palette keeps the receipt looking polished.
Ensure clear hierarchy in text elements. Make the donor’s name, donation amount, and date stand out by using bold text or slightly larger font sizes. This makes key information easily accessible.
Include a prominent logo or brand mark. Position it at the top or bottom of the template for consistency. A well-placed logo adds credibility and reinforces the brand identity without overwhelming the receipt’s content.
Keep margins and spacing consistent throughout the document. Ample white space between sections prevents the receipt from feeling cluttered. This increases legibility and overall aesthetic appeal.
Be mindful of alignment. Align text to the left for a more formal and structured appearance, and avoid excessive use of center alignment, which can make the receipt look unbalanced.
Ensure the template is mobile-friendly. Design with scalability in mind, so that it looks good when printed or viewed on a screen. A template that adapts to different sizes increases its functionality across various devices.
| Tip | Recommendation |
|---|---|
| Fonts | Limit to 1 or 2 fonts; use serif for headings, sans-serif for body text |
| Colors | Use a monochromatic or limited color palette |
| Logo | Place logo at the top or bottom for consistency |
| Spacing | Keep margins and spacing consistent for a clean layout |
| Alignment | Left-align text for formal look, avoid center alignment |
| Mobile-Friendliness | Design for scalability across devices |
Legal Considerations When Using Donation Receipts
Ensure your donation receipts comply with local tax laws. Always include the required details, such as the donor’s name, the date of the donation, the amount, and the non-profit organization’s information. Verify if the donation is tax-deductible based on the donor’s country and the organization’s status. A mistake could affect both the donor’s tax benefits and your organization’s legal standing.
Include Accurate Information

Incorrect or missing data can invalidate the receipt. Make sure the organization’s name, address, and registration number are correct. For donations of goods, provide a description, but avoid assigning a value unless necessary for tax purposes. If offering a service, it’s crucial to avoid overstating the value or offering vague descriptions.
Ensure Timely Issuance
Provide receipts promptly after a donation is made. Some jurisdictions require that receipts be issued within a certain period for the donor to claim tax benefits. Make sure receipts are sent promptly and are available for tax filing purposes.
By adhering to these guidelines, you help build trust with donors while staying compliant with legal standards regarding donations.