Create a clear and functional email receipt template with HTML to improve customer experience and ensure professional communication. Start by organizing key details like transaction amount, date, and order items in a structured format. Use simple tables and styles to keep the layout clean and readable.
For readability, use bold text to highlight important data, like the total amount or purchase date. Keep the design minimal, with enough spacing to separate each section. This approach ensures the email is easy to scan and understand.
Incorporate personalization by addressing the customer by name and including a thank-you note. This small touch builds rapport and reinforces a positive experience. Avoid using excessive styling that can distract from the core content–focus on clarity and accessibility.
Here’s a refined version of the HTML article plan with minimal repetition:
Focus on using clear, direct headings that precisely reflect the content beneath. This keeps your article structured and easy to navigate. Try to limit the introduction to one or two sentences to immediately get to the point. For each section, use subheadings that guide the reader through logical progressions of ideas. Ensure each paragraph has a distinct purpose, avoiding unnecessary filler text.
Content Organization
Group related topics together. For example, if the article is about creating HTML email receipts, have a section dedicated solely to design elements, followed by a section on coding techniques. This will allow readers to jump to the relevant part without unnecessary searching. Avoid broad, generic terms, and focus on specifics.
Concise Writing
Keep sentences short and information direct. Instead of explaining concepts in multiple ways, provide a clear, singular explanation. This enhances readability and makes the content easier to process. Use bullet points where applicable to break down complex ideas.
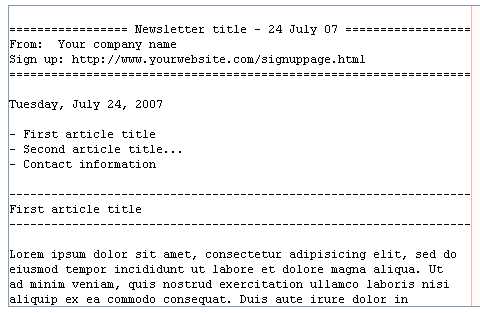
- HTML Email Receipt Template
Ensure your email receipts are clear and visually appealing with a well-structured HTML template. Start with a basic layout that includes necessary transaction details such as order number, date, items purchased, and total amount. Incorporate a clean design that makes information easy to digest and navigate. Make use of bold or highlighted text to bring attention to key data points like the order total.
Key Elements to Include
- Header Section: Include your logo and contact information at the top for easy brand recognition.
- Transaction Details: Provide order number, date, and payment method for reference.
- Itemized List: List each purchased item with quantities, prices, and total cost.
- Total Amount: Bold the total sum to ensure visibility.
- Footer Information: Include terms, return policies, and links to customer support.
Design Tips
Keep the design minimalistic. Use a single-column layout to avoid clutter. Ensure your receipt is mobile-friendly, as many customers will access it on smaller screens. Maintain a color scheme that aligns with your brand’s identity and ensure the text is legible with good contrast.
By following these guidelines, your email receipt will provide customers with all the information they need while maintaining a professional, clean presentation.
To create a functional receipt template in HTML, start by structuring it with essential components such as the header, transaction details, and footer. Begin with a <div> element for the overall container to keep everything aligned properly.
- Container Setup: Use a
<div class="receipt-container">to wrap the entire content. This helps ensure that the receipt elements are grouped together and easy to manage. - Header: Add a header with a
<div class="header">that includes the company name, logo, and contact information. Keep this section simple but clearly visible. - Transaction Details: Below the header, create sections for date, receipt number, and transaction breakdown. Utilize
<ul>and<li>for listing items like product names, quantities, prices, and totals. - Footer: Conclude with a footer section for payment methods, thank you notes, or additional instructions. Use
<div class="footer">for this part.
Ensure that the content is easily readable by keeping the layout simple and organized. Use <strong> and <em> tags for emphasis on key details like totals or dates. This structure provides clarity, allowing customers to quickly understand the receipt contents.
Incorporating dynamic content into your email receipt template allows you to personalize the experience and provide transaction-specific details. Use placeholders to automatically pull in data like transaction ID, customer name, and purchase items. These elements can be customized for each recipient, ensuring relevance and clarity. Below is an example of how to integrate dynamic transaction information into an email receipt template.
| Item | Quantity | Price |
|---|---|---|
| {{item_name}} | {{quantity}} | {{price}} |
Here, {{item_name}}, {{quantity}}, and {{price}} are placeholders that will be replaced by the actual values during the email generation process. This allows the email to be tailored to each transaction, making it more informative for the recipient.
To display the transaction ID and customer details, you can add placeholders like {{transaction_id}} and {{customer_name}} at the top of the email:
Transaction ID: {{transaction_id}}
Customer Name: {{customer_name}}
This dynamic approach ensures that each email is personalized, providing a better experience for your customers and reducing the chances of confusion or errors. It also allows for easy updates to the content without manual intervention, saving time and effort. By automating the inclusion of transaction data, you can streamline communication and maintain a professional and clear email receipt system.
Focus on a fluid design that adapts to various screen sizes. Use flexible grid layouts and media queries to ensure elements resize and adjust based on the user’s device.
- Apply a mobile-first approach to prioritize small-screen experiences. This ensures that the email layout functions well even on smaller devices, which is crucial for modern users.
- Ensure font sizes and clickable buttons are large enough for users with visual impairments or limited dexterity. Set a minimum font size of 16px to enhance readability.
- Use high-contrast colors for text and background to improve legibility, especially for those with color blindness. Stick to a contrast ratio of at least 4.5:1 for normal text.
- Utilize semantic HTML elements such as
<header>,<footer>, and<main>to structure content, improving accessibility for screen readers.
Test responsiveness across multiple devices and screen sizes. Tools like browser developer tools can simulate various devices to help identify layout issues before sending out emails.
Include your brand’s logo at the top of the receipt to make the email instantly recognizable. Position it clearly so that customers can identify your company without needing to read further. Choose a logo size that fits well with the email layout, ensuring it doesn’t overwhelm other important information.
Use your brand’s color palette for both text and background elements. This enhances the visual identity and provides consistency with other customer-facing materials. Incorporate contrasting colors for buttons and calls to action to guide customers naturally through the receipt details.
Consider adding a custom footer with your brand’s slogan or tagline. This small touch reinforces your brand messaging while providing additional space for relevant links, like customer support or social media profiles. Make sure the text aligns with your company’s tone and voice.
Utilize custom fonts that reflect your brand’s style, but ensure they are web-safe to prevent rendering issues. Clear, readable typography improves the overall user experience. Avoid overcomplicating the design with too many different fonts; stick to one or two consistent styles.
Incorporate personalized elements like the customer’s name or purchase details to make the email feel tailored. This adds a personal touch that strengthens the connection between your brand and the customer.
Include clear payment information in your email template to provide transparency for your customers. Display the transaction amount, the payment method used, and the date of the payment. This ensures recipients can verify their purchase details without confusion. Keep the text simple and easy to read by using bullet points or tables.
Payment Method and Amount
Clearly state the payment method (credit card, PayPal, etc.) and the exact amount paid. Use straightforward language and ensure the format matches the style of your email.
Confirmation Links
Include clickable confirmation links that allow users to access their order status or payment history. These links should be easy to spot and direct the recipient to a secure page for more detailed information. This helps build trust and guides users in case they need to review or update their transaction details.
To ensure consistent presentation, test your HTML email templates on popular email clients like Gmail, Outlook, and Apple Mail. These clients often render HTML and CSS differently, which can affect the layout and design. Use testing tools like Litmus or Email on Acid to preview your email across various platforms.
Start by checking responsive design on both desktop and mobile devices. Many clients, especially mobile versions, may alter how media queries work, so ensure your design adjusts appropriately. Pay attention to font rendering, as some email clients don’t support custom fonts and default to system fonts.
Test interactive elements such as buttons and forms. Some clients might strip out JavaScript, so it’s essential to use alternative methods like inline CSS or HTML form elements. Always ensure that call-to-action buttons are visible and functional across all tested clients.
Check for image compatibility by testing how images load in each client. Some email clients block images by default, which can affect the layout. Include ALT text and optimize image sizes for faster loading times. Avoid using large background images that may not render correctly on older email clients.
Finally, test subject lines, preheaders, and alt text in different environments. Email clients often have unique limitations for these elements, so it’s crucial to verify their visibility and accuracy across various platforms.
Make sure to close your unordered list with the tag. It’s essential for maintaining proper HTML structure and preventing any display issues. By not closing the list correctly, you risk breaking the layout of your email receipt, causing the content to render unpredictably. A simple tag is enough to keep the list well-formed and functional. Always double-check your code for these small but crucial details to ensure everything renders as expected across different email clients.