How to Use a Free Receipt Template in Excel
To create a simple and functional receipt using Excel, first download a free template from a reliable source. Many templates are available with predefined fields such as receipt number, date, seller’s details, itemized list, and total amount. Once downloaded, open the file in Excel and adjust the fields according to your specific needs. Fill in the information like item descriptions, quantities, prices, and taxes, ensuring everything is clear and accurate. With these templates, you can quickly generate receipts without needing to format them from scratch.
Customizing Your Template

Customizing an Excel receipt template is easy. You can adjust the font, colors, and layout to match your business style. To add your logo, simply insert an image into the header or footer section. Additionally, if you frequently use specific terms (like product categories or service names), you can pre-fill these in the template to save time. You can also modify the layout of the table where item details are entered, ensuring it aligns with your receipt format requirements.
Calculations and Formulas
One key benefit of using Excel is the ability to automate calculations. For instance, you can input formulas to automatically calculate taxes, discounts, or totals. In the “Total” column, enter a formula like =SUM(B2:B10) to calculate the total amount for a list of items. This allows for quick and accurate receipts every time you need them. You can also set up automatic calculations for VAT or other relevant taxes by adjusting the formulas accordingly.
Where to Find Free Templates

Many websites provide free Excel receipt templates. Search for reliable sites that offer customizable options for small businesses, freelancers, or personal use. Websites such as Microsoft Office templates, Template.net, and Vertex42 offer a wide variety of styles and formats, all available for download. Select a template that suits your needs and customize it according to your preferences.
Additional Features

- Include payment method options, such as cash, credit card, or bank transfer, for better tracking.
- Ensure your receipt template contains space for both buyer and seller information, such as names and contact details.
- Consider including a “Thank You” note or an additional line for terms and conditions if applicable.
With just a few edits, your receipt template will be ready for use every time a transaction occurs. Excel provides an easy and cost-effective way to manage your receipts without the need for expensive software or custom solutions.
Free Receipt Template for Excel: A Practical Guide
How to Download and Open a Receipt Template in Excel for Free
Search online for free receipt templates specifically designed for Excel. Websites like Microsoft Office’s official template gallery or platforms such as Vertex42 offer a wide selection. Once you’ve found the template, click on the download link, and it will open in Excel automatically. If you’re using a version of Excel online, the template will be accessible directly in your browser.
Customizing Fields: Tailoring the Template to Your Needs
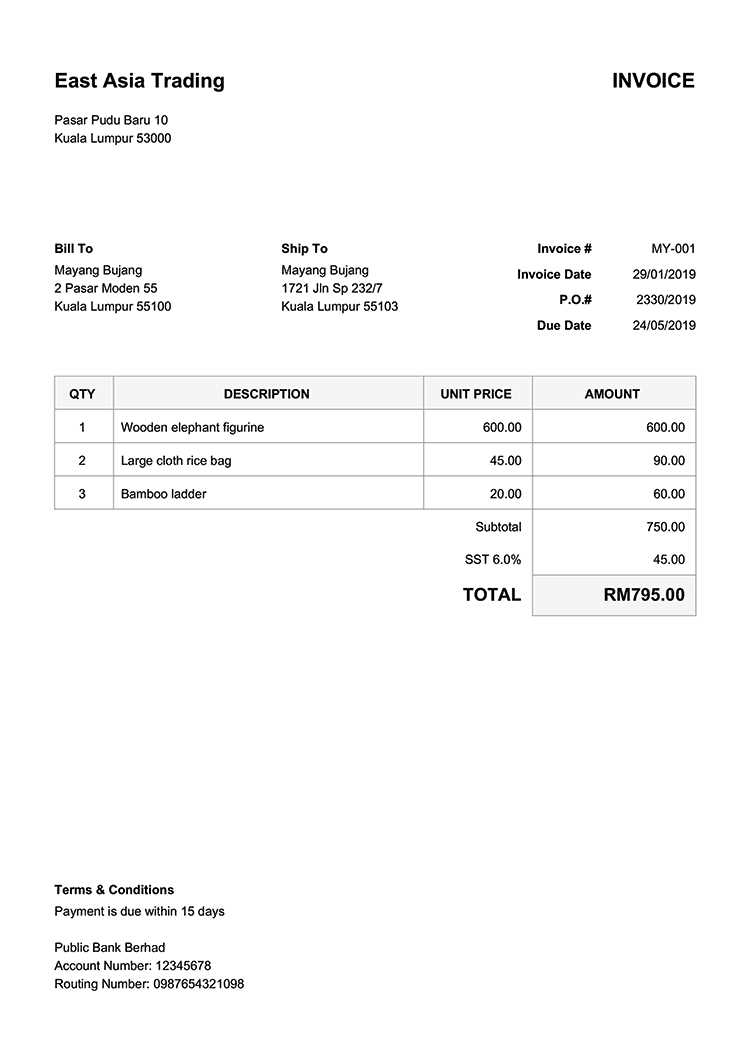
Adjust the template to suit your business or personal preferences by editing the fields. Replace placeholders like ‘Company Name’ and ‘Address’ with your own details. You can modify product or service descriptions, amounts, and add more rows if necessary to accommodate larger transactions. Ensure all essential information is visible and accurate.
Integrating Tax and Discount Calculations into Your Receipt

To calculate taxes and discounts automatically, use Excel’s built-in formulas. For example, you can create a formula to calculate sales tax based on your tax rate, like =B2*0.05 (where B2 is the amount). To add discounts, subtract a percentage of the total from the final amount with a formula like =C2*(1-0.10) for a 10% discount.
Adding a Professional Logo and Branding to the Template
Include your business’s logo at the top of the receipt for a polished look. Simply insert an image by selecting ‘Insert’ from the menu, then ‘Picture.’ Resize the logo appropriately and place it where it’s most visible. You can also customize the template’s colors to match your branding, ensuring it aligns with your company’s identity.
Best Practices for Organizing Data in Your Receipt
Arrange information logically: start with your business name and address, followed by the customer’s details. List products or services clearly, with quantities, prices, and total amounts. Always leave enough space for additional notes, payment method, or transaction number. Keep the layout simple and professional for easy readability.
How to Save and Share Your Personalized Receipt Template
Once your template is complete, save it as an Excel file (.xlsx) to keep the ability to edit it later. For sharing, convert it to PDF format for easy distribution. To do this, click ‘File,’ then ‘Save As,’ and select PDF from the dropdown. You can then email the PDF or print it for in-person transactions.