Create a clear and functional POS receipt template in Google Docs to streamline your business transactions. Google Docs offers a flexible platform for designing a receipt that suits your needs.
Step-by-Step Guide
Start with a clean document. Open Google Docs and choose a blank document. Here’s how you can structure it:
- Business Information: At the top, include your company name, address, phone number, and email.
- Date & Time: Add the date and time of the transaction below your business details.
- Transaction Details: Create sections for items purchased, their quantities, unit prices, and the total price.
- Payment Method: Add a section for payment methods, such as cash, credit card, or mobile payment.
- Thank You Note: Conclude with a polite thank you message or your return policy.
Formatting Tips
Use tables to organize the information clearly. Here’s a simple layout:
| Item | Quantity | Price | Total |
|---|---|---|---|
| Example Product | 1 | $10.00 | $10.00 |
Apply bold and italics to make important sections stand out, like total amounts or special instructions. Use different font sizes for headings and details for better readability.
Customization Options
Google Docs allows you to change the font style and size. Customize your template to match your brand by using your company’s fonts or colors. You can also insert your logo or any other branding elements to make the receipt look professional.
Pos Receipt Template for Google Docs
How to Set Up a Basic Receipt Template in Google Docs
Customizing the Layout and Design of Your Receipt
Incorporating Store Logo and Contact Details in the Template
Creating Itemized Lists for Products or Services on Your Receipt
Formatting Tax and Discount Information Clearly
Saving and Sharing Your Receipt Template in Google Docs
To set up a basic receipt template in Google Docs, begin by creating a blank document. Use a table for structure to align items neatly. Start with rows for transaction details like store name, date, receipt number, and total amount. Adjust the table’s borders and background for better visibility and layout.
To customize the design, play with fonts and colors to match your store’s branding. Keep the style clean and legible, especially for crucial information like prices and totals. Bold or increase the font size for the most important sections to make them stand out.
Incorporate your store’s logo and contact details at the top of the receipt. Insert an image of your logo, then add your store’s name, address, phone number, and email beneath it. This makes your receipt look professional and informs the customer where to reach you for any inquiries.
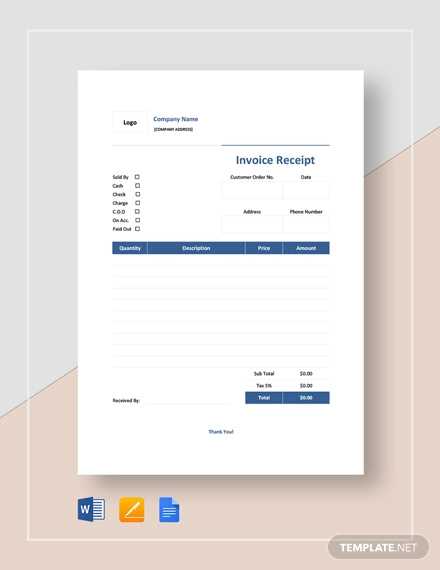
For itemized lists, create rows in the table for each product or service. Include columns for the description, quantity, unit price, and total. This organization helps customers clearly understand the breakdown of their purchase.
Clearly format tax and discount information in separate rows or sections. Place the tax and discount amounts directly below the itemized list and bold them for emphasis. Ensure the total is clearly marked, including the sum after applying tax and any discounts.
Once you’ve completed the template, save it in Google Docs for easy access. Share the document by clicking the “Share” button and choosing who can view or edit it. You can also make a copy of the template to reuse for future receipts.

