If you’re looking for a quick and reliable way to create receipts, using a Microsoft receipt template is an excellent solution. These templates are easy to find and customize, making them ideal for businesses and freelancers who need to provide professional documentation for transactions.
Start by selecting a template that fits your business needs. Microsoft offers a variety of options, from basic receipt formats to more detailed ones that include tax calculations and itemized lists. After selecting the right template, simply fill in the transaction details such as the buyer’s information, purchased items, and payment method.
Customize the template to match your brand by adjusting the colors, logo, and fonts. This simple step adds a personal touch, making your receipts look more polished. With Microsoft templates, you can also easily save receipts for future use, which can help you maintain organized financial records.
Keep in mind that ensuring accuracy in the details is key. Double-check the dates, prices, and any applicable taxes before finalizing the receipt. By using a Microsoft receipt template, you not only save time but also maintain a high level of professionalism in your transactions.
Here’s the revised text where repeated words are shortened, but the meaning and grammatical structure are maintained:
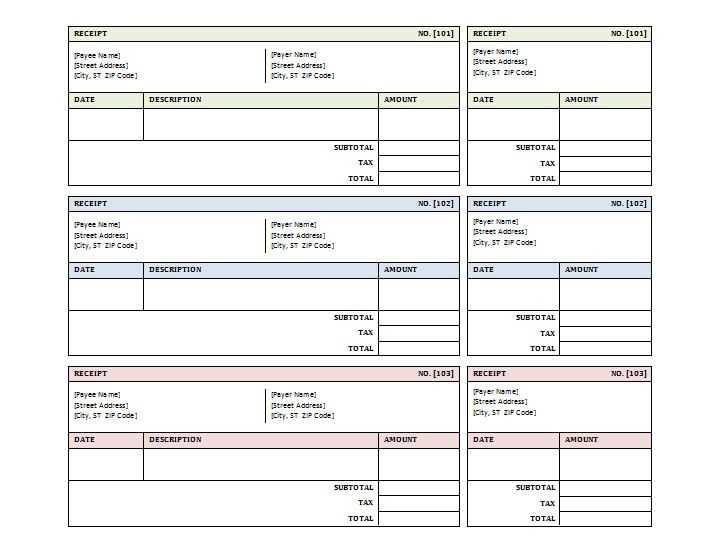
For a streamlined receipt template, start by clearly defining the necessary fields: business name, transaction details, and contact information. Ensure all items are listed with prices and quantities. A simple layout helps customers quickly understand the transaction.
Incorporate your business logo at the top for easy identification. The date, receipt number, and payment method should be clearly visible. Place the total at the bottom to make it easy to spot. Include space for any additional notes or terms at the footer, allowing for flexibility in transactions.
Keep fonts readable, using bold for headings to distinguish key information. Align items and totals neatly to ensure the receipt is both functional and professional. When printing, choose a format that minimizes waste, ensuring it fits onto standard paper sizes.
Customize your template based on your business needs. If you offer discounts or taxes, include fields for those adjustments. This ensures the receipt reflects the exact amount paid, making it useful for both the customer and your accounting records.
Microsoft Receipt Template: A Practical Guide
Choosing the Right Format for Your Business Needs
How to Customize a Receipt in Microsoft Word
Adding a Logo and Branding to Your Design
Incorporating Taxes and Discounts into the Layout
Saving and Printing Receipts from the Document
Managing Records for Accounting and Audits
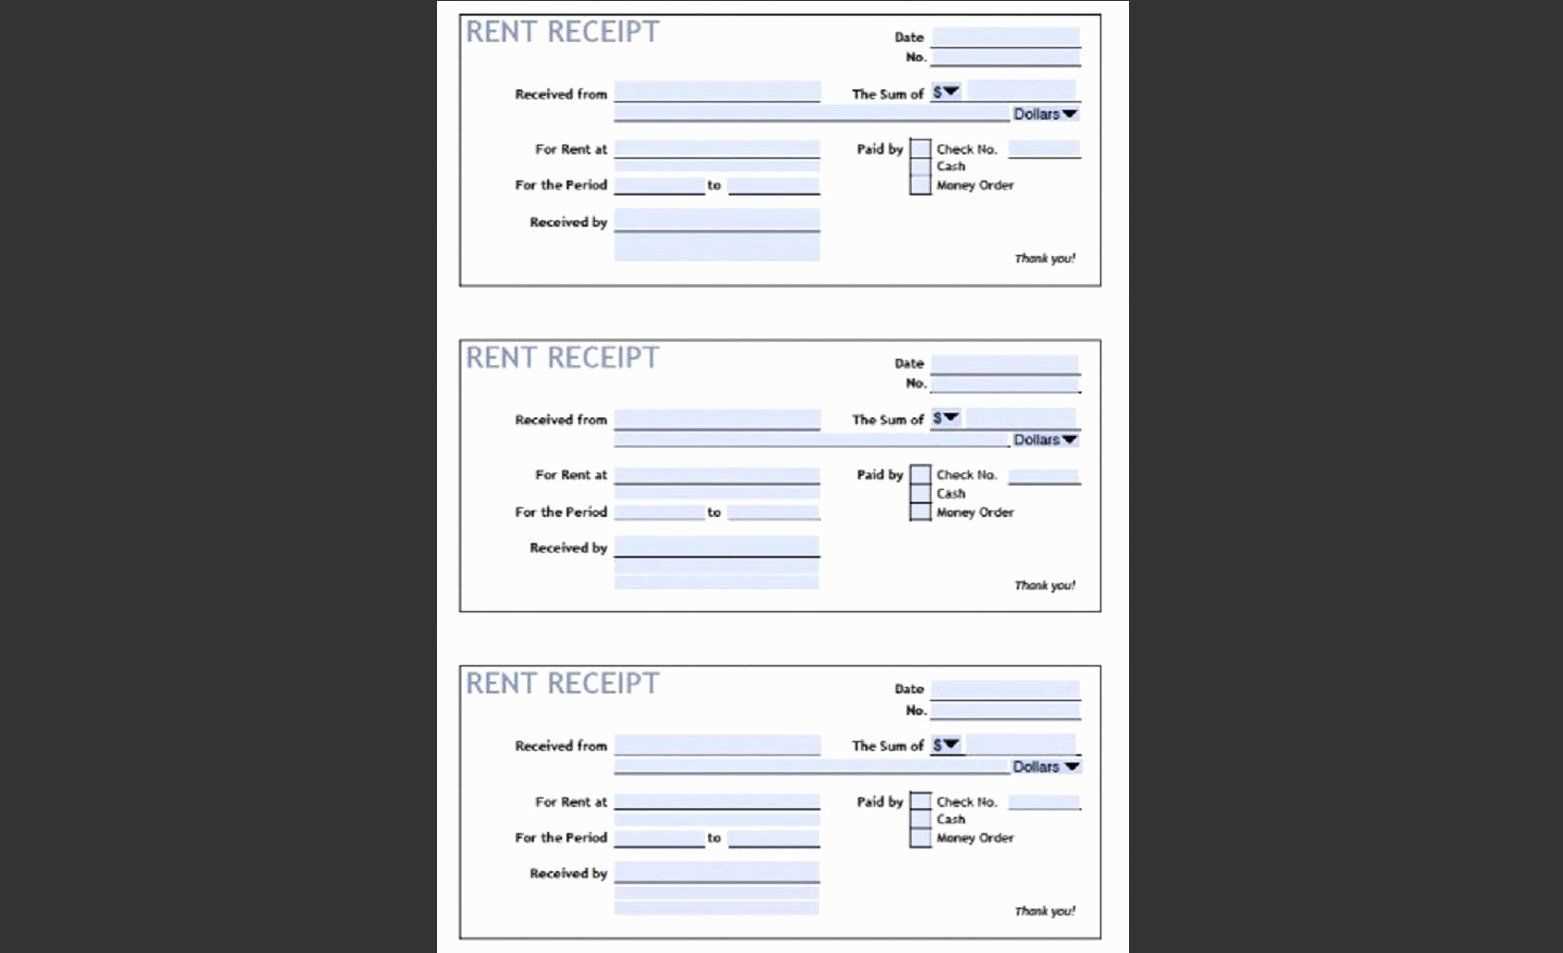
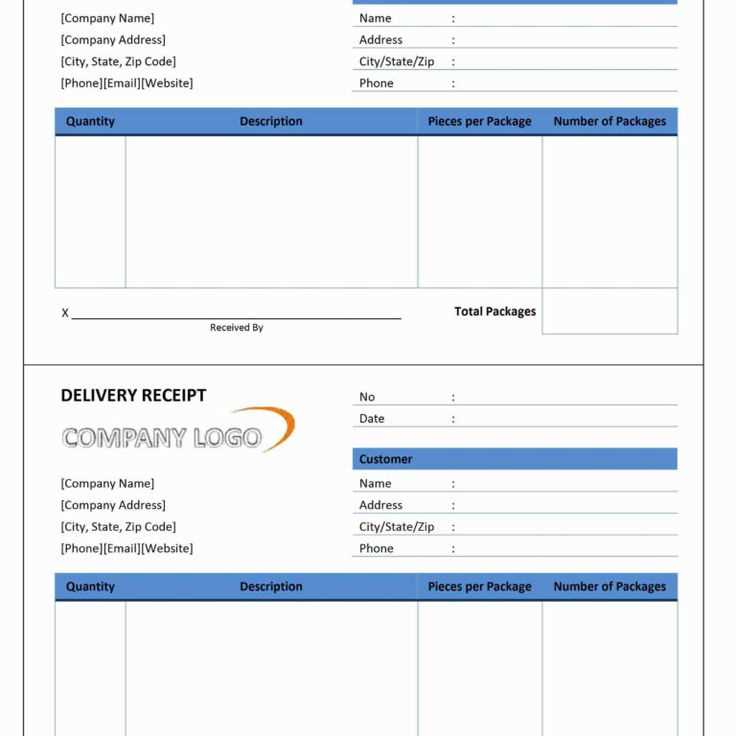
Choose a template that aligns with your business style. Microsoft Word offers simple, customizable templates that you can adjust to fit various transaction types. For businesses needing detailed receipt information, select a format that includes space for items, quantities, prices, taxes, and totals. This ensures clarity for both you and your customers.
Customizing the receipt is straightforward in Microsoft Word. Use the built-in tools to adjust fonts, text sizes, and alignments. You can edit placeholders for customer information, product details, and pricing. Add rows for additional items or leave space for special instructions if necessary. For a polished look, make sure the layout is clean and the text is easy to read.
To personalize your receipt further, incorporate your logo and branding. Insert your company’s logo at the top or in the header. Adjust the size and placement for a professional look. Additionally, choose colors that align with your brand. Microsoft Word allows you to customize the text color and background, so the receipt can reflect your business identity.
Adding taxes and discounts to your template is simple. Include formulas for tax calculations, especially if the tax rate changes depending on the location. To apply discounts, create a section for promotional codes or bulk purchase discounts. Make sure the receipt clearly separates the original price, tax, and discount values to avoid confusion.
Once you’ve designed your receipt, saving and printing it is easy. Save the document as a template or PDF for consistent use. Printing can be done directly from Word, or you can set up an automated system to print receipts after transactions. Ensure that the printer settings match the document format for best results.
Keep receipts organized for accounting and audits. Store digital copies in a secure location, such as cloud storage, for easy access. If needed, export the data into accounting software to track sales and expenses. This helps with financial reporting and ensures compliance during audits.