Use a structured itemized daycare receipt to provide clear financial records for parents and simplify tax reporting. A detailed breakdown of charges ensures transparency and helps avoid disputes over payment amounts.
Include essential details such as child’s name, billing period, services provided, and total cost. Specify rates for daily care, extended hours, meals, or special activities. If applicable, list discounts, late fees, or additional charges separately.
Format the receipt for easy reference. A table layout works well, aligning each service with its cost. Add your daycare’s name, address, contact details, and tax ID to make the receipt official. A signature line or digital approval can further validate the document.
Providing itemized receipts not only helps parents track expenses but also strengthens your daycare’s professional credibility. Using a consistent template saves time and ensures accuracy with each transaction.
Itemized Daycare Receipt Template
Include Clear Payment Details – List each charge separately with descriptions, dates, and rates. Specify daily, weekly, or monthly fees, along with any additional services like meals or extended care.
Break Down Additional Fees – Outline late pickup charges, supply fees, or activity costs. Transparency prevents disputes and helps parents track expenses accurately.
Provide Payment Confirmation – Include received amounts, payment method, and outstanding balances. A simple “Paid in Full” or “Balance Due” section clarifies the payment status.
Ensure Tax Compliance – Add the daycare’s tax ID, parent’s name, and total paid amount for tax reporting. This simplifies reimbursement and deduction claims.
Make It Professional – Use a structured format with the daycare’s name, contact details, and an invoice number. A clean, organized receipt builds trust and ensures easy record-keeping.
Key Elements to Include in a Daycare Receipt
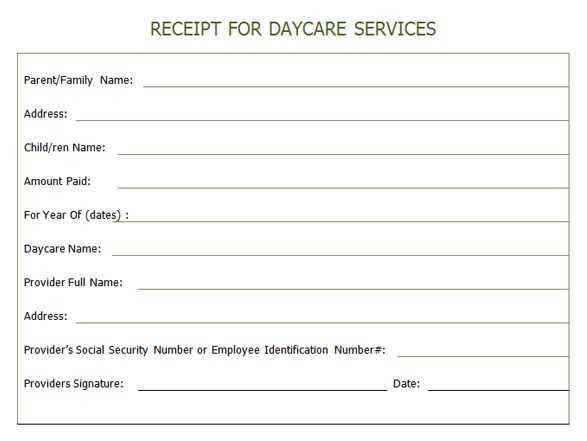
Include the daycare’s name, address, and contact details at the top. This ensures parents have clear documentation for tax purposes and reimbursement claims.
Parent and Child Information
List the parent’s full name and the child’s name to avoid confusion. If the receipt covers multiple children, specify each one separately.
Payment Breakdown
Provide a detailed summary of charges. Separate regular fees from additional costs like late pick-ups or special programs. Use a table for clarity.
| Description | Amount ($) |
|---|---|
| Monthly Tuition | 800.00 |
| Late Pick-up Fee | 25.00 |
| Supply Fee | 15.00 |
| Total | 840.00 |
Include the payment method and date to confirm the transaction. If paid by check, note the check number.
Add a statement confirming receipt of payment with the daycare provider’s signature or stamp for authenticity.
Formatting a Clear and Organized Receipt

Use a structured layout with distinct sections for provider details, payment breakdown, and parent information. Align text consistently and leave adequate spacing to improve readability.
List charges in a table format, separating service descriptions, dates, and costs into columns. Label each section clearly, ensuring that totals are easy to find. Bold important figures like the total amount due.
Include payment method details and a confirmation statement for clarity. If applicable, add a unique receipt number to simplify record-keeping.
Ensure all fonts are legible and avoid excessive styling. Stick to simple formatting that makes key information easy to locate at a glance.
Breaking Down Charges for Transparency
List each charge separately with a clear description. Instead of a single total fee, provide a breakdown of tuition, meals, supplies, and any additional services. This approach helps parents understand exactly what they are paying for.
Specify timeframes for recurring charges. For example, indicate whether tuition is weekly or monthly. If there are late fees, outline the conditions and exact amounts to avoid confusion.
Include optional costs. Some parents may choose extra programs, extended hours, or field trips. Label these separately so families can see what is included and what is an add-on.
Use consistent wording and formatting to keep the receipt easy to read. Align amounts in a column, use the same terminology throughout, and avoid vague descriptions. Parents should be able to compare receipts month to month without guessing.
Offer a contact point for questions. A simple note with a phone number or email allows parents to clarify any details, reinforcing trust and preventing misunderstandings.
Customizing a Template for Different Payment Methods
Ensure clear payment categories. Label each section according to the payment type, such as cash, credit card, bank transfer, or mobile payment. This helps parents quickly identify the relevant details.
Adding Dynamic Payment Fields

Use placeholders to make the template adaptable. For example, instead of a fixed “Card Number” field, create a flexible section where users can enter payment-specific details like transaction ID, check number, or digital wallet reference. This keeps the receipt structured without unnecessary fields.
Including Payment Processing Fees
If certain methods include additional charges, add a section for processing fees. Use a simple formula: “Total Fee = Service Cost + Processing Fee”. Displaying this clearly prevents confusion and ensures transparency.
Highlight discounts for preferred methods. If offering reduced rates for specific options, include a “Discount Applied” line in the breakdown. This encourages parents to use cost-effective payment channels.
Adapting a template to multiple payment types makes receipts clearer, reduces disputes, and provides a professional experience for both daycare providers and parents.
Legal and Tax Considerations for Daycare Receipts
Ensure that each receipt includes all required details to comply with tax regulations. Missing information can lead to rejected claims or audits.
- Include essential details: The receipt must state the provider’s name, address, tax identification number, payment date, service period, amount paid, and parent’s name.
- Use a consistent format: A structured layout helps parents and tax authorities verify expenses easily.
- Verify licensing requirements: Some jurisdictions require daycare providers to be registered for payments to qualify as deductible expenses.
- Keep copies: Retain receipts for at least three to seven years, depending on local tax laws.
- Report income correctly: If providing childcare services, report all earnings and issue receipts to parents for their records.
- Understand tax deductions: Parents may claim childcare expenses under tax credits, but only if receipts meet legal standards.
Following these steps prevents disputes and ensures compliance with financial regulations.
Using Digital Tools to Generate Receipts
Leverage online platforms to streamline receipt creation. Tools like receipt generators automate the process, saving time and reducing errors. These tools allow you to customize receipts to fit your specific needs, from daycare charges to discounts.
Benefits of Using Online Tools

- Customization: Adjust layouts, fonts, and item details to match your business’s branding.
- Time-saving: Automate repetitive tasks like date stamping and totals calculation.
- Accuracy: Minimize human errors in calculations and formatting.
- Security: Store receipts digitally, ensuring secure backup and easy retrieval.
Popular Digital Tools
- Invoice Ninja: A free tool offering receipt templates and invoicing features.
- Wave: A cloud-based tool for easy receipt and invoice creation, ideal for small businesses.
- Zoho Invoice: Provides customizable templates, helping you generate professional receipts in minutes.


