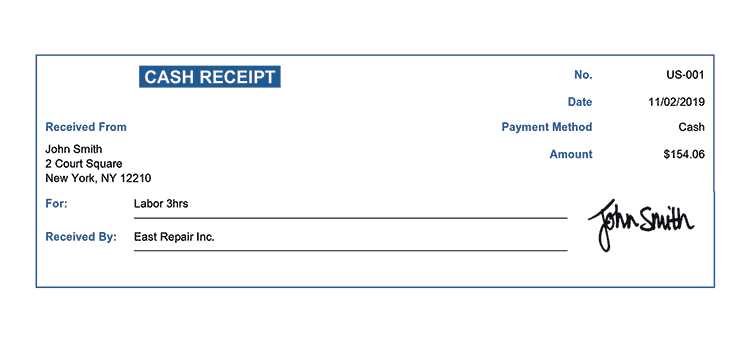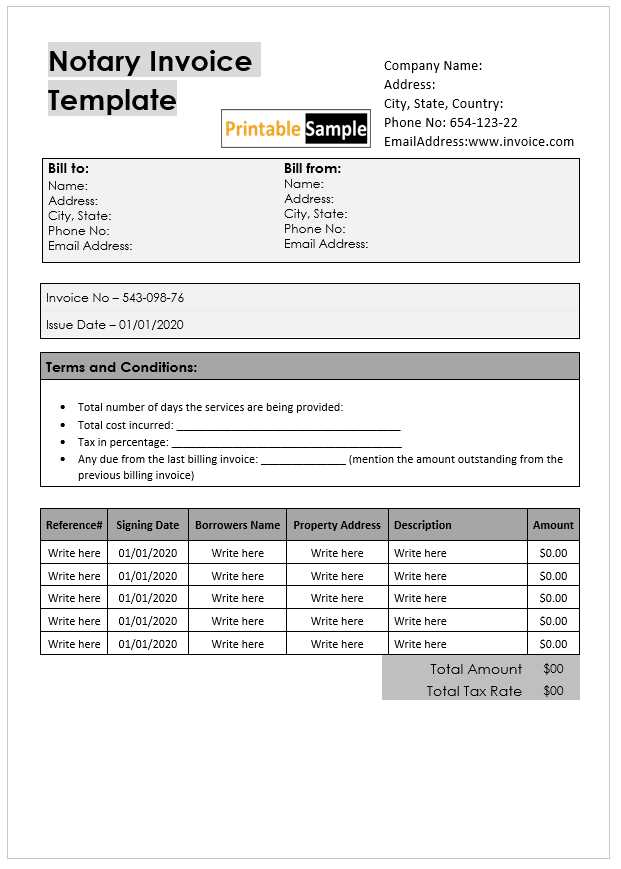
To create a reliable and professional notary receipt, begin by ensuring that it contains all the required details, such as the names of the parties involved, the date, and the specific service rendered. Include the notary’s full name, title, and contact information. The document should also specify the type of document being notarized, whether it’s a contract, affidavit, or another legal form.
The format of the receipt should be clear and concise. Start with a brief introductory statement confirming the service provided. Follow with a detailed description of the document being notarized, ensuring to specify the dates and any reference numbers if applicable. Be sure to include a line for the notary’s signature and seal, which confirms the authenticity of the transaction.
When drafting the receipt, remember to account for any local or state-specific requirements for notarization. Different jurisdictions may have slightly varied rules, so double-check the regulations in your area to ensure compliance. A well-structured notary receipt provides transparency and security for all parties involved, while also enhancing the professionalism of the service.
Notary Receipt Template Guide

To create a well-organized notary receipt template, include the following key elements to ensure its clarity and professionalism:
1. Header Information
Start with the notary’s name, business address, and contact details. This gives the receipt a clear point of reference for the person issuing the receipt.
2. Date of Notarization

Clearly state the exact date of notarization. This is critical for documentation and tracking purposes.
3. Description of Notarized Document
Provide a brief but precise description of the document that was notarized. This helps distinguish the transaction and provides context for both parties.
4. Notary’s Signature and Seal
Ensure that the notary’s signature and seal appear on the receipt. This confirms the authenticity of the notarization.
5. Signature of the Person Receiving the Notarization
Include a line for the signature of the individual who received the notarization. This acknowledges their receipt of the document.
6. Payment Details
Document the payment made for the notarization services. This could include the amount, payment method, and any applicable fees.
Essential Information for a Notary Receipt
A notary receipt must include key details that ensure its legal validity. First, it should clearly state the full names of all parties involved, including the notary public. Additionally, the date and location where the notarial act took place are crucial components.
Specifics of the Transaction
The receipt must describe the type of transaction being notarized, such as an affidavit, power of attorney, or contract. Include any reference numbers or document identifiers for clarity and future reference.
Notary’s Acknowledgment
The notary’s acknowledgment must confirm that the document was signed voluntarily and that the parties provided valid identification. It’s also important to include the notary’s signature and seal to validate the transaction.
How to Create a Notary Receipt Step-by-Step
Begin by gathering the necessary details. Ensure you have the names and addresses of all parties involved, the date of the notarization, and a description of the document being notarized. This information forms the foundation of the receipt.
Next, include a clear statement of the notary’s authority. Specify that you are certifying the identity of the signer, the document’s authenticity, or the signing of the document in your presence. This establishes the notary’s role and responsibility.
Specify the notarial act performed. Whether you are certifying a signature, administering an oath, or taking an affidavit, make sure this is clearly noted on the receipt. For example, use a phrase like: “This is to certify that I, [Notary Name], have witnessed the signing of [Document Name].”
Include your notary details: full name, official title, and commission number. Your commission’s expiration date should also be stated. This is critical for verifying the notary’s authority at the time of the transaction.
Sign and stamp the receipt. The notary’s seal should be affixed in the designated area, ensuring it’s legible. Without this, the document would not be considered officially notarized.
Finally, provide space for the recipient’s signature. This serves as an acknowledgment that the receipt has been issued to them. The recipient’s contact details can be added, if necessary, for further identification.
Common Errors to Avoid in Notary Receipts
One of the most common mistakes is failing to accurately include the date of notarization. Double-check that the date aligns with the actual signing to avoid discrepancies that could render the document invalid.
Another frequent issue is missing or incorrect details about the signatories. Always ensure the full names of all parties involved are correctly spelled, and verify their identities if necessary. This is especially important when notarizing documents that involve multiple individuals.
Inaccurate Notary Acknowledgment
A common error is providing an incorrect notarial statement. The acknowledgment should match the language specified by your local regulations, ensuring the notary is properly identified and the document’s authenticity is affirmed. Avoid modifying standard language as it can lead to confusion or legal issues.
Overlooking Witness Information
If witnesses are required, make sure to list their full names, addresses, and signatures, if applicable. Missing witness details can result in complications during legal proceedings or invalidation of the notarized document.
| Error | Recommendation |
|---|---|
| Missing Date | Ensure the notarization date matches the document signing date. |
| Incorrect Signatory Information | Verify full names and identities of all signatories. |
| Invalid Notary Acknowledgment | Use the standard notarial statement according to regulations. |
| Lack of Witness Information | Include full details of all witnesses, if required. |
Customizing Notary Receipts for Different Jurisdictions

Each jurisdiction has specific requirements for notary receipts, which must be addressed in your document. To ensure accuracy, tailor the receipt format to comply with local regulations.
Understand Local Laws and Formats
Start by researching the notary laws in the specific jurisdiction where the transaction occurs. Some regions may require specific wording, additional fields, or signatures. For example, in certain areas, you must include the notary’s commission number and expiration date, while others may require a statement of the notary’s authority. It’s crucial to confirm the exact details with the jurisdiction’s governing body or local regulations.
Incorporate Required Legal Statements
In many jurisdictions, notary receipts include a declaration stating the notary’s presence during the signing process and that all parties provided valid identification. Ensure you integrate this statement if required by local law. Furthermore, some jurisdictions may mandate specific phrasing for these legal affirmations, so double-check local requirements before finalizing the template.
By adapting the notary receipt format to meet the standards of each jurisdiction, you ensure compliance and maintain the validity of notarized documents.
Legal Considerations in Notary Receipt Usage
When using a notary receipt, ensure compliance with local laws and regulations to avoid legal disputes. Notary receipts must be properly signed and sealed by a certified notary to guarantee authenticity. The notary’s role is to verify the identity of signatories and witness the execution of the document, ensuring the transaction’s legality.
It’s important to verify that the notary is authorized in the jurisdiction where the receipt is issued. Different regions may have distinct requirements, so double-check the notary’s credentials. Failure to do so can result in the document being considered invalid.
- Ensure the receipt includes the notary’s seal and signature, which confirms the validity of the transaction.
- The notary must confirm that all parties involved are signing willingly and under no duress.
- Check if the document requires any witnesses aside from the notary, depending on its nature.
- Confirm the notary’s jurisdiction to avoid future legal challenges to the validity of the receipt.
Additionally, notary receipts should clearly specify the date and nature of the transaction, as any ambiguity can lead to potential challenges in court. Be aware that some transactions may require additional documentation, so it’s wise to consult with a legal professional to ensure full compliance.
Sample Notary Receipt Templates for Various Purposes
For creating notary receipts, it’s crucial to tailor the template to the specific purpose it serves. Here are several examples of templates you can modify based on different needs:
- Real Estate Transactions: Include property details, buyer and seller information, and acknowledgment of signing documents. Be specific about the nature of the agreement and the parties involved.
- Loan Agreements: Outline the terms of the loan, including the amount, repayment schedule, and interest rates. The notary should verify the identity of the borrower and lender.
- Wills and Testaments: List the names of the testator and witnesses, with a clear statement that the document was signed in the presence of the notary. Ensure the notary seals and dates the document.
- Affidavits: Include the declarant’s statement, verifying that the information provided is true and correct. The notary should authenticate the signature and affirm the identity of the affiant.
- Power of Attorney: Clearly outline the powers granted, the identity of the grantor and agent, and the date the document was executed. Ensure the notary confirms the mental capacity of the principal.
Each template must include standard notarial elements such as the notary’s name, seal, and commission information. Adjust the details according to the legal requirements of the specific transaction or agreement.


