When creating a receipt in DOCX format, clarity and simplicity are key. A well-structured receipt ensures both the issuer and the recipient understand the transaction without confusion. A template in DOCX can save time and prevent errors by providing a standardized layout that only requires filling in the details.
A receipt template should include basic elements such as the company name, address, and contact information, along with the date of the transaction, item descriptions, quantity, price, taxes, and the total amount paid. Be sure to include clear payment terms and any other relevant details specific to the transaction.
If you are using Microsoft Word to create the receipt, leverage its built-in table and text formatting options to make the document professional-looking. You can also use placeholders for variable fields, such as the customer’s name and payment method, ensuring easy customization for future transactions.
Consider customizing your receipt template by adding your company logo and brand colors to maintain a professional appearance. With a well-designed DOCX template, creating receipts for future transactions becomes quick and straightforward, helping you stay organized and efficient in handling payments.
Here’s the corrected version with repeated words removed:
Ensure each sentence is clear and concise by eliminating redundant terms. This avoids clutter and improves readability. For example, instead of saying “We need to make sure that the receipt is correctly prepared,” revise it to “Ensure the receipt is prepared correctly.”
Follow these steps to remove repetitions effectively:
- Review your text for phrases that use synonyms unnecessarily.
- Replace overly wordy sentences with straightforward alternatives.
- Use proper punctuation to separate distinct ideas without repetition.
After applying these methods, the message becomes more direct, while retaining all necessary information. Aim for clarity in every sentence.
Here is an example of a repetitive sentence and its corrected version:
- Before: “Please be sure to verify that the receipt is properly validated before finalizing the transaction.”
- After: “Verify the receipt before finalizing the transaction.”
By doing this, you streamline your communication without losing meaning. This approach ensures professional clarity in all receipts or any related documents.
- Receipt Template DOCX
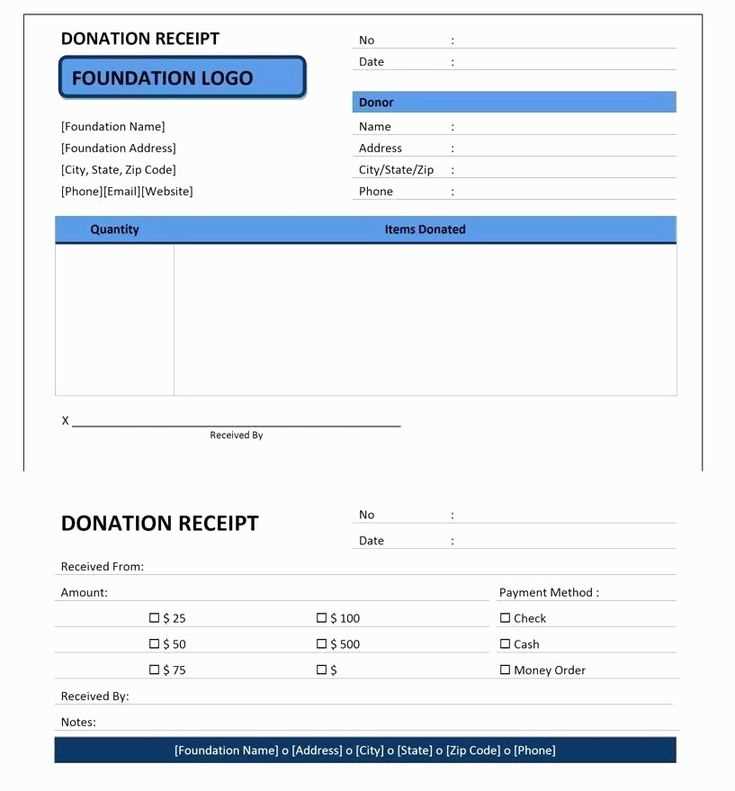
A well-structured receipt template in DOCX format simplifies transaction records, making them clear and easy to customize. For business owners or anyone handling regular transactions, this type of template is invaluable for maintaining accurate records and ensuring professionalism.
Key Features of a Receipt Template in DOCX
To create a useful and functional receipt template in DOCX, focus on these core components:
- Header with Business Information: Include your business name, address, contact details, and logo if possible.
- Receipt Number and Date: Automatically generated fields for quick reference and tracking.
- Customer Information: A section for the customer’s name and contact details, helping personalize the receipt.
- Transaction Details: List of items purchased, quantity, unit price, and total amount, broken down to avoid confusion.
- Taxes and Additional Charges: Clearly state the tax rate, tax amount, and any additional fees for transparency.
- Footer: Any legal disclaimers, return policies, or business-related notes.
How to Customize a DOCX Receipt Template

Customizing a DOCX receipt template is simple. Use the following steps:
- Adjust Layout: Modify the table and text formatting to match your branding or preferred style.
- Add Fields: If necessary, add more fields like payment method or invoice references to meet your needs.
- Automate Data Entry: Use placeholders for automatic insertion of customer names, amounts, and dates, making future use quicker.
- Save and Reuse: Save the template as a master file to avoid starting from scratch each time a new receipt is needed.
Begin by opening a new DOCX file in Microsoft Word or any other compatible word processing software. Set up a clean document layout, keeping in mind the fields you want to customize later. If you want to create a receipt template, include sections like the title, date, customer name, amount, and item descriptions.
Use placeholders for these customizable fields. For example, insert text like “Customer Name” where the user’s name will go. This way, users can quickly replace the placeholder with actual data. You can format these placeholders in a distinctive way (e.g., bold or italic) to make it clear they need to be filled in.
For a flexible design, apply styles to the sections that need customization. Use Word’s style features to make sure the document elements (like headings and text) remain consistent across different uses. This will ensure that any user modifying the document won’t have to adjust individual formatting manually.
To make the template even more user-friendly, consider using form fields. Go to the “Developer” tab in Word and insert text form fields where needed. This feature will let users fill in the required information directly into the document without accidentally altering the template’s design. You can also restrict editing on certain areas of the document by selecting specific sections for users to fill in.
Save your document as a DOCX file. To ensure that it can be easily used and modified, save it in a way that retains all formatting and placeholders. This allows anyone who uses your template to customize it quickly without worrying about losing formatting.
Finally, test the template by filling in the placeholders with sample data. Make sure everything aligns properly and that users can replace text or form fields without any issues. Once you’re satisfied, your customizable DOCX template is ready to be shared and used.
DOCX templates streamline the creation of business transaction documents. These templates help standardize receipts, invoices, contracts, and other business forms, saving time and ensuring consistency. By using a DOCX template, you ensure that every transaction document adheres to company standards, reducing the chance of errors and ensuring professionalism.
Benefits of Using DOCX Templates
First, templates improve workflow efficiency. You don’t need to start from scratch each time a new document is needed. Just input the relevant transaction details, and the template fills in the predefined structure. This consistency enhances productivity and reduces manual work.
Customization for Specific Needs
DOCX templates can be customized to suit different types of transactions. For instance, a sales receipt may include itemized lists, tax calculations, and payment methods, while a contract template may focus on terms and conditions. Tailoring templates for specific uses ensures clarity and professionalism across all transaction documents.
To automate receipt creation in DOCX format, use a combination of Python libraries and templates. The most efficient approach involves using the `python-docx` library to work with DOCX files programmatically and the `Jinja2` templating engine to replace dynamic fields in the receipt.
Step 1: Set Up a Receipt Template
Create a DOCX file with placeholders for data like date, amount, customer name, and service details. These placeholders will be replaced with dynamic data during the automation process. Save this file as your receipt template.
Step 2: Write Python Code for Automation
Install the necessary libraries by running:
pip install python-docx jinja2
Then, create a Python script that loads the template, replaces placeholders with actual data, and saves the result as a new file. Here’s an example:
from docx import Document
from jinja2 import Template
def generate_receipt(data, template_path, output_path):
# Load the template DOCX file
doc = Document(template_path)
# Define the template string with placeholders
template = Template("{{ customer_name }} paid {{ amount }} on {{ date }} for {{ service }}.")
# Replace placeholders with data
content = template.render(data)
# Update the DOCX file content
for para in doc.paragraphs:
if "{{" in para.text:
para.text = content
# Save the generated receipt
doc.save(output_path)
In the above script, replace the placeholders in the template with the data passed in the `data` dictionary.
Step 3: Example Data

The `data` dictionary might look like this:
data = {
'customer_name': 'John Doe',
'amount': '$100',
'date': '2025-02-11',
'service': 'Web Design'
}
Step 4: Generate the Receipt
Run the script with your data to generate a personalized receipt. The generated receipt will be saved as a new DOCX file, ready to be sent or printed.
Using a Template for Multiple Receipts
For bulk generation, iterate over a list of data entries and generate multiple receipts using the same template:
data_list = [
{'customer_name': 'John Doe', 'amount': '$100', 'date': '2025-02-11', 'service': 'Web Design'},
{'customer_name': 'Jane Smith', 'amount': '$200', 'date': '2025-02-12', 'service': 'Consulting'}
]for data in data_list:
generate_receipt(data, 'receipt_template.docx', f"receipt_{data['customer_name']}.docx")
Advantages of Automation
Automating receipt creation significantly reduces manual effort, minimizes errors, and allows for bulk processing of receipts. This method is adaptable to various types of documents beyond receipts, providing scalability for different business needs.
| Step | Action |
|---|---|
| 1 | Create a receipt template with placeholders |
| 2 | Write a Python script to replace placeholders with dynamic data |
| 3 | Provide data and generate the DOCX receipt |
Reducing Redundancy in Receipt Templates
To avoid redundancy in your receipt template, replace repeated terms like “Receipt” or “DOCX” with simpler alternatives. For example, instead of repeatedly writing “Receipt,” use terms like “Proof of Purchase” or “Transaction Record.” Similarly, “DOCX” can be shortened to just “document” or “file” in most cases.
This strategy keeps the template concise without losing clarity. The goal is to maintain a smooth flow while ensuring the key information is still communicated effectively. By rephrasing and using varied language, your template becomes more user-friendly and less cluttered.
For example, instead of saying “Receipt generated as DOCX file,” you can say “Document created” or simply “Generated file.” This minimizes unnecessary repetition and makes your document easier to read and understand.