How to Create a Template

To create a template for a Home Depot receipt, start with the essential elements that appear on the store’s receipts. Include the store name, address, contact details, and a list of items purchased. Be sure to add the date of purchase, transaction number, and total cost. For the layout, use clear, readable fonts, and structure the template logically for easy reading.
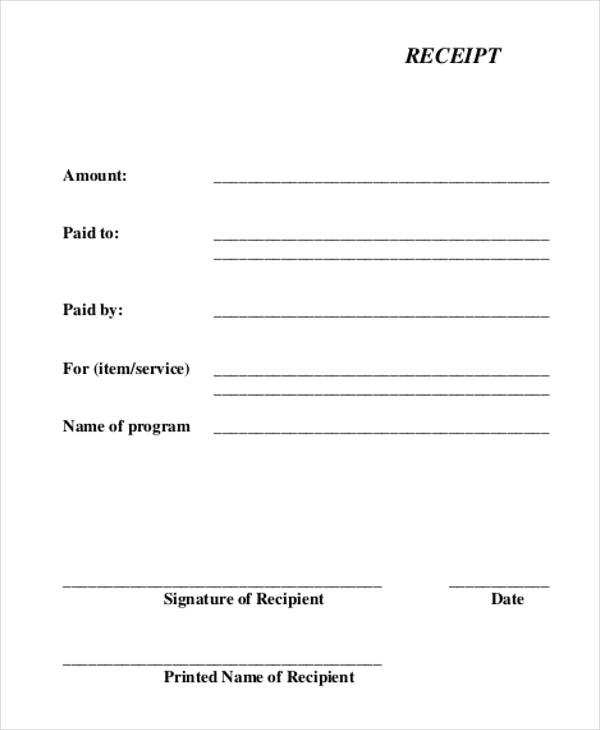
Important Details to Include
- Store Information: Name, address, and contact number.
- Customer Information: Optional, but can include customer name and contact details.
- Itemized List: A clear list of products purchased, including prices and quantities.
- Payment Information: Method of payment (credit card, cash, etc.), subtotal, taxes, and final amount.
- Store Policies: Return policy or warranty details (if applicable).
Formatting Tips

For readability, use a simple, clean layout. Align all text properly to avoid confusion. Ensure the font size is large enough to read easily but not too large. Divide sections with lines or blank spaces to make the receipt appear organized. If designing digitally, save it in a PDF format for easy printing.
Final Thoughts
By focusing on clarity and including all relevant details, you can create a functional template for a Home Depot receipt. This template can be used for creating similar receipts for personal use or for businesses requiring a simple yet professional layout.
Template Home Depot Receipt: A Practical Guide
How to Access Your Receipt Template from Home Depot
Steps to Customize a Home Depot Receipt for Your Needs
What Information Can Be Included in the Template Receipt?
Saving and Printing Your Home Depot Receipt Template
Common Mistakes to Avoid When Using a Receipt Template
How to Use the Home Depot Template for Returns
To access the Home Depot receipt template, visit their official website and log into your account. From there, navigate to your purchase history and select the transaction you wish to generate a template for. Click on the “Print Receipt” option and choose “Template” from the dropdown menu. This will automatically convert the receipt into a customizable template that can be saved or printed.
Customizing the Template
Once the template is open, you can modify certain fields like item descriptions, quantities, and prices. Add or remove line items according to your specific needs. The template allows you to edit the transaction date and store location as well, making it easy to tailor the receipt for different purposes, such as returns or accounting.
What Information Can Be Included in the Template Receipt?

The template can display essential details such as product names, prices, tax amounts, total costs, and payment methods. You can also add extra notes or specific terms related to your purchase, such as warranty information or store-specific policies.
Once you’ve customized your template, you can save it in PDF or Excel format. For printing, make sure the template is scaled correctly so all details are visible on one page. This is especially useful for documentation or business purposes where a hard copy is required.
Common mistakes include failing to double-check the accuracy of the information before printing or saving, which could lead to discrepancies. Also, not formatting the template properly for printing may result in cropped details. Make sure you review your final template to ensure it aligns with your needs.
If you need to use the receipt for returns, the Home Depot template includes all the necessary purchase information, which simplifies the return process. You can print the template and present it at the store, or if you’re returning items online, attach the template to your return request for a smooth transaction.