Renting property requires clear, well-documented transactions. A rental receipt serves as proof of payment and outlines key details for both the tenant and landlord. Using a blank rental receipt template streamlines the process and ensures accuracy.
This simple document should include the tenant’s name, rental amount, payment date, property address, and the landlord’s contact information. It’s essential to maintain this record to avoid any future disputes regarding rent payments.
A blank template gives flexibility. You can fill in the required details for each transaction without creating a new format from scratch. This saves time and provides consistency in all rental dealings.
Here’s the updated version:
Ensure all necessary fields are included in your rental receipt template to avoid confusion or errors. Start by clearly identifying the landlord’s and tenant’s details, including full names, contact information, and the property address. Then, indicate the rental amount and the payment period–whether it’s weekly, monthly, or annually. Provide a clear breakdown of any additional fees, such as utilities or maintenance costs, if applicable.
Payment Methods and Confirmation
Specify the method of payment (cash, check, or electronic transfer). It’s important to include the date the payment was made and the receipt number for reference. This confirms that the transaction has been completed and can be used for any future inquiries or disputes.
Signatures and Legal Details
Both parties should sign and date the receipt to verify the transaction. This serves as a legally binding document that proves payment has been received. Make sure to include a disclaimer that outlines the terms of the rental agreement, including the late payment policy and other relevant terms that apply to the lease.
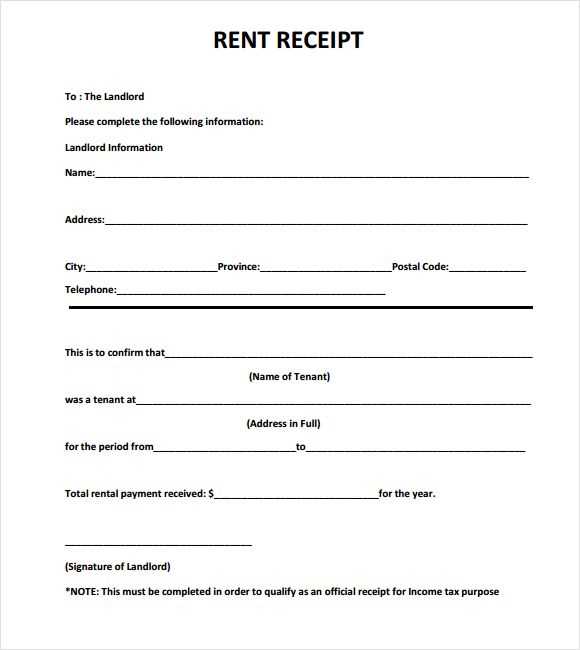
- Blank Rental Receipt Template
Use a simple rental receipt template to document rental transactions clearly. The template should include the following key details:
- Tenant Information: Include the full name and address of the tenant. This ensures both parties can be easily identified.
- Landlord Information: Provide the name and contact details of the landlord or property management company. This offers transparency in communication.
- Rental Property Address: Clearly state the address of the rented property. This helps avoid confusion in case the tenant rents multiple properties.
- Payment Date: Indicate the exact date the payment was made. This is critical for both the landlord and tenant in tracking payment history.
- Amount Paid: Specify the full rental amount paid. Include any additional charges such as late fees, utilities, or other costs.
- Payment Method: Mention how the payment was made (e.g., cash, check, bank transfer). This serves as proof of the transaction method.
- Receipt Number: Assign a unique receipt number for easy tracking of rental payments.
- Signature: Both the landlord and tenant should sign the receipt. This provides mutual confirmation of the rental payment.
Ensure the template is simple, with no extra information that could confuse either party. Clear formatting and well-organized sections will help both the landlord and tenant understand the receipt details easily.
Modify a rental receipt template by focusing on details that align with your business model. Start with the basics, like including your business name, address, and contact information. This makes the receipt official and easy to trace back to your company.
1. Add Relevant Rental Information
Ensure the rental details are clear and comprehensive. Include fields for:
- Rental property address or description
- Start and end dates of the rental period
- Total amount due and payment method
- Security deposit information, if applicable
Each of these items helps to avoid confusion and ensures both parties are on the same page regarding terms.
2. Include Custom Terms and Conditions
If your rental business has specific rules or policies, such as late fees or cancellation terms, include them on the receipt. This keeps your terms clear and accessible for future reference.
3. Add a Unique Identifier

For easier record-keeping, add a unique rental receipt number. This helps both you and your clients track payments or resolve any disputes more efficiently.
4. Customize for Different Rental Types

If your business includes a range of rental services (e.g., residential, equipment, or vehicle rentals), make sure to adjust the template accordingly. Tailor the fields to suit the specific needs of each rental type.
5. Design for Clarity and Simplicity
A clean, organized layout ensures that all information is easy to find. Use a simple font and clear headings for each section. You want the receipt to be functional, not overwhelming.
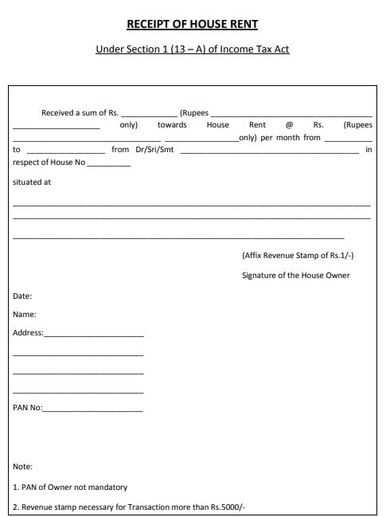
When creating a rental receipt, make sure it includes the following key details:
- Rental Property Address: Clearly state the property’s full address to avoid any confusion about the rental location.
- Tenant’s Name: Include the full name of the tenant renting the property.
- Landlord’s Name: Mention the name of the landlord or the property management company issuing the receipt.
- Payment Date: Indicate the specific date when the payment was made or received.
- Payment Amount: Specify the total amount of rent paid, including any additional fees or charges, if applicable.
- Payment Method: List the method of payment used (cash, check, bank transfer, etc.).
- Rental Period: Include the start and end date of the rental period covered by the payment.
- Security Deposit (if applicable): If a security deposit is involved, note the amount and specify whether it’s included in the payment or collected separately.
- Receipt Number: Assign a unique receipt number for tracking purposes.
Additional Information
- Late Fees: If applicable, specify any late payment fees charged.
- Signature: Include spaces for both the tenant’s and landlord’s signatures to verify the receipt.
- Contact Information: Provide contact details for both parties for future reference or disputes.
Ensure your receipt has a clear structure, starting with the title at the top, such as “Receipt” or “Payment Confirmation”. Use a bold, larger font for the title to make it easily noticeable. Right below, include the business name, address, phone number, and email for quick contact.
Organize transaction details in a table format. Use separate columns for the description of goods or services, quantity, unit price, and total cost. Align text consistently to avoid confusion. Leave enough space between rows for clarity.
Include the date and time of the transaction prominently, as well as the receipt number. This helps both parties track the transaction easily. For payments, mention the method (e.g., cash, card, or online transfer) clearly at the bottom.
Highlight the total amount at the end, making sure it’s distinct by using a bold font or a larger size. Consider adding tax breakdowns or any discounts, but keep the layout simple and easy to scan.
Keep font size legible–around 10-12 points. Avoid overcrowding the receipt with excessive information. The goal is readability and easy reference.
Issue receipts immediately after any payment is made. This ensures both parties have proof of the transaction right away. Make sure the receipt includes all necessary details, such as the tenant’s name, rental period, amount paid, payment method, and the date. These details clarify any future questions regarding the payment.
Keep Records Organized
Maintain a copy of each receipt in an easily accessible system, whether digital or paper. This helps with efficient record-keeping, reducing the chance of losing important information. A well-organized system is key in case of future disputes or audits.
Ensure Clarity and Transparency
Write receipts clearly, using simple language. Avoid abbreviations or unclear terms. This will prevent confusion and make it easy for tenants to understand the payment details. Transparency builds trust and reduces the likelihood of misunderstandings.
When using a receipt template, ensure that the document includes all necessary information to comply with local laws. Most jurisdictions require receipts to feature the seller’s name, address, date of transaction, and a clear description of the goods or services provided. These elements help avoid legal disputes and provide a clear record of the transaction.
Ensure Accuracy of the Details
Double-check all details before issuing a receipt. Incorrect information, such as wrong amounts or product descriptions, can lead to misunderstandings or even legal complications. Always ensure the template allows for accurate customization to reflect the specific nature of the transaction.
Compliance with Tax Regulations

Receipts may also need to meet tax requirements, depending on the type of transaction. In some regions, sales tax information must be included. Be sure the template accommodates the necessary tax calculations and that the tax rate is accurate for your location.
How to Store and Organize Receipts for Record-Keeping
Store receipts in a well-organized system that is easy to access and maintain. Categorize them by type–such as rental, utility, or purchase receipts–and keep them in separate folders or digital files. This allows you to quickly locate a specific receipt when needed.
Physical Storage Tips
If you prefer physical receipts, use a filing system with labeled folders or a dedicated box. Ensure receipts are stored in a dry, cool space to avoid damage from heat or moisture. Label each folder by category and keep receipts sorted by date for easy retrieval. Use a file cabinet or an accordion file for added convenience.
Digital Storage Tips
For digital organization, scan receipts and save them in cloud storage or a dedicated folder on your computer. Use software or apps to categorize receipts by type, date, or amount. This method reduces clutter and ensures you can access your records from any device. Regularly back up your digital files to prevent data loss.
| Storage Method | Pros | Cons |
|---|---|---|
| Physical Folders | Easy access, no technology required | Space-consuming, vulnerable to damage |
| Digital Files | Space-saving, easy to organize and search | Requires technology, data backup needed |
Consistently label receipts with key details, such as transaction type, date, and amount, whether they are stored physically or digitally. Regularly review your receipts to ensure they are up-to-date and complete, especially for tax purposes or financial planning.
Blank Rental Receipt Template: Simplified Approach
To create a clear and concise rental document, focus on the key details: the names of the parties involved, the rental period, and the payment details. Include the property or item description, the total amount paid, and any relevant terms for better clarity.
Ensure the template includes a section for both the landlord’s and tenant’s information, such as full names, addresses, and contact details. Also, make space for a signature line to confirm that both parties acknowledge the transaction.
By simplifying the language and avoiding repetitive use of “rental” and “receipt,” you can make the template both user-friendly and professional. This approach helps maintain readability and ensures that the document serves its purpose efficiently.