Creating a rent receipt in Excel streamlines the process of documenting rental payments. Use a template to easily input details such as the tenant’s name, rental amount, payment date, and property address. A simple structure helps avoid errors and makes it easier to manage records.
Start by including basic information in your template. Specify the tenant’s name, the rental amount paid, the payment method, and the date of payment. Make sure to add a unique receipt number for easy reference. If needed, add fields for additional information, such as late fees or adjustments to the rent.
Ensure your template is user-friendly. Use clear labels for each section and maintain consistent formatting. Create a formula to calculate totals automatically and avoid manual errors. Excel’s built-in features, such as dropdown lists for payment methods and conditional formatting, can make the receipt creation process even faster.
Finally, save the template for future use. You can customize it for different tenants or payment scenarios. Excel allows you to save templates with all formatting and formulas intact, making it easy to generate receipts for any payment received.

Here are the corrected lines:
Ensure that each entry in the receipt template includes the correct rental period dates. This helps avoid confusion and ensures accurate record-keeping. Double-check the tenant’s name and address for accuracy, as these details are critical for identification and correspondence.
Next, validate the payment amount, including any applicable taxes or fees, and ensure it matches the agreed-upon rent. This ensures transparency and can prevent disputes later. Always provide a clear breakdown of the payment, whether it’s a full or partial payment, to maintain clarity.
Finally, update the payment method section to reflect the correct mode of transaction, whether cash, bank transfer, or another method. This ensures that the transaction details are precise and can be easily referenced if necessary.
- Excel Rent Receipt Template Guide
Begin by opening a new worksheet in Excel. Set up your columns to include the date of payment, tenant’s name, property address, payment amount, payment method, and a space for your signature or landlord’s name. Use simple formatting, like bold text for headers, to make the template clean and easy to navigate.
Next, apply date formatting for the payment date column so it automatically adjusts to the correct format. You can set this by selecting the column, right-clicking, and choosing “Format Cells,” then selecting the date format you prefer.
For the payment amount, use currency formatting to ensure the amounts are consistent. To do this, select the payment amount column, then right-click, choose “Format Cells,” and select “Currency.” This will display the amounts with the appropriate currency symbol and decimal places.
Ensure you leave space for a signature or a handwritten note in the last column for verification purposes. This adds a professional touch to your receipt while making it suitable for both digital and printed formats.
If you expect multiple tenants or transactions, create a template for each month or each tenant to keep track of payments more effectively. You can even add a simple formula that automatically calculates the total payments received each month, which helps keep everything organized.
Once you’ve finalized the layout, save the template for future use. It’s also a good idea to protect the sheet to prevent accidental editing of formulas or important information. Go to “Review” and click on “Protect Sheet” to prevent changes to your template structure.
Open Excel and create a new worksheet. Set up the header section with your business name, address, and contact details. Use merged cells to center-align these details for a neat presentation.
Next, set up columns for item descriptions, quantities, unit prices, and totals. Make sure to label each column clearly. To calculate totals, use simple formulas like =A2*B2, where A2 represents the quantity and B2 the unit price. Drag the formula down the column to apply it to all rows.
For a professional touch, add a footer with payment details or instructions, such as bank account information or a thank-you note. Format the cells for easy readability, using borders, bold text, and shading where necessary.
If needed, include a row for tax calculation. Use Excel’s built-in percentage formula, such as =SUM(E2:E10)*0.10 for a 10% tax rate on the sum of your totals.
Once your template is set up, save it as a reusable file by choosing “Save As” and selecting “Excel Template” format. This way, you can quickly generate new receipts without recreating the layout each time.
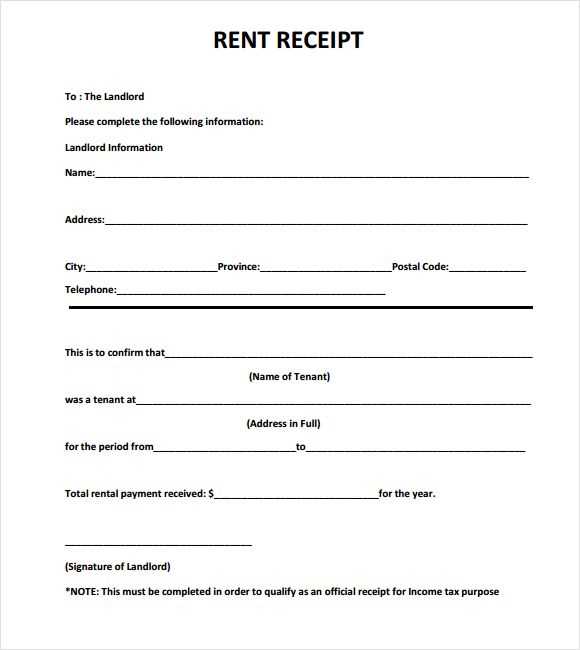
Ensure the receipt includes the tenant’s full name and the address of the rental property to prevent confusion. Clearly state the rental amount paid and the payment date. Double-check that the payment method (cash, check, bank transfer) is specified for transparency. Indicate the rental period covered by the payment, including the start and end dates. If applicable, include any additional fees or charges, along with a breakdown, to maintain accuracy. Finally, provide your contact details or business information for any future inquiries or disputes.
Automating receipt generation in Excel allows for faster processing and fewer manual errors. Follow these steps to set it up:
- Set Up the Data Entry Fields: Create a template with essential fields such as tenant name, rental amount, date, payment method, and address. Place these fields in distinct columns to organize the data.
- Use Formulas for Calculations: Automate calculations like total rent by multiplying the rental rate by the number of days or months. You can use the SUM function to add up amounts if there are multiple components to the payment.
- Incorporate Date Formatting: Utilize Excel’s date functions to automatically display the current date on the receipt. You can use the TEXT function to format the date to your preferred style (e.g., “dd/mm/yyyy”).
- Apply Conditional Formatting: Highlight specific values, like overdue payments or discounts, using conditional formatting rules. This makes it easier to track variations in rental payments.
- Create a Dropdown List for Payment Method: Use data validation to create a dropdown list for selecting the payment method (e.g., credit card, bank transfer). This reduces errors in data entry.
- Design the Receipt Layout: Organize the receipt in a clear format, including headers for the tenant’s name, address, rental period, and payment details. Excel’s cell formatting tools, like borders and shading, can enhance readability.
- Generate Multiple Receipts at Once: Once the template is set up, copy and paste the template into multiple rows to generate receipts for various tenants. Use Excel’s autofill feature to quickly input repeated data.
- Automate Receipt Generation Using Macros: If you need more advanced automation, use Excel macros to automate the entire process. A simple macro can input data from your master list and generate completed receipts in seconds.
- Save or Print the Receipts: Once completed, save the receipts as PDFs or print them directly from Excel. Automating this final step ensures receipts are readily available without further effort.
When using an Excel template for a rent receipt, ensure all required details are clearly organized for simplicity. Begin with the renter’s name and address, followed by the rental property details. Include the payment amount, rental period, and date of payment. These fields should be prominently visible for clarity.
Payment Method and Rent Breakdown

Include a section that specifies the payment method, whether cash, check, or online transfer. If the rent is divided into multiple components, list them separately for transparency. This allows both landlord and tenant to verify the exact amounts for each component.
Additional Fields for Clarity

Consider adding a reference number for easier tracking of payments, especially if there are multiple properties involved. Ensure the receipt includes a signature line for both parties, confirming the transaction. This can provide an added layer of security and professionalism to the document.