A well-structured rent receipt protects both landlords and tenants by providing clear proof of payment. Whether you manage multiple rental properties or rent out a single unit, issuing a proper receipt ensures transparency and helps maintain accurate financial records.
Every rent receipt should include key details such as the tenant’s name, the rental property address, payment date, amount paid, payment method, and the rental period covered. Adding the landlord’s name, contact information, and a signature further strengthens the document’s validity. If the payment includes late fees or other charges, specify these amounts separately to avoid confusion.
Using a template saves time and ensures consistency. A structured format reduces the risk of missing important details and makes it easier to track payments over time. Digital templates with auto-fill features are especially useful for landlords handling multiple tenants.
Providing a receipt is not just a courtesy–it can be a legal requirement in some locations. Tenants may need proof of rent payments for tax deductions, rental assistance programs, or loan applications. Landlords also benefit by maintaining a clear payment history, which helps resolve disputes efficiently if they arise.
Here’s the revised version with reduced repetitions of the words “rent” and “receipt” while maintaining the original meaning:
To create a rent payment confirmation, start with a clear statement of the transaction. Include the tenant’s name, address of the rental property, and the payment date. Specify the amount paid and the rental period it covers. It’s helpful to also mention the method of payment used for transparency.
Details to Include
Provide an itemized breakdown of the amount, especially if there are any additional charges like utilities or late fees. List the total paid at the end to ensure clarity. For instance, instead of repeating “rent” in multiple places, refer to the total amount as “payment” or “sum.” Ensure the confirmation is signed by the landlord or authorized agent.
Final Touches

Conclude with a brief note stating that the payment has been processed. This ensures both parties are clear on the status of the transaction. Keep the tone professional and concise.
- Receipt for Rent Payment Template
Creating a clear and professional rent payment receipt is straightforward. This template should include key details such as the payment amount, date, and property address. A well-structured receipt provides both the landlord and tenant with documentation of the transaction.
Key Components of a Rent Payment Receipt
Include the following elements in your template:
- Landlord’s and Tenant’s Information: Include names and contact details.
- Payment Details: Specify the amount paid, payment method, and rent period.
- Property Address: Clearly mention the rental property’s address.
- Date of Payment: The exact date when the payment was made.
- Receipt Number: For easy reference, add a unique receipt number.
- Signature: A section for the landlord’s signature to confirm receipt.
Example of a Rent Payment Receipt Template

Here’s an example of how to structure the document:
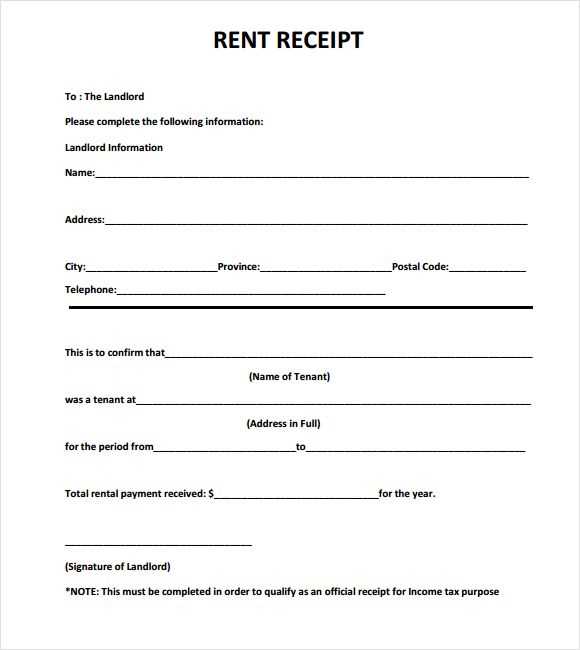
Receipt for Rent Payment
Receipt Number: [Unique ID]
Date of Payment: [Date]
Landlord’s Information:
Name: [Landlord’s Name]
Contact: [Landlord’s Phone/Email]
Tenant’s Information:
Name: [Tenant’s Name]
Contact: [Tenant’s Phone/Email]
Property Address:
[Complete Property Address]
Payment Details:
Amount Paid: [$XXX.XX]
Payment Method: [Cash/Credit Card/Bank Transfer]
Rent Period: [Start Date] to [End Date]
Signature: _____________________
Landlord’s Signature
Use this template for every payment to ensure clear, accurate, and consistent records. Having a physical or digital copy of each payment strengthens both parties’ understanding of the rental agreement.
To ensure clarity and accuracy, include the following key details in a payment receipt:
1. Receipt Title: Clearly label the document as a “Payment Receipt” at the top. This helps avoid confusion with other documents.
2. Payment Date: Specify the exact date of payment. This is necessary for record-keeping and verifying the transaction timeline.
3. Payee Information: Include the full name or business name of the payee. Add any relevant contact details like an address or phone number.
4. Payer Information: List the name of the payer. You can also include contact details if needed for follow-up or verification.
5. Amount Paid: Write the exact amount paid, including currency. Use a clear and readable format (e.g., $500.00 or 500 EUR).
6. Payment Method: Specify the method used for payment–cash, check, bank transfer, etc. This adds transparency and allows for easy verification.
7. Service or Item Description: Provide a brief explanation of what the payment covers (e.g., rent, utility bill, etc.). Include specific dates or periods if applicable.
8. Receipt Number: Assign a unique receipt number for tracking purposes. This helps avoid confusion when referencing the receipt later.
9. Signature or Confirmation: For added authenticity, include the signature of the payee or an electronic confirmation of receipt if necessary.
10. Additional Notes: If required, include any additional terms, payment conditions, or references to previous agreements.
Structure the receipt in a clear, consistent way. Use distinct headings for each section, such as “Tenant Information,” “Payment Details,” and “Landlord Information.” This helps both parties quickly identify relevant information. Make sure the rent amount, payment date, and due date are prominently displayed. A well-organized receipt prevents misunderstandings and serves as reliable proof in legal disputes.
Include a unique reference number for each transaction. This number is important for tracking payments and resolving any discrepancies. Use the format “Receipt #” followed by a numerical value or a combination of letters and numbers for uniqueness.
Describe the payment method clearly. If the tenant paid by check, specify the check number and issuing bank. For digital payments, include the transaction ID, payment processor, and any relevant details. This allows both parties to verify the method of payment used.
Ensure that both parties sign and date the document. A signature from the landlord or property manager, along with the tenant’s signature, confirms the transaction’s legitimacy. Without signatures, the document may not hold up in legal settings.
| Section | Details |
|---|---|
| Tenant Information | Tenant’s full name and address |
| Payment Amount | Specify the exact amount of rent paid |
| Payment Date | Exact date the payment was made |
| Payment Method | Details about how payment was made (cash, check, transfer, etc.) |
| Landlord Information | Landlord’s name, address, and contact details |
| Signatures | Landlord and tenant signatures with date |
Lastly, keep the language simple and direct. Avoid unnecessary jargon that could confuse either party. The more straightforward and transparent the receipt is, the less likely it will be contested in a legal scenario.
Rent payment receipts can be managed both in print and digitally, offering flexibility to landlords and tenants alike. For printed receipts, ensure the format includes necessary details such as the tenant’s name, rental period, payment amount, and the signature of the landlord. This hard copy serves as a physical record for both parties. It’s best printed on official letterhead or plain paper, with a clear and readable font.
For a more convenient and eco-friendly alternative, digital receipts provide an easy way to store, share, and track payments. Sending receipts via email ensures quick delivery, and the file can be saved for future reference. Digital formats such as PDF are commonly used for their consistency across devices. Be sure to include all relevant payment details, just like the printed version, to ensure it’s a valid and professional record.
Choosing between printable and digital options largely depends on the preferences of both the landlord and tenant. Printable receipts are more tangible, while digital receipts can be accessed from anywhere, adding convenience without sacrificing reliability.
Make sure the date on your receipt is accurate. It’s easy to overlook, but an incorrect date can cause confusion in record-keeping or even lead to legal issues. Double-check the transaction date and the date the receipt is issued.
1. Missing or Incorrect Payment Details
- Ensure you specify the exact amount paid and the method of payment (cash, check, credit card, etc.).
- Do not leave blank spaces where important information should go, like the rental period or payment breakdown.
2. Lack of Clear Identification
- Identify both parties clearly. Include the full name or business name of both the landlord and the tenant, along with contact information.
- Omitting this can make the receipt vague and harder to trace in case of disputes.
3. Inaccurate or Vague Descriptions
- Describe the rent payment accurately. Avoid generic terms like “payment received”; instead, specify the rent period (e.g., “January 2025 rent payment”).
- Vague descriptions lead to confusion when reviewing past transactions.
4. Forgetting to Include a Receipt Number
- A receipt number or reference ID is essential for tracking and organization. Make sure each receipt has a unique identifier.
- This prevents any confusion or potential fraud, and it allows for easy referencing in future correspondence.
5. Skipping Signature or Authorization
- If applicable, include a signature from the party receiving the payment, especially if it’s a business. This confirms receipt of the funds and offers further legitimacy to the document.
By avoiding these common mistakes, you can create receipts that are clear, reliable, and legally sound.
Customizing for Different Payment Methods
To adapt a rent payment receipt for various payment methods, ensure each method is clearly identified and described. If payment is made by bank transfer, include the transaction reference number and the name of the bank. For checks, note the check number and bank details. Cash payments require a written acknowledgment of the amount received, and if payment is via online platforms, include the platform name and any transaction or confirmation numbers.
Bank Transfers
For payments made through a bank transfer, add the sender’s account number, bank name, and any reference code. This makes it easy to trace payments back to the tenant and confirm receipt. Provide the exact date of the transfer to ensure the payment aligns with the agreed-upon rent cycle.
Online Payment Platforms

When using platforms like PayPal, Venmo, or others, include the payment ID or transaction number, the date, and the platform’s name. Double-check that the platform’s fees, if any, are clarified to avoid confusion over the total amount paid and the rent due.
Each state has its own set of rules that may impact rent payment receipts. Make sure to check local laws to ensure full compliance. Below are key state-specific elements to consider when creating a rent receipt:
- Identification Information: In some states, landlords must include specific identifying details, such as the tenant’s name and the rental property address. These details must be accurate and up-to-date to prevent disputes.
- Payment Breakdown: Certain states require a detailed breakdown of payments, including rent, late fees, and other charges. Be sure to list each component separately if the state law mandates this clarity.
- Signatures: While not all states require a landlord’s signature on rent receipts, a few states do for added legal protection. Check if your state falls under these requirements.
- Payment Method Disclosure: In some states, landlords must specify the payment method (e.g., check, cash, credit card) on the receipt. Make sure to mention this if required by local laws.
- Late Fee Terms: Some states regulate how late fees are applied, including the maximum allowable amount. If your receipt includes late fees, ensure it reflects the correct calculation based on your state’s cap.
- Language Requirements: A few states require rent receipts to be provided in specific languages if requested by tenants. For example, California mandates that rent receipts be available in Spanish if a tenant speaks Spanish.
- Electronic Receipts: In certain states, electronic rent receipts are permitted and are as legally binding as paper ones. Ensure your electronic receipts comply with any local guidelines for digital records.
Stay informed about your state’s rent receipt requirements to avoid legal complications. Consult local rental laws or seek legal advice if you’re unsure about specific regulations. Following state rules will help ensure that your rent receipts are valid and enforceable.
Receipt for Rent Payment Template
To create a clear and accurate rent payment receipt, include key details. Start with the tenant’s name, the property address, and the rental period covered by the payment. Specify the amount paid, the date of payment, and the payment method used, whether cash, bank transfer, or check. If applicable, include any late fees or adjustments made to the rent. Clearly state the total amount received and leave space for a signature, whether from the landlord or an authorized representative. This simple format ensures transparency and proper record-keeping for both parties.