Creating a rent receipt in Canada requires specific details to ensure it is legally valid and clear for both the tenant and the landlord. A well-structured receipt should include key information such as the tenant’s name, address of the rental property, date of payment, rental period, and the total amount paid. This not only provides proof of payment but also serves as a record for tax or financial purposes.
For convenience, landlords can use a rent receipt template that simplifies the process. A good template includes fields for the tenant’s information, the rent amount, payment method, and any additional details like overdue fees or deposits. Keeping a consistent format helps maintain clear records and prevents confusion in the future.
Tips for Creating a Rent Receipt:
- Ensure all required information is included–tenant’s name, payment date, amount, and rental period.
- Provide a receipt number for tracking purposes, especially for long-term leases.
- Consider adding a clause confirming that the payment was received in full, without deductions or adjustments.
- If applicable, indicate whether the payment was made via cheque, cash, or bank transfer.
Having a standardized template not only saves time but also helps avoid any potential legal or tax-related issues down the line. Keep your rent receipts professional, accurate, and easy to follow, ensuring both parties are on the same page.
Here’s the revised text with repeated words removed, while maintaining the meaning and structure:
When creating a rent receipt in Canada, be sure to include key details such as the tenant’s name, the rental property address, the payment amount, and the payment date. This ensures the document serves as clear evidence of the transaction. The receipt should also specify the rental period covered by the payment to avoid confusion. Make sure the format is easy to read, and all relevant details are listed without redundancy.
Provide both the tenant’s and landlord’s contact information for transparency. While a digital version can be shared, always offer a printed version to meet legal requirements in some provinces. The receipt should be signed by the landlord or authorized person to verify authenticity. Consider including a unique receipt number for future reference or record-keeping.
In addition to the basic payment details, the rent receipt should reflect any deductions, like utilities or other agreed-upon charges. This ensures both parties have a clear understanding of the amount paid versus the amount owed. The receipt should be issued promptly after payment to maintain good documentation and avoid discrepancies later on.
- Rent Receipt Canada Template
For tenants and landlords in Canada, a rent receipt is a clear record of payment and helps ensure both parties are on the same page. The receipt serves as proof of rental payments made. It is important that a rent receipt includes key details to avoid any misunderstandings.
The receipt should feature the following elements:
- Date of Payment: The specific day the payment was made.
- Amount Paid: The exact sum paid, including any applicable taxes.
- Rental Period: The timeframe for which the payment applies (e.g., January 1-31, 2025).
- Tenant’s Name: The individual making the payment.
- Landlord’s Name: The recipient of the payment.
- Address of Rental Property: The full address of the rental property.
- Payment Method: Indicate how the payment was made (cash, cheque, bank transfer, etc.).
- Signature: Landlord’s signature confirming the receipt of the payment (optional but useful).
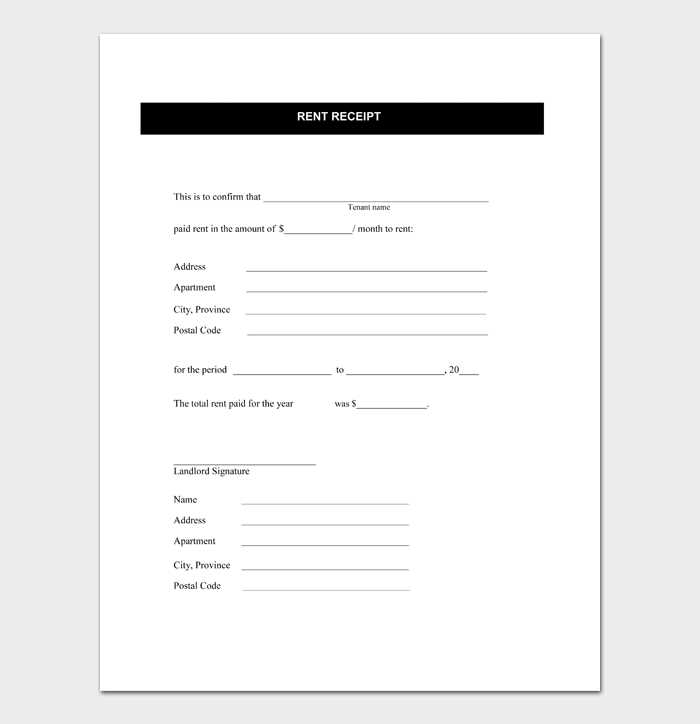
Here’s an example of a simple rent receipt template:
Date: [Insert Date]
Received From: [Tenant’s Name]
Amount: $[Amount Paid]
For Rent of: [Rental Property Address]
Rental Period: [Start Date] to [End Date]
Payment Method: [Cash/Cheque/Bank Transfer]
Landlord’s Name: [Landlord’s Full Name]
Landlord’s Signature: [Signature]
This template can be adapted depending on your specific needs or legal requirements. Keep a copy for both the tenant and the landlord to avoid disputes later.
A rent receipt should contain specific details to be valid and useful. Make sure the following elements are included:
- Landlord’s Information: Full name, address, and contact information of the landlord or property manager.
- Tenant’s Information: Full name of the tenant(s) who made the payment.
- Payment Date: The exact date the rent payment was made.
- Rental Period: The start and end dates of the rental period being covered by the payment.
- Amount Paid: The exact amount paid for that period, including any applicable taxes or additional charges.
- Payment Method: Indicate how the payment was made (cash, cheque, bank transfer, etc.).
- Receipt Number: A unique number or reference code to identify the transaction.
- Signature: Both the landlord’s and tenant’s signatures, if applicable, or a statement confirming receipt.
Including these details ensures clarity for both parties and helps avoid misunderstandings. It’s also important for tax or legal purposes, should the need arise. Make sure your receipt is clear and professionally presented.
A rent receipt must include specific details to meet legal requirements in Canada. The format should be clear, precise, and include all mandatory elements to ensure both the tenant and landlord are protected in case of disputes. Here’s what needs to be included:
Required Information on the Rent Receipt
Each rent receipt must display the following details:
| Element | Description |
|---|---|
| Landlord’s Name and Address | Provide the full legal name of the landlord or property management company, along with their contact information. |
| Tenant’s Name | The full name of the tenant paying the rent. |
| Property Address | Include the address of the rental property, not just the tenant’s unit number. |
| Amount Paid | Clearly state the total amount of rent paid for the specified period. |
| Date of Payment | The exact date when the payment was made. |
| Payment Method | Specify how the payment was made (e.g., cheque, e-transfer, cash). If possible, include a reference number or details to track the transaction. |
| Receipt Number | Assign a unique receipt number for record-keeping and referencing. |
Additional Considerations
Ensure the receipt is signed and dated by the landlord or their representative. This validates the transaction and helps resolve any potential future disputes. If the rent is paid by a third party, include the name of the person or entity making the payment as well. Keep copies of all receipts for your records, as they are essential in case of tax audits or legal proceedings.
Ensure all payment details are included in the rent receipt. Missing or incomplete information such as the rental amount, payment date, or property address can cause confusion or disputes. Always double-check the numbers and ensure the date matches the actual payment date.
Don’t forget to provide a unique receipt number. This helps track payments and provides a clear reference for both tenant and landlord. Without it, it can become challenging to differentiate between multiple payments over time.
Avoid vague descriptions of the payment. Specify if the payment covers rent for a particular period or includes other charges like utilities or late fees. This keeps everything transparent and prevents future misunderstandings.
Always use correct spelling and accurate details. Misspellings in the tenant’s name or property address could invalidate the receipt or create unnecessary confusion. Ensure that the information is checked before issuing the receipt.
Never issue a receipt without the tenant’s acknowledgment. It’s crucial that the tenant confirms the payment in writing, either by signing the receipt or sending an email confirmation. Without this, the landlord may face difficulties proving the transaction later.
Don’t leave out the method of payment. Indicate whether the payment was made by cheque, bank transfer, or cash. This additional detail helps in cases where there’s a need to track or verify the payment method.
For cash transactions, always provide a detailed receipt that clearly records the payment. This is vital for both record-keeping and customer transparency.
Step 1: Include the Date and Amount
Start by stating the exact date the payment was made. Next, clearly indicate the amount paid in cash. If there’s any change involved, mention it as well.
Step 2: Identify the Parties Involved
Specify the name of the person receiving the cash and the individual or business making the payment. This helps to avoid confusion, especially in cases of disputes.
Step 3: Provide a Description of the Transaction
Outline what the cash payment is for. Whether it’s for rent, services, or a product, be as specific as possible to provide clarity for both parties.
Step 4: Assign a Receipt Number
For better tracking and organization, assign a unique receipt number. This will help you reference the transaction quickly in your records.
Step 5: Include Your Contact Information
Make sure to add your name, phone number, or email. This allows the payer to reach out if any issues arise later.
Step 6: Signature
Include a space for both parties to sign. This adds an extra layer of acknowledgment and formality to the receipt.
What to Do if a Tenant Refuses to Accept a Receipt

If a tenant refuses to accept a rent receipt, take the following steps:
- Keep a record of the transaction, including the amount paid, the date, and the payment method. This helps ensure transparency and can act as proof if needed later.
- Offer to send the receipt via email or mail. Make sure to document the attempt and get confirmation from the tenant that they received it.
- If the tenant continues to refuse, politely explain the legal requirement for receipts and their importance in the rental agreement. Let them know that refusing to accept a receipt could complicate things for both parties.
- Offer alternative ways to issue receipts, such as electronic formats or through a property management portal. Flexibility may resolve the situation.
- If necessary, consult your local tenancy laws for guidance on what steps to take. Some regions require landlords to provide receipts and failure to do so can lead to complications.
Several online platforms make generating rental receipts in Canada straightforward. These tools often provide ready-made templates to ensure compliance with Canadian tax regulations and provide all necessary details in a clear, professional format.
1. QuickBooks
QuickBooks offers a simple way to generate receipts, especially for landlords who also use the software for accounting. It includes customizable receipt templates with fields for rent amounts, payment dates, and tenant information. QuickBooks automatically formats the receipts according to Canadian requirements, ensuring accurate record-keeping.
2. Zoho Invoice

Zoho Invoice provides a range of free templates that landlords can use for rent receipts. The platform allows customization, such as adding taxes or specific terms related to the rental agreement. It also enables landlords to send receipts directly to tenants via email.
These tools are ideal for landlords who need efficiency, accuracy, and convenience in managing their rental transactions.
Replaced Repetitive “Rent Receipt” with “Receipt” to Avoid Redundancy
When creating a rent receipt template, it’s important to maintain clarity while avoiding redundancy. Repeating the term “Rent Receipt” unnecessarily can clutter the document and distract from its purpose. In some cases, using simply “Receipt” instead of repeating “Rent Receipt” improves readability without sacrificing meaning.
Practical Example
Consider this format:
- Receipt Number: 12345
- Date: February 4, 2025
- Tenant’s Name: John Doe
- Amount Paid: $1,200
- Property Address: 123 Maple St.
By omitting the phrase “Rent Receipt” in several places, the receipt remains clear and concise. The term “Receipt” adequately conveys the necessary information without redundancy, making the document easier to read and more professional.